The secret to keeping a plant alive during long trips isn’t an “indestructible” plant, but a resilient pre-travel system that minimizes shock.
- Most “low-maintenance” plants die from incorrect placement (low light + high moisture) and post-travel overcorrection, not just a lack of water.
- A simple DIY wick system is more effective and reliable for a 3-week absence than expensive gadgets or just hoping for the best.
Recommendation: Focus on preparing your plant for “care hibernation” by reducing light and managing moisture, and have a clear revival protocol for your return.
As a digital nomad, my apartment is more of a home base than a permanent residence. And for years, the one constant casualty of my lifestyle was my houseplants. I followed all the common advice: I bought the “indestructible” Snake Plants and ZZ Plants. I’d drench them before a three-week trip, hoping for the best, only to return to either a shriveled husk or a mushy, rotten mess. I’ve learned the hard way that the internet’s favorite answer—just buy a tough plant—is a frustrating oversimplification. Can you leave a plant for three weeks without water? Yes, but it’s not the question that matters.
The real problem isn’t just about drought tolerance. It’s about understanding the full cycle of a traveler’s plant: the pre-departure prep, the period of neglect, and the critical post-return recovery. Most guides focus on the plant, but the solution lies in the process. It’s about creating a tiny, self-sustaining ecosystem that can weather your absence and knowing how to gently wake it from its slumber when you get back. The key isn’t finding a plant that survives neglect, but creating a system that provides consistent, minimal care in your place.
This guide is the culmination of my own trials, errors, and finally, successes. We’re going to move beyond the simple lists and dive into the practical strategies that work. We’ll dismantle common myths, build a foolproof DIY watering system, and establish the exact steps to take before you leave and after you return. This is the playbook I wish I had when I started—the one that will finally let you come home to a thriving green companion, not a botanical tragedy.
To navigate this journey, we’ve broken down the essential strategies into a clear roadmap. This article will guide you through the common pitfalls, the best plant choices for specific dark spaces, and the step-by-step protocols for both preparing and reviving your indoor jungle.
Summary: Your Guide to a Thriving Welcome-Home Jungle
- Why Even “Indestructible” Snake Plants Rot in Dark Bathrooms?
- How to Create a DIY Self-Watering Wick System for Under $5?
- ZZ Plant or Pothos: Which Is Better for a Windowless Hallway?
- The Post-Travel Mistake That Shocks Plants After a Long Absence
- How to Prepare Your Indoor Jungle 2 Days Before a Long Vacation?
- How to Revive a Dracaena That Has Been Dry for 4 Weeks?
- When to Stop Watering Succulents Completely for Winter Rest?
- How to Harvest Aloe Vera Gel Safely Without Damaging the Mother Plant?
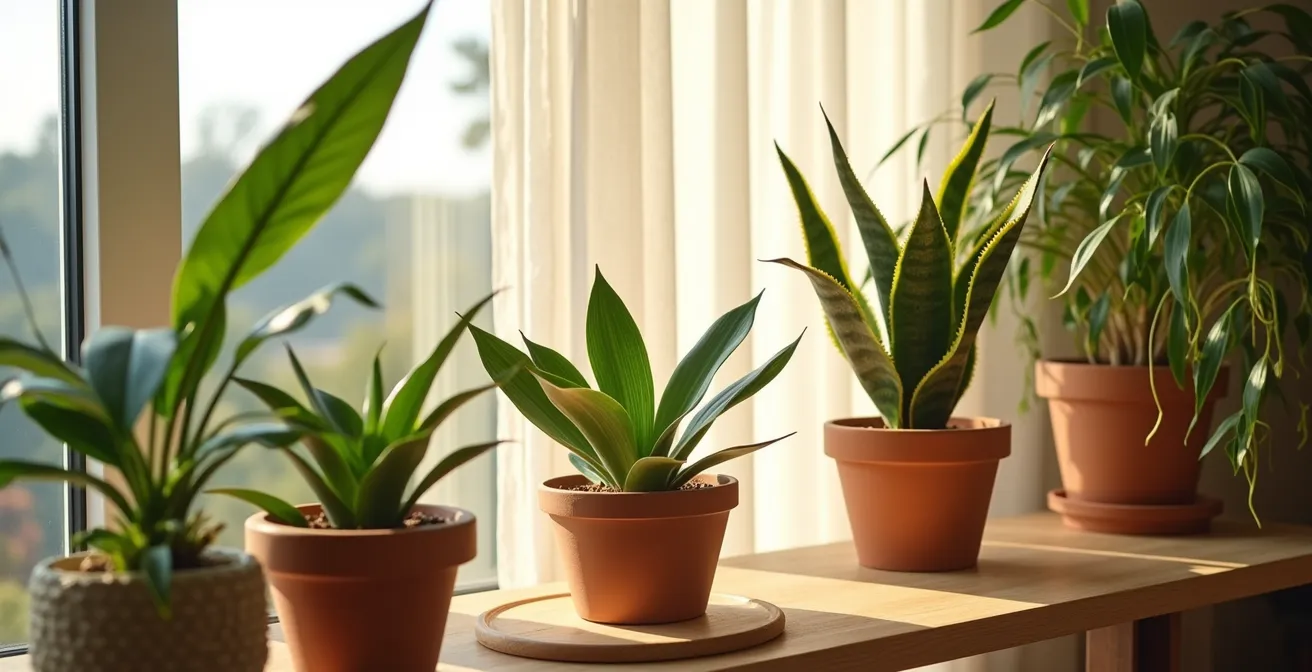
Why Even “Indestructible” Snake Plants Rot in Dark Bathrooms?
We’ve all been told the Snake Plant (Sansevieria) is the king of neglect, a plant so tough you can forget it exists. While it’s true they are incredibly drought-tolerant, their “indestructible” reputation comes with a huge asterisk: light. The reason they use so little water is thanks to a special process called CAM photosynthesis. Unlike most plants, they open their pores to “breathe” at night to conserve moisture. In fact, research shows they have 95% lower water usage than typical houseplants. This makes them water-efficient, but it doesn’t make them lovers of the dark.
When you place a Snake Plant in a dark, windowless bathroom and water it “just in case” before a trip, you set it up for failure. Without light, the plant’s metabolism slows to a crawl, entering what is essentially a state of care hibernation. It stops using the water in its soil. That well-intentioned watering sits around the roots in a dark, damp environment, creating the perfect breeding ground for fungus and the dreaded root rot. The plant isn’t drinking, so it effectively drowns in slow motion.
Case Study: The Bathroom Graveyard
An analysis of Snake Plant placement highlights this exact problem. The study notes that if a bathroom is windowless or very dim, it’s not a good long-term home for these plants because they become highly susceptible to root rot. When in low light, the plants essentially stop growing and their colors fade. They enter a hibernation state rather than thriving, making them extremely vulnerable to overwatering because they aren’t using the water in the soil effectively.
The lesson is clear: a plant’s ability to survive without water is directly linked to its environment. For a Snake Plant, low water is fine, but low light plus high moisture is a death sentence. True plant resilience comes from balancing all its needs, not just acing one of them.
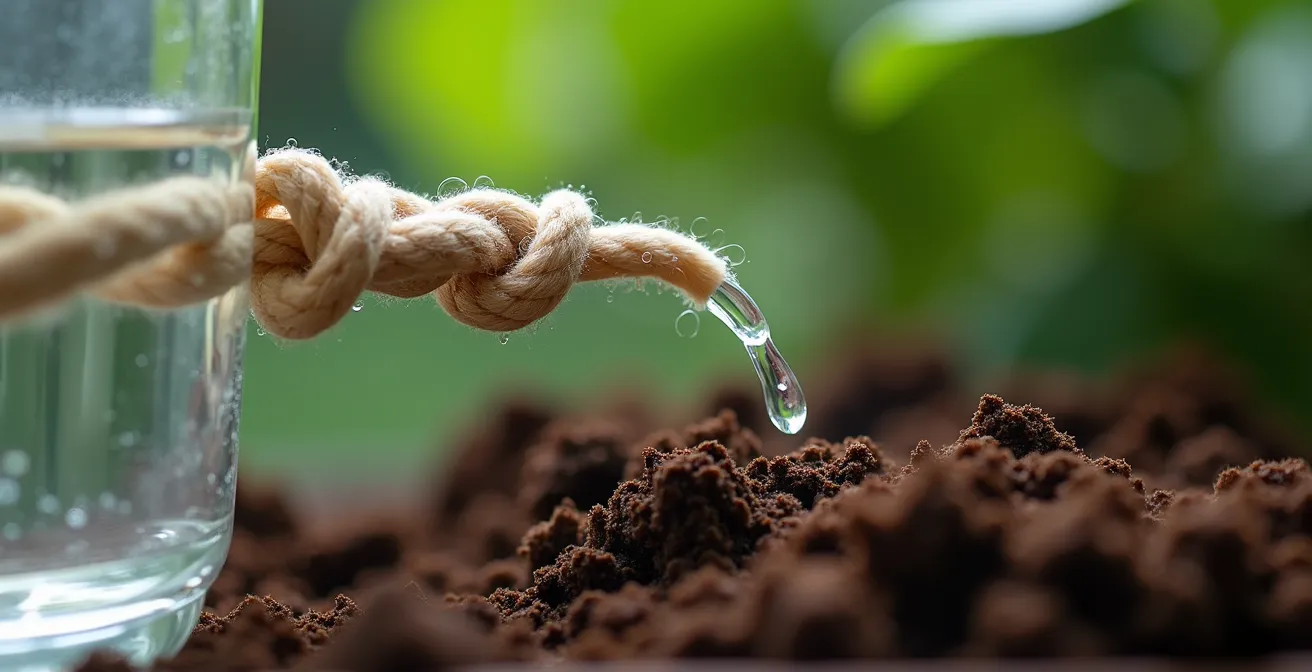
How to Create a DIY Self-Watering Wick System for Under $5?
Forget expensive self-watering pots and fancy glass bulbs that empty in three days. The most reliable and budget-friendly solution I’ve found for a multi-week trip is a simple, old-school technology: the wick system. It works through capillary action, the same principle that allows trees to pull water from their roots to their highest leaves. The rope acts like a straw, delivering a slow, steady supply of moisture directly to the soil, providing exactly what the plant needs and no more. This prevents both drying out and the risk of root rot from pre-trip overwatering.
Setting one up costs next to nothing and takes less than 10 minutes per plant. All you need is a water container (a large jar, vase, or even a bucket) and a piece of absorbent rope. Cotton or synthetic rope works best; avoid natural jute or twine which can rot. Here is the step-by-step process to create your own system:
- Position the Reservoir: Place a large glass or bowl of water next to your plant. For a 3-week trip, ensure the reservoir is large enough (at least 1-2 liters for a medium-sized plant).
- Choose Your Wick: Get a length of cotton rope or even strips from an old t-shirt. The thicker the wick, the faster the water flow.
- Insert the Wick: Push one end of the wick 2-3 inches deep into your plant’s soil, being careful not to damage the main roots.
- Submerge the Other End: Place the other end of the wick into the water container, making sure it reaches the bottom.
- Test the System: Most importantly, set this up a week before you travel. This allows you to check if the soil is staying consistently moist but not waterlogged. If it’s too wet, use a thinner wick; if too dry, use a thicker one or add a second wick.
This method provides a consistent level of moisture that adapts to the plant’s needs, making it a far superior solution for maintaining plant health over several weeks compared to other common techniques.
| Method | Cost | Duration | Best For | Setup Time |
|---|---|---|---|---|
| Wick System | $3-5 | 2-3 weeks | Small-medium plants | 10 mins |
| Watering Bulbs | $10-20 | 1-2 weeks | Individual plants | 5 mins |
| Plant Bath Method | Free | 1 week | Multiple small pots | 15 mins |
| Drip Irrigation | $30-50 | 4+ weeks | Large collections | 1 hour |
ZZ Plant or Pothos: Which Is Better for a Windowless Hallway?
This is a classic showdown for travelers with low-light spaces. Both the ZZ Plant (Zamioculcas zamiifolia) and the Golden Pothos (Epipremnum aureum) are champions of shade tolerance, but when it comes to surviving a long, dark, waterless period, there is a clear winner. While the Pothos is adaptable, the ZZ Plant is in a league of its own. Its secret lies underground in its large, potato-like rhizomes. These structures are water and energy storage tanks, allowing the plant to endure extreme periods of drought with barely a sign of stress. In fact, gardening experts confirm that ZZ plants can survive for months without water, simply drawing on their internal reserves.
A Pothos, by contrast, has no such specialized storage system. It tolerates low light and can go a week or two without water, but after that, it will begin to show signs of stress. Its leaves will droop, and it may start to become “leggy” as it desperately stretches for a light source. It might survive a three-week trip, but it will likely look worse for wear and need immediate attention upon your return.
For a windowless hallway or a dim corner of a room that you’ll be leaving for weeks at a time, the ZZ Plant is the undisputed champion. It won’t just survive; it will look almost exactly the same as when you left. It has a superior low-light metabolism that allows it to maintain its form and structure with minimal resources. The Pothos will survive, but the ZZ Plant will endure.
| Feature | ZZ Plant | Pothos |
|---|---|---|
| Water Storage | Rhizomes store water/energy | No specialized storage |
| Light Tolerance | Survives in very low light | Tolerates low light |
| Without Water | 2-4 weeks easily | 1-2 weeks maximum |
| Visual Decline | Maintains form, stops growing | Gets leggy, loses variegation |
| Recovery Speed | Slow but steady | Quick bounce-back |
The Post-Travel Mistake That Shocks Plants After a Long Absence
You walk in the door after three weeks away, drop your bags, and survey your indoor jungle. Some plants look a little thirsty, a little sad. Your first instinct is to “rescue” them immediately: a big drink of water, maybe some fertilizer to “perk them up,” and moving them right back into that sunny window. This is the single biggest mistake you can make, and it’s what I call post-travel shock. A plant that has been in a low-light, low-water state has slowed its systems down. A sudden flood of resources is like waking a hibernating bear with a bucket of ice water—it’s a violent shock to its system.
Dumping a large amount of water on compacted, bone-dry soil often leads to it running straight through the pot without being absorbed by the root ball. More importantly, giving a stressed plant fertilizer is counter-productive. As houseplant expert Kaitlin Mitchell of Rutabaga Tools explains, this is a critical error. In an interview with Apartment Therapy, she notes the logic behind withholding nutrients:
The nutrients will support growth and require energy. Avoiding fertilizer will help them grow slower.
– Kaitlin Mitchell, Apartment Therapy
A recovering plant doesn’t have the energy for new growth; it needs to focus on re-establishing its basic functions. The correct approach is a gentle, gradual rehydration protocol. You need to reintroduce light and water slowly, giving the plant time to reacclimate. Ignore the urge for a dramatic rescue and instead opt for a patient, phased recovery.
Action Plan: Your Post-Travel Plant Revival
- Day 1 – Assess: Check the soil moisture of all plants. Do NOT water unless the soil is completely bone dry. Use this time to inspect for any pests like spider mites or gnats that may have appeared during your absence.
- Day 2 – Gentle Rehydration: If the soil is dry, water sparingly. The best method is bottom-watering: place the pot in a tray of water for 10-15 minutes to allow the soil to absorb moisture slowly from the bottom up. Remove any yellow or dead leaves.
- Day 3 – Gradual Reacclimation: Begin moving plants back to their usual light positions, but do so gradually. Avoid moving a plant from a dark corner directly into a bright, sunny spot. Resume your regular watering schedule but use about 25% less water for the first week.
- Week 2 – Monitor and Support: Only after a full week, and only if the plant is showing clear signs of new growth, should you consider using a diluted fertilizer.
- Ongoing – Patience: Remember that recovery takes time. Don’t panic if the plant doesn’t bounce back overnight. Consistent, gentle care is the key.
How to Prepare Your Indoor Jungle 2 Days Before a Long Vacation?
Your trip is booked, your bags are nearly packed, and now it’s time to prepare your green roommates for their solo time. The 48 hours before you leave are critical for putting your plants into a successful care hibernation mode. This isn’t about a single action but a series of steps designed to reduce their needs and create a more stable environment. The goal is to lower their metabolism by reducing light, and to maximize moisture retention without waterlogging the roots. This process is your best defense against returning to a plant graveyard.
One of the most effective strategies is creating a micro-climate. By grouping your plants together, you allow them to share the humidity they release through transpiration. This communal moisture bubble significantly slows down how quickly their soil dries out. Moving them away from bright windows is also a non-negotiable step. Less light means less photosynthesis, which means a dramatically reduced need for water. It’s a simple equation that is fundamental to their survival.

Here is a detailed 48-hour countdown checklist that I use before every long trip:
- T-48 hours: Group all your plants together in a location with moderate, indirect light (like the middle of a room). Inspect each one thoroughly for pests and treat if necessary.
- T-24 hours: Water every plant thoroughly. Let water run all the way through the drainage holes. This ensures the entire root ball is saturated. You can also place pots on humidity trays filled with pebbles and water (ensure the pot sits on the pebbles, not in the water).
- T-12 hours: Apply a layer of mulch, sphagnum moss, or even damp newspaper to the soil surface. This acts as a blanket, trapping moisture in the soil and slowing evaporation.
- T-2 hours: This is a crucial final check. Empty all drainage saucers completely. Leaving plants sitting in water is the fastest way to cause root rot while you’re away. Finally, set your thermostat to a stable temperature, ideally between 65-75°F (18-24°C), to avoid any extreme temperature fluctuations.
By following this pre-flight checklist, you’re not just hoping your plants survive; you’re giving them a strategic advantage and a stable environment to wait for your return.
How to Revive a Dracaena That Has Been Dry for 4 Weeks?
Returning to a Dracaena with crispy, brown-tipped leaves and soil that’s pulled away from the sides of the pot can be heartbreaking. It looks completely dead. But often, it’s not. Many plants, including Dracaena, have an incredible will to live, and their plant resilience is centered in their root systems. Even when the foliage looks like a lost cause, the roots can remain viable for a surprisingly long time. In fact, some botanical research indicates that roots can survive for 2-3 months even after the foliage has died back, waiting for conditions to improve.
The key to revival is a gentle and effective rehydration protocol that focuses on the roots, not the leaves. Pouring water from the top is inefficient and stressful. The water will likely run through the hydrophobic, compacted soil without absorbing. The far better method is bottom-soaking, which allows the entire root ball to rehydrate slowly and evenly. This mimics a long, gentle rain rather than a flash flood, which is far less shocking for a severely stressed plant.
The 4-Week Drought Recovery Method
Studies on plant rehydration show that even severely dehydrated plants that have gone 3-4 weeks without water can often be revived. The most effective method involves soaking the plant from the bottom in a bucket or sink of water for 10-15 minutes. For very dry plants, adding a seaweed solution can provide gentle nutrients that encourage root recovery. This process allows the entire root ball to become saturated without overwhelming the plant. Repeating this soak every week for 2-3 weeks is often enough to stimulate new growth from the base, even if the old leaves are lost.
First, trim away any leaves that are completely brown and crispy; they won’t recover and are just draining energy. Then, begin the bottom-soaking regimen. Be patient. It may take several weeks to see new shoots emerging from the soil or the stem. But as long as the roots had life in them, you have a very good chance of bringing your Dracaena back from the brink.
The Essentials
- Plant survival isn’t just about picking a “tough” species; it’s about a 3-part system: pre-travel preparation, a stable environment during absence, and a gentle post-travel recovery.
- For a 3-week trip, a DIY wick system is the most reliable and affordable automated watering method, preventing both under- and over-watering.
- Never “shock” a returning plant with fertilizer or a sudden flood of water and light. A gradual reintroduction to normal care is crucial for recovery.
When to Stop Watering Succulents Completely for Winter Rest?
For travelers, succulents and cacti seem like the perfect solution—plants that thrive on neglect. And while they are incredibly drought-tolerant, their care needs change dramatically with the seasons. Understanding their winter dormancy period is key to their long-term health and makes them even better companions for a frequent traveler. During winter, when daylight hours shorten and light intensity drops, most succulents enter a state of rest. Their growth slows down dramatically, and so does their need for water. This is a natural part of their life cycle, a form of care hibernation.
Watering a dormant succulent with the same frequency as in the summer is one of the fastest ways to kill it with kindness. With its metabolism slowed, the plant simply cannot use the water, leaving it to sit in the soil and cause root rot. The question isn’t *if* you should reduce watering, but *when* and by how much. The trigger is environmental. As the experts at the Cambridge Bee Botanical Gardens advise:
When daylight hours consistently drop below 10, and growth visibly stops, reduce watering to once every 4-8 weeks.
– Cambridge Bee Botanical Gardens, Indoor Plant Care Guide
This means for many succulents and cacti, a winter watering schedule of once every 4-6 weeks is more than sufficient. For a traveler, this is fantastic news. If you’re leaving for a 3-4 week trip in the middle of winter, your succulent likely won’t need any special watering system at all. You can simply water it right before you leave and trust that its dormancy period will see it through. Learning to recognize and respect this winter rest is the mark of an experienced plant owner and makes these desert dwellers even more suited to a nomadic lifestyle.
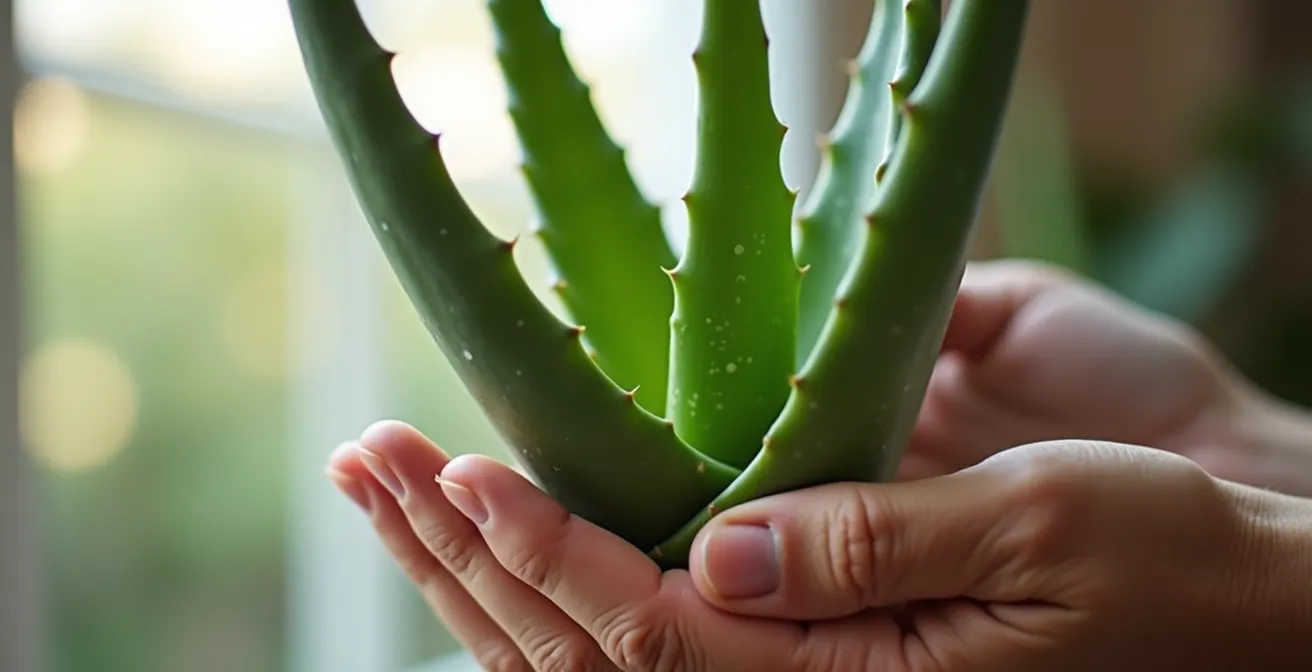
How to Harvest Aloe Vera Gel Safely Without Damaging the Mother Plant?
Aloe Vera is a traveler’s dream plant: it’s a succulent that can easily thrive for up to four weeks without watering, and it offers the bonus of its healing gel. However, harvesting that gel requires a bit of knowledge to ensure you don’t compromise the plant’s health, especially if you’re relying on its resilience during your travels. The key is to see the outer leaves as the plant’s reserves. Harvesting them depletes its stored water and energy, reducing its ability to withstand a long period of neglect. Therefore, the number one rule is to never harvest from your Aloe plant right before a trip.
Safe harvesting is about selective, minimal impact. You should only ever take the oldest, thickest, and most mature leaves from the outside of the plant. These leaves contain the most gel and are also the oldest, so their removal is least stressful to the plant’s core growth. The young, central leaves should be left completely untouched, as this is where all new growth originates. Using a clean, sharp knife is essential to make a clean cut at the base, which helps the wound heal faster and prevents infection.
To protect the mother plant and ensure its continued plant resilience, follow this safe harvesting protocol:
- Timing is Everything: Never harvest within 2 weeks of a long trip. Give the plant time to recover and store resources.
- Select Mature Leaves: Choose only the thickest, outermost leaves. They should feel firm and heavy.
- Use a Clean Blade: Cut the leaf as close to the main stem as possible with a sterilized knife or pair of sharp scissors.
- Limit the Harvest: Never harvest more than one-third of the plant’s total leaves at one time to ensure it has enough foliage for photosynthesis.
- Allow Callusing: Let the wound on the mother plant dry and form a callus for 3-5 days before you consider watering the plant again. This prevents rot from entering the fresh cut.
By treating harvesting as a careful surgical procedure rather than a random cutting, you ensure a continuous supply of gel while keeping your low-maintenance travel companion healthy and strong for years to come.
Your journey from a plant-killer to a green-thumbed globetrotter is complete. By focusing on a system of preparation and recovery rather than just on the plant itself, you can build an indoor jungle that doesn’t just survive your travels but thrives between them. Start by implementing these protocols before your next trip.