The key to long-lasting blooms isn’t just nurture; it’s managing the plant’s “energy economy” through strategic stress and recovery.
- Manipulate environmental signals like temperature drops and periods of darkness to trigger a reblooming cycle.
- Adjust fertilizer formulas to match the plant’s growth stage, providing energy for leaves or flowers as needed.
- Understand that a plant’s dormancy is a necessary rest period to store energy, not a sign of death.
Recommendation: Stop treating potted plants like disposable decor and start managing them as a long-term investment in living color.
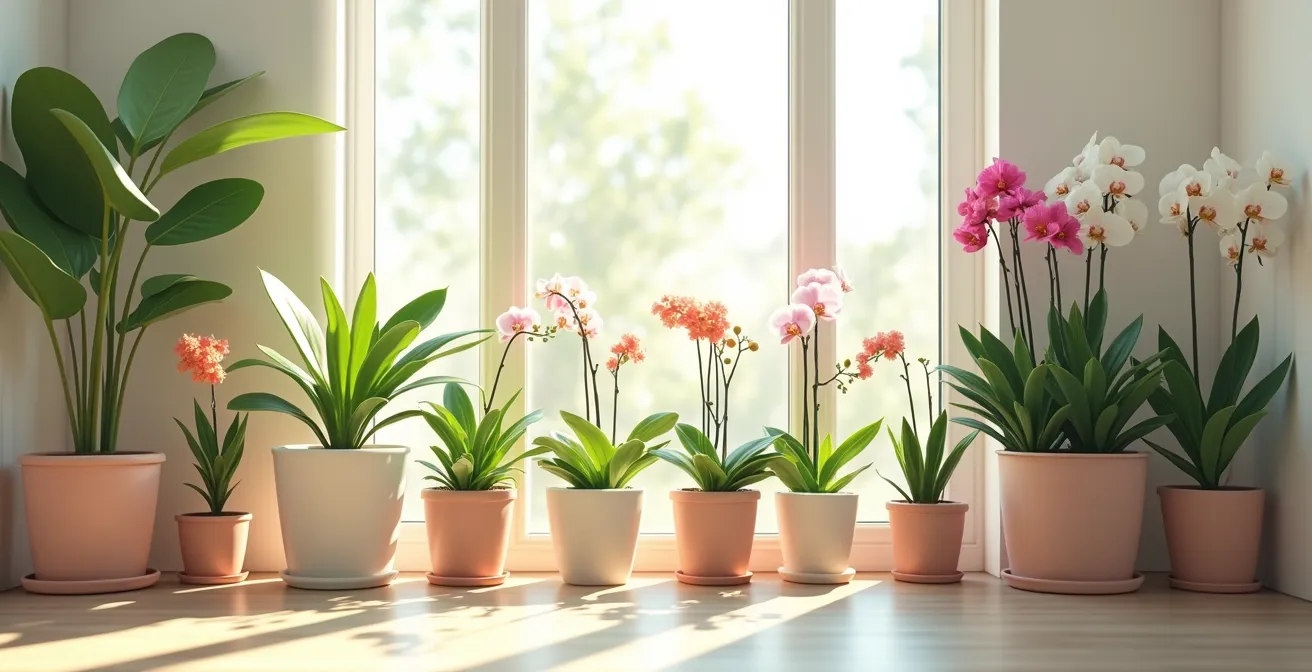
The familiar disappointment is universal: a beautiful bouquet of cut flowers, vibrant for a few days, inevitably wilts and fades. As a value-conscious alternative, many turn to blooming potted plants, hoping for a splash of color that endures. Yet, often the story ends the same way. Once the initial magnificent flush of flowers is gone, the plant is discarded, treated as little more than a slightly longer-lasting bouquet. The common advice to “water it” or “give it light” rarely seems to prevent this outcome.
But what if the conventional wisdom is missing the point entirely? The secret to longevity isn’t just passive care; it’s active management of the plant’s internal energy economy. A blooming cycle is an immense expenditure of resources for a plant. To make it perform again, you can’t just provide sustenance—you must understand and manipulate the environmental triggers that signal when to rest and when to bloom. It’s less like tending a garden and more like coaching an athlete for peak performance.
This guide moves beyond generic tips to reveal the specific strategies that floriculture experts use. We will explore how to manage a plant’s energy reserves by controlling light, temperature, and nutrients. By understanding these mechanisms, you can transform a one-time gift into a perennial source of beauty, securing a far greater return on your investment than any cut-flower arrangement could ever offer.
Summary: A Guide to Enduring Floral Beauty
- Why Your Orchid Refuses to Bloom Again After the Flowers Fall?
- How to Deadhead Kalanchoe to Encourage a Second Flush of Color?
- Cyclamen or Azalea: Which Is Easier to Keep Alive Indoors?
- The Heating Vent Mistake That Blasts Flowers Off the Stems
- When to Stop Fertilizing Blooming Plants to Prevent Salt Buildup?
- Why Is the Temperature Near Your Window 5 Degrees Lower Than the Room?
- When to Switch to High-Potassium Feed for Bigger Blooms?
- How to Design Floral Arrangements for Home Events Under $50?
Why Your Orchid Refuses to Bloom Again After the Flowers Fall?
When a Phalaenopsis orchid drops its last flower, it’s not signaling its demise; it’s entering a necessary recovery phase. The spectacular bloom was a massive drain on its energy reserves, and now it must rest and replenish. It won’t bloom again until it receives a clear environmental signal that conditions are right for another “performance.” This isn’t a sign of failure but an opportunity for strategic intervention. You must provide a specific trigger to coax it out of its resting state.
The most effective trigger for these orchids is a consistent change in temperature. According to horticultural experts, orchids need a specific nighttime temperature drop of 10°-15°F for several weeks to initiate a new flower spike. This mimics the natural seasonal shifts that signal the start of a new blooming season in their native habitat. Without this strategic stress, the plant will happily continue producing leaves, saving its energy rather than spending it on flowers.
When this energy management is successful, the plant invests in its future, as you can see by the healthy, silvery-green roots and the emergence of a new flower spike. This visual proof confirms that the plant has exited its recovery phase and is preparing for its next spectacular display. It’s a direct result of managing the plant’s energy economy effectively.
Your Orchid Reblooming Audit Plan
- Assess the Spike: After the last flower falls, examine the flower spike. If it’s still green, cut it just above a triangular node. If it’s brown and dry, cut it all the way back to the base of the plant to redirect energy.
- Initiate Cool-Down: Move the orchid to a location, like a north-facing windowsill, where nighttime temperatures will naturally drop to 55-65°F (13-18°C). Maintain this for 4-6 weeks.
- Maintain Energy Input: During this cool treatment, ensure the plant still receives bright, indirect light. Photosynthesis is crucial for rebuilding the energy reserves needed for blooming.
- Monitor for Results: Patiently watch the base of the plant and between the leaves for a new spike to emerge. It will look like a flattened, green mitten.
- Return to Performance Conditions: Once a new spike is confirmed, you can return the plant to its normal, warmer location and resume your regular watering and feeding schedule.
How to Deadhead Kalanchoe to Encourage a Second Flush of Color?
Deadheading a Kalanchoe is the first step, not the last, in encouraging a second bloom. By pinching or snipping off spent flower clusters at the stem, you prevent the plant from wasting energy on seed production. This action signals to the plant that its first reproductive attempt has failed, preserving resources in its “energy bank.” However, deadheading alone is often not enough. To trigger a full rebloom, you must manipulate its perception of the season through a process called photoperiodism.
Kalanchoes are “short-day” plants, meaning they form flower buds only when they experience long, uninterrupted nights, mimicking winter conditions. To force a rebloom, the kalanchoe requires an extended period of 14 hours of darkness for 6 weeks. This strict light diet is the most critical factor in its blooming cycle. Even a brief exposure to light during the dark period can reset the internal clock and halt the process. This isn’t about neglect; it’s a precise environmental manipulation.
Case Study: Replicating Commercial Photoperiodism at Home
Commercial growers achieve year-round Kalanchoe blooms by placing them under blackout cloths to enforce a strict light schedule. Home gardeners can achieve the same results with a simpler method. One successful approach involves placing the plant in a dark closet every day from 5 PM to 8 AM. This provides 15 hours of complete darkness. After six weeks of this consistent routine, the plant, when brought back into normal light conditions, will be covered in new flower buds, ready for a second display.
This strategic use of darkness is the key to unlocking the Kalanchoe’s potential for multiple bloom cycles. It demonstrates that providing the right “stress” is more effective than simply providing continuous light and water. It’s an active management technique that yields dramatic results, turning a short-lived plant into a repeat performer.
Cyclamen or Azalea: Which Is Easier to Keep Alive Indoors?
When choosing a long-lasting flowering gift, both Cyclamen and Azaleas are popular choices. However, their long-term survival rates indoors differ dramatically due to their fundamental needs and life cycles. An Azalea, bred as an outdoor shrub, struggles with the dry air and consistent temperatures of a typical home. A Cyclamen, a Mediterranean tuber, is naturally better adapted to indoor life, provided its specific needs for cool temperatures and a summer rest are met. For the average gift recipient, the Cyclamen is significantly easier to keep alive and rebloom year after year.
The primary reason for this difference lies in their dormancy periods. Azaleas do not have a true dormancy period indoors and require constant care to prevent them from drying out. In contrast, the Cyclamen’s summer dormancy is a natural and predictable part of its energy management cycle. Many owners mistakenly discard the plant when its leaves turn yellow and drop in late spring, assuming it has died. In reality, it is simply entering its scheduled “off-season” to conserve energy during the hot, dry months.
Case Study: Embracing Cyclamen Dormancy for Longevity
A common mistake is to throw away a Cyclamen when it enters its natural summer dormancy. By understanding its life cycle, one gardener reported keeping the same Cyclamen for five consecutive years. The strategy was simple: when the leaves yellowed in late spring, they stopped watering almost completely and moved the pot to a cool, dark, and dry place like a garage or basement. In early autumn, they brought it back into the light and resumed watering. The tuber, having successfully managed its energy reserves, reliably sent up new leaves and a full flush of flowers each winter.
The following table, with data synthesized from sources like gardening guides on plant care, breaks down the key differences, making it clear why the Cyclamen’s needs are more manageable in a home environment.
| Care Factor | Cyclamen | Azalea |
|---|---|---|
| Temperature Preference | Cool (50-65°F) | Cool to moderate (60-70°F) |
| Common Cause of Death | Overwatering & warm temperatures | Underwatering & dry air |
| Watering Method | Bottom watering preferred | Regular top watering |
| Dormancy Period | Summer dormancy (easier to manage) | No dormancy (constant care needed) |
| Humidity Needs | Moderate (50%) | High (60-70%) |
| Reblooming Difficulty | Moderate (natural cycle) | Challenging (specific conditions) |
The Heating Vent Mistake That Blasts Flowers Off the Stems
One of the most common and fastest ways to kill a blooming plant is by unknowingly placing it in a “danger zone.” These are areas in your home that experience blasts of hot, dry air from heating vents, radiators, or even direct, intense afternoon sun. This dry heat dramatically increases the plant’s transpiration rate, causing it to lose water through its leaves and flowers much faster than its roots can absorb it. The result is bud blast, where unopened buds dry up and fall off, and existing flowers quickly wilt and drop.
This environmental stress puts the plant’s water economy into a severe deficit. It’s the equivalent of forcing an athlete to run a marathon in a desert without water. To protect your investment, you must become a microclimate manager. The goal is to create a pocket of stable temperature and higher humidity around your plants, buffering them from the harsh, dry conditions of the surrounding room. This is especially critical during winter when indoor heating systems are running constantly.
Creating a humid microclimate is a powerful strategy. By grouping several plants together, their collective transpiration naturally raises the humidity in their immediate vicinity. Placing pots on trays filled with pebbles and water further enhances this effect, as the water evaporates and moistens the air directly around the foliage. This simple setup can increase local humidity by 10-20%, a significant buffer against the desiccating effects of indoor heating.
This arrangement isn’t just aesthetically pleasing; it’s a functional, self-sustaining ecosystem that protects the plants from environmental shock. It’s a proactive measure that costs nothing but yields significant returns in plant health and bloom longevity, preventing the premature end of your floral display.
When to Stop Fertilizing Blooming Plants to Prevent Salt Buildup?
Fertilizer is not “food” in the way we think of it; it’s a supplement of mineral salts that fuel specific processes. While essential during growth and blooming, continuous application leads to a dangerous accumulation of these salts in the soil. This buildup can become toxic, “burning” the plant’s delicate roots and impeding their ability to absorb water and nutrients. The first sign is often a white, crusty layer on the soil surface or pot rim. If left unmanaged, it will lead to yellowing leaves, stunted growth, and the premature end of blooms, despite your best intentions.
The key to proper fertilization is moderation and timing. Many growers make the mistake of using full-strength fertilizer, believing “more is better.” However, this accelerates salt buildup. A more effective and safer strategy is to use a half-strength solution. One study of container plants demonstrated that growers using half-strength fertilizer with monthly flushing maintained continuous blooming for 3-4 months longer than those using full-strength applications. This is because a weaker solution provides sufficient nutrients without overwhelming the soil’s capacity.
Equally important is knowing when to stop fertilizing. When a plant enters dormancy (like a Cyclamen in summer) or is in its mandated “rest” period (like an orchid undergoing cool treatment), it has no use for these supplemental nutrients. Fertilizing a resting plant is not only wasteful but also contributes directly to the toxic salt buildup in the soil. Fertilizing should cease completely during these periods and only resume when new growth appears.
When you do notice salt buildup, a simple soil flush is the solution. This technique involves pouring a large volume of lukewarm water through the pot’s soil to dissolve and wash away the excess mineral salts, effectively resetting the soil’s balance. It’s a critical maintenance task for the long-term health of any potted plant.
Why Is the Temperature Near Your Window 5 Degrees Lower Than the Room?
The air right next to a window pane is almost always a different temperature than the rest of the room. Glass is a poor insulator, meaning it quickly loses heat to the colder outside air in winter and gains heat from the sun in summer. This creates a distinct microclimate in the immediate vicinity of the window. For a blooming plant, this isn’t a problem to be avoided but a powerful tool to be harnessed. This natural temperature differential is often the key to triggering reblooming without any special equipment.
During winter nights, the air temperature directly against the glass can easily be 5 to 15 degrees cooler than the ambient room temperature. For a plant like a Phalaenopsis orchid, this is the perfect “strategic stressor.” Placing the orchid on a windowsill where it experiences this nightly dip provides the exact signal it needs to initiate a new flower spike. In effect, the natural window area provides the crucial 10°F temperature drop that forces the plant out of its vegetative state and into its blooming cycle.
This principle is well-documented by successful home growers. In online forums, members of the “Orchid Buds” community frequently report success by simply moving their non-blooming orchids to an east-facing windowsill. The combination of cooler nighttime temperatures and gentle morning sun provides the perfect sequence of environmental cues. One member noted that after 6 weeks on the windowsill, their orchid produced two new flower spikes without any other changes to its care routine. This passive management strategy leverages your home’s existing environment to meet the plant’s specific needs.
Understanding and using these naturally occurring microclimates is a cornerstone of intelligent plant management. It allows you to provide the necessary environmental triggers with minimal effort, turning a simple windowsill into a dedicated reblooming station. It’s a perfect example of working with nature, rather than against it, to achieve your desired outcome.
When to Switch to High-Potassium Feed for Bigger Blooms?
Not all fertilizers are created equal, and applying the right formula at the right time is critical to managing a plant’s energy. Plant fertilizers are defined by their N-P-K ratio, which stands for Nitrogen (N), Phosphorus (P), and Potassium (K). Nitrogen fuels leaf and stem growth (vegetative growth), while Phosphorus supports root development and Potassium regulates overall cell function and flowering (bloom support). Using a balanced fertilizer (like 20-20-20) year-round is a common mistake that can encourage lush foliage at the expense of flowers.
The strategic switch occurs when you want the plant to shift its energy investment from making leaves to making flowers. As soon as you spot the very first signs of new buds forming, or when you observe a slowdown in new leaf production, it is time to change your fertilizer. You should switch from a balanced formula to a “bloom booster” formula, which is high in Potassium (e.g., 10-30-20). This provides the specific nutrients needed to develop large, vibrant, and long-lasting flowers. Reducing nitrogen intake at this stage is crucial, as too much nitrogen will signal the plant to revert its energy back to growing leaves.
The timing and ratio of nutrients must be adapted to the plant’s current stage in its energy cycle. Giving a plant a high-nitrogen feed when it’s trying to set buds is counterproductive, while providing a high-potassium feed during a dormancy period is simply wasteful and contributes to salt buildup. The table below outlines the ideal nutrient ratios for each stage of a plant’s life cycle.
| Growth Stage | Ideal N-P-K Ratio | Purpose | Application Frequency |
|---|---|---|---|
| Active Growth | 20-20-20 | Balanced leaf and root development | Every 2 weeks |
| Pre-Bloom | 10-30-20 | Trigger flower bud formation | Weekly at half strength |
| Blooming | 0-10-10 | Support flower development | Every 10-14 days |
| Post-Bloom | 10-10-10 | Recovery and energy storage | Monthly |
| Dormancy | None | Rest period | No fertilization |
By tailoring the nutrient supply to the plant’s needs, you are actively directing its energy flow. This level of management is what separates a one-time bloom from a plant that performs reliably year after year.
Key Takeaways
- Blooming is a significant energy expense for a plant; its subsequent rest period is for recovery, not a sign of decline.
- Active management using environmental triggers like cool temperatures and controlled darkness is more effective than passive care for inducing reblooming.
- Dormancy is a natural and necessary part of many plants’ life cycles, allowing them to conserve and rebuild energy for the next season.
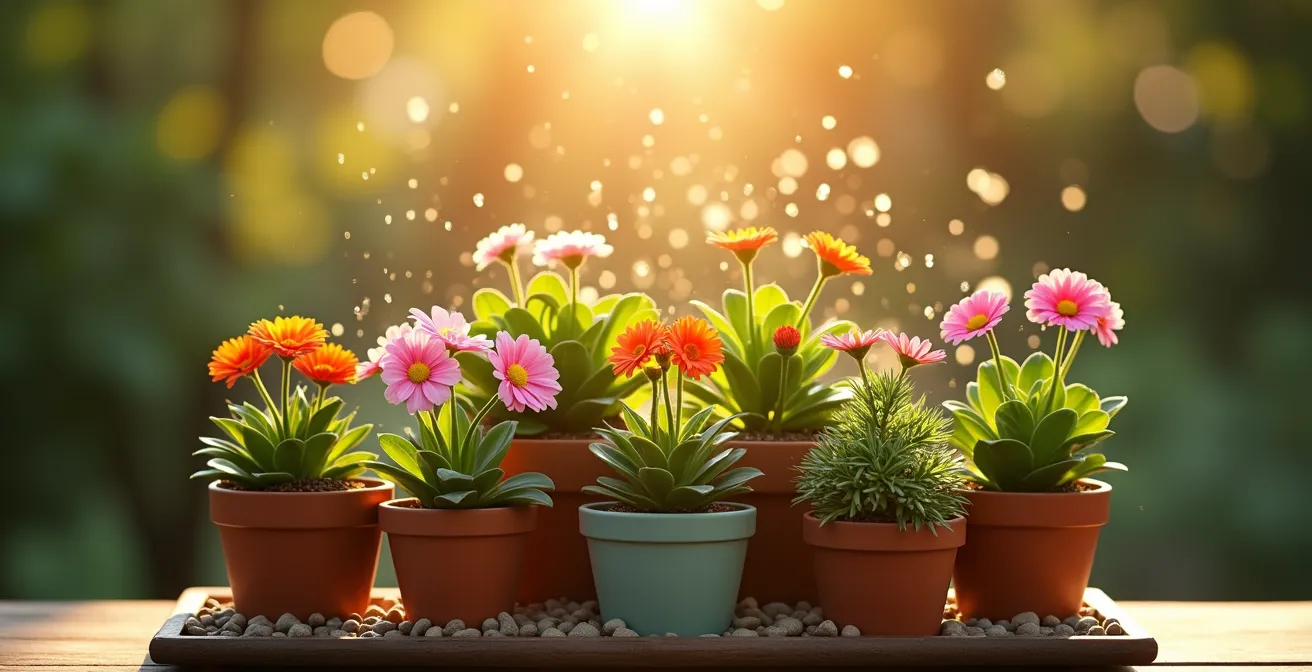
How to Design Floral Arrangements for Home Events Under $50?
Thinking of blooming pot plants as a long-term investment completely changes the calculus for event decorating. Instead of spending money on cut flowers that are discarded the next day, you can create stunning “living arrangements” that offer superior value. For a budget under $50, you can assemble a centerpiece that not only looks beautiful for your event but continues to provide color for months and can even be given to guests as lasting party favors.
This approach shifts the focus from disposable beauty to sustainable value. The key is to think in layers, just like a professional floral designer. Start with one slightly taller “thriller” plant as the focal point, such as a mini-orchid or a striking bromeliad. Then, add two or three smaller, mounding “filler” plants like Kalanchoes or African Violets to add mass and color. Finally, tuck in a small, inexpensive “spiller” plant like a trailing ivy to soften the edges of the container. Grouping these individual potted plants into a single large, decorative tray or basket unifies them into a cohesive and impressive arrangement.
Case Study: The Living Centerpiece That Became a Party Favor
For a dinner party of ten, an event planner spent $45 on ten small blooming plants (a mix of mini orchids and kalanchoes). She arranged them in a long, rustic wooden tray filled with moss to create a lush, continuous centerpiece for the dining table. The effect was more vibrant and texturally interesting than a traditional bouquet. At the end of the evening, she invited each guest to choose a plant to take home. The centerpiece was a conversation starter, and the favors provided guests with a living memento that continued to bloom in their homes for the next 8-12 weeks, creating far more value and goodwill than the initial $45 investment would suggest.
This method maximizes the return on every dollar spent. The initial outlay is comparable to a mid-range bouquet, but the longevity and potential for reuse or gifting make it an exponentially better value. It’s the ultimate expression of the “investment” mindset, transforming event decor from a fleeting expense into a lasting asset.
By applying these principles of energy management and strategic intervention, you can shift your perspective entirely. Instead of buying another temporary bouquet, start investing in living arrangements that offer lasting value, continuous beauty, and a much greater return on your initial cost.