You believe stunning floral decor for your events is out of reach without a florist’s budget, but the opposite is true.
- The secret to a high-end look isn’t in expensive flowers, but in mastering the “invisible” structure: the right vase, mechanics, and color discipline.
- Simple techniques like proper stem cutting and strategic flower placement can double the life and perceived value of any bouquet.
Recommendation: Stop focusing on the cost of the blooms and start mastering the high-impact, low-cost design principles that create a luxury look with any material.
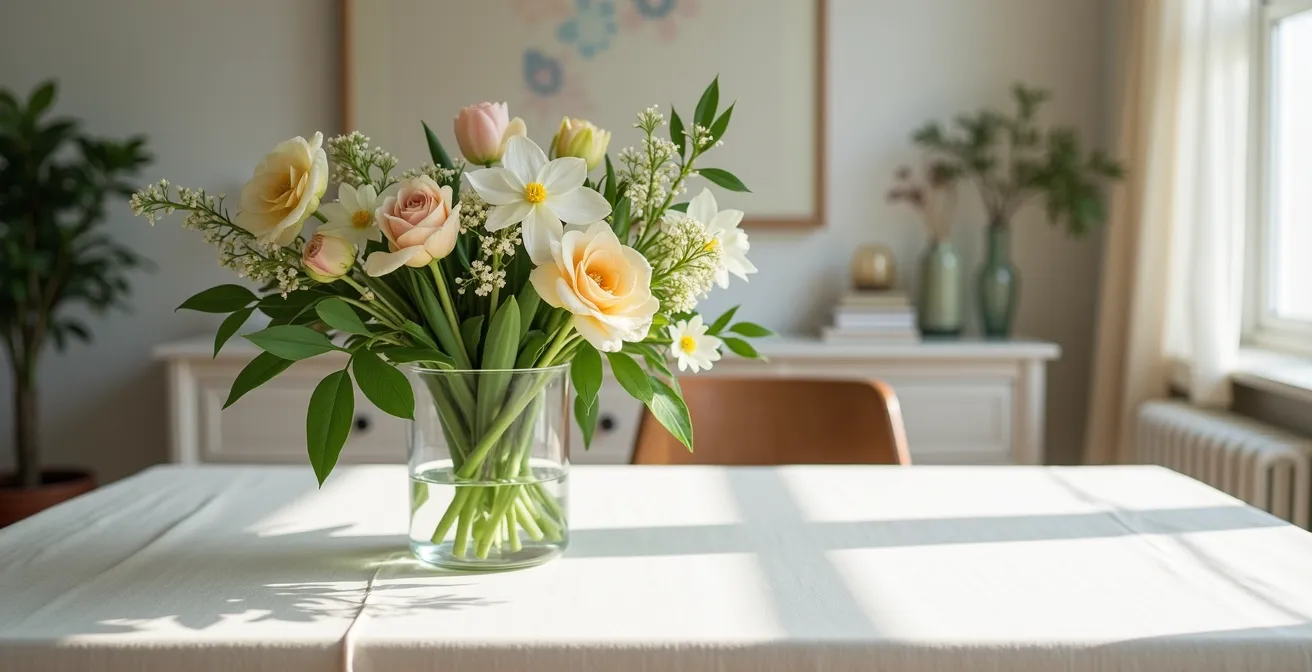
The vision is clear: a home filled with elegant, breathtaking floral arrangements that make your guests feel truly special. The reality, however, often involves a last-minute trip to the grocery store, resulting in a bouquet that looks… fine. Just fine. For too long, the world of high-end floral design has felt inaccessible, a luxury reserved for extravagant budgets and professional florists. Many guides simply advise you to find cheap flowers or use a basic vase, but these tips miss the fundamental point.
The true art of budget floral design isn’t about finding the cheapest blooms; it’s about making those blooms look priceless. The secret lies not in the flowers themselves, but in the hidden architecture that supports them. It’s a combination of physics, technique, and a disciplined eye for color that elevates a $15 bouquet into a work of art. Forget what you think you know about simply plopping stems in water. We are about to deconstruct the professional’s playbook.
This guide will walk you through the structural and aesthetic principles that transform inexpensive materials into jaw-dropping centerpieces. We will explore how the shape of a vase dictates balance, how the right cut can extend a flower’s life for a week, and why the “wrong” color palette can cheapen even the most expensive flowers. Prepare to see your next bouquet not as a finished product, but as a kit of potential waiting to be unlocked.
This article provides a complete roadmap to mastering budget-friendly floral design. Discover the foundational principles and advanced techniques organized below to guide you from basic preparation to final, show-stopping placement.
Summary: How to Design Floral Arrangements for Home Events Under $50?
- Why the Wrong Vase Shape Destroys Your Arrangement’s Balance?
- How to Cut Stems Correctly to Make Flowers Last 7 Days Longer?
- Floral Foam or Chicken Wire: Which Mechanics Support Heavy Blooms Best?
- The Color Palette Error That Makes Expensive Flowers Look Cheap
- In Which Order Should You Place Focal Flowers vs Filler Greens?
- Ficus Tree or Hanging Pothos: Which Best Fills Vertical Dead Space?
- Soil or Hydroponic Glass: Which Look Is More Elegant for Centerpieces?
- How to Create Living Floral Decor for Weddings on a Budget?
Why the Wrong Vase Shape Destroys Your Arrangement’s Balance?
Before you even think about the flowers, you must consider their home. The vase is not just a container; it’s the foundation of your design’s structural integrity. The wrong shape can make a full bouquet look sparse and a carefully constructed design feel chaotic. The relationship between the vase opening, height, and shape directly influences the arrangement’s form and visual weight. A wide-mouthed vase, for instance, will cause stems to splay outwards, losing all sense of structure and requiring three times the flowers to look full.
Conversely, a vase with a narrow neck provides immediate support, allowing you to create height and shape with fewer stems. This is a core secret to making budget bouquets look intentional and lush. The “Rule of 1.5,” where the arrangement’s height is roughly 1.5 times the vase’s height, is a classic guideline for achieving pleasing proportions. But the material matters, too. Transparent glass can be used to showcase beautiful stems as a design element, while opaque ceramic or metal vases are perfect for hiding messy mechanics like tape grids or chicken wire.
Case Study: The $5 Vintage Vase Transformation
To prove this point, Magnolia’s floral team took a basic grocery store bouquet and transformed it entirely by their choice of vessel. They used a vintage brass urn, found at a thrift store for under $5, as the base. The urn’s medium-wide opening and classic shape provided the perfect visual weight to ground the arrangement. By pairing this high-impact, low-cost vessel with a simple chicken wire mechanic, they created a professional-grade centerpiece that looked far more expensive than its total sub-$50 cost.
Choosing your vase is the first, most critical design decision. It sets the stage, defines the silhouette, and can either sabotage your efforts or amplify them tenfold. Master the vase, and you’ve already won half the battle.
How to Cut Stems Correctly to Make Flowers Last 7 Days Longer?
You’ve sourced your budget blooms and chosen the perfect vase. Now, the single most important action to ensure your creation lasts is proper stem preparation. This isn’t just a chore; it’s a science. An improperly cut stem seals itself off, starving the flower of water, no matter how much is in the vase. Professional guidelines from experts like Two Sisters Flower Farm show that flowers can last up to 7-10 days with proper cutting techniques, compared to a mere 2-3 days without. The goal is to maximize the surface area for water absorption.
The universal rule is to cut every stem at a sharp 45-degree angle under running water or submerged in a basin. This prevents air bubbles from blocking the xylem, the flower’s water-uptake channels. Immediately after cutting, place the stems into a bucket of clean, cool water. Furthermore, you must strip all leaves that will fall below the waterline in the final arrangement. Submerged foliage rots quickly, creating bacteria that will clog the stems and poison the water, dramatically shortening the life of your flowers.
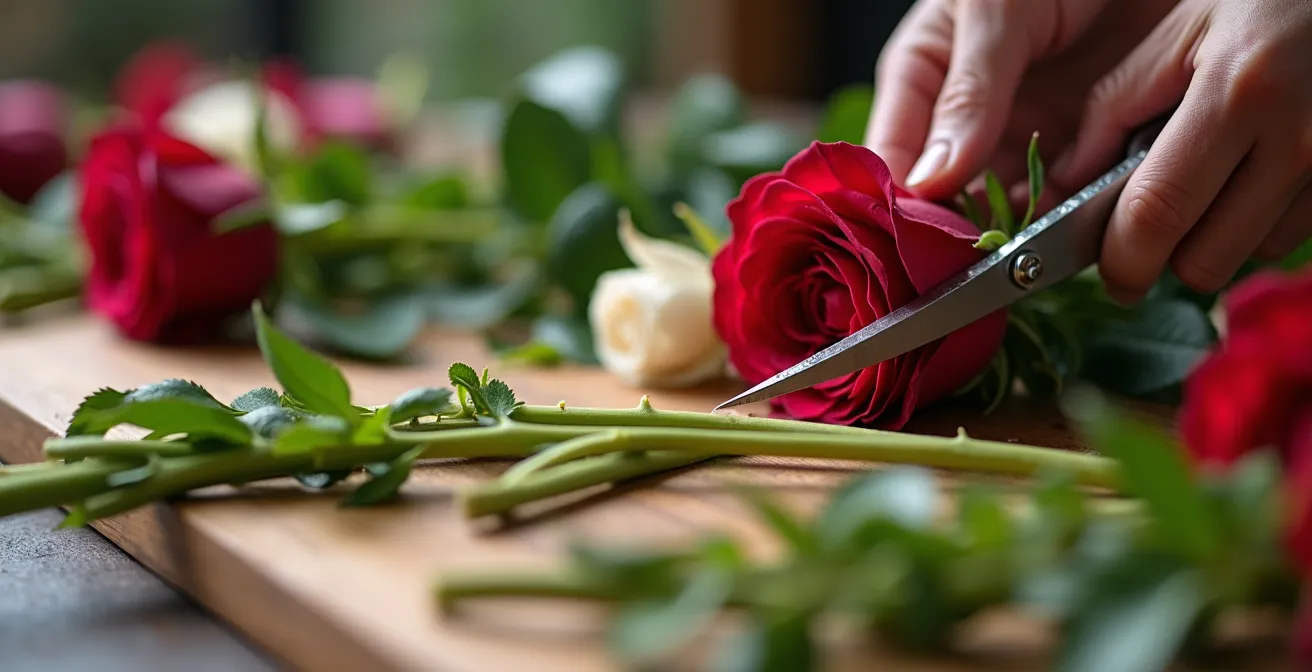
This macro view highlights the precision required. Notice how a clean, angular cut exposes the stem’s vascular system, creating a wide-open pathway for hydration. This simple, two-second action is the difference between an arrangement that thrives for a week and one that wilts overnight.
Your Action Plan: Professional Stem Conditioning Protocol
- Handle Woody Stems: For tough stems like roses or hydrangeas, make long vertical slits after the initial angular cut to dramatically increase the water uptake surface area.
- Treat Soft Stems: For delicate stems like tulips or ranunculus, a simple, clean 45-degree angle is sufficient for optimal absorption.
- Let Them Rest: After cutting and stripping, let all flowers rest for at least 2 hours in a cool, dark place with fresh water before you begin arranging. This “hardening” process ensures they are fully hydrated.
- Remove Lower Leaves: Systematically remove any and all leaves that will sit below the water line of your final vase to prevent bacterial growth and cloudy, foul-smelling water.
- Make Your Own Flower Food: Mix a simple, effective solution of 1 tsp sugar (food), 1 tsp bleach (antibacterial), and 2 tsp lemon juice (to acidify water) per quart of water to nourish your blooms.
Floral Foam or Chicken Wire: Which Mechanics Support Heavy Blooms Best?
The “invisible architecture” holding your arrangement together is known as mechanics. For decades, the go-to for florists was green floral foam, a block of water-absorbent plastic that holds stems in place. It allows for precise placement and is excellent for creating structured, formal designs. However, it is a single-use plastic that crumbles into microplastics and offers no reusability, making it both costly over time and environmentally questionable.
Enter the sustainable, budget-savvy alternative: chicken wire. A small roll, often costing less than $5, can be used for a lifetime. By simply balling up a section of wire and placing it inside your vase, you create a flexible yet incredibly strong matrix that supports even the heaviest blooms like peonies and hydrangeas. This method encourages a more natural, organic style of arrangement, as stems can be easily repositioned. For clear glass vases where chicken wire would be visible, a grid made of clear floral tape across the vase opening offers similar support for just pennies.
This comparative analysis from floral experts at Stevie Storck clearly breaks down the trade-offs. As the data shows, chicken wire provides a far more sustainable and cost-effective solution for most home arrangements.
| Mechanic Type | Initial Cost | Reusability | Environmental Impact | Best For |
|---|---|---|---|---|
| Chicken Wire | $5 one-time | Lifetime reusable | Eco-friendly metal | Natural, organic arrangements |
| Floral Foam | $2-3 per block | Single use only | Microplastic pollution | Precise, formal designs |
| Tape Grid | $1 per arrangement | Single use | Minimal waste | Clear glass vases |
| Natural Branches | Free (foraged) | Compostable | 100% biodegradable | Rustic, garden-style |
Case Study: Magnolia’s Sustainable Support System
Professional florists at Magnolia have largely replaced traditional floral foam in their studio work. By using rolled chicken wire balls, they achieve the exact same structural support for heavy-headed flowers like peonies and hydrangeas. This switch not only created a reusable and eco-friendly solution but also saved an estimated $15 in material costs per arrangement over the course of just 10 events—a testament to the long-term value of investing in sustainable mechanics.
The choice of mechanics dictates both the style and the sustainability of your work. For the modern, resourceful host, chicken wire is the clear winner for its versatility, reusability, and professional-grade support.
The Color Palette Error That Makes Expensive Flowers Look Cheap
Perhaps the most common mistake in DIY floral design is a chaotic color palette. In an attempt to create something vibrant, we often grab flowers in every color of the rainbow. The result, however, is rarely the sophisticated vision we had in mind. A busy, multi-colored arrangement can look jarring and cheapen the overall effect, regardless of the quality of the flowers. The secret to a high-end, elegant look is discipline and restraint. According to professional wedding planners, using 3 or fewer colors increases the perceived elegance by 60%.
The most effective strategy for an instantly luxurious look is creating a monochromatic palette. This doesn’t mean boring; it means creating depth and interest through texture and tone. Select flowers in varying shades of a single color family—think ivory, cream, and pure white, or blush, rose, and deep pink. This forces the eye to appreciate the unique shapes and textures of each bloom: the ruffles of a ranunculus, the smoothness of a rose petal, the cloud-like form of a hydrangea. The result is a composition that feels intentional, sophisticated, and cohesive.
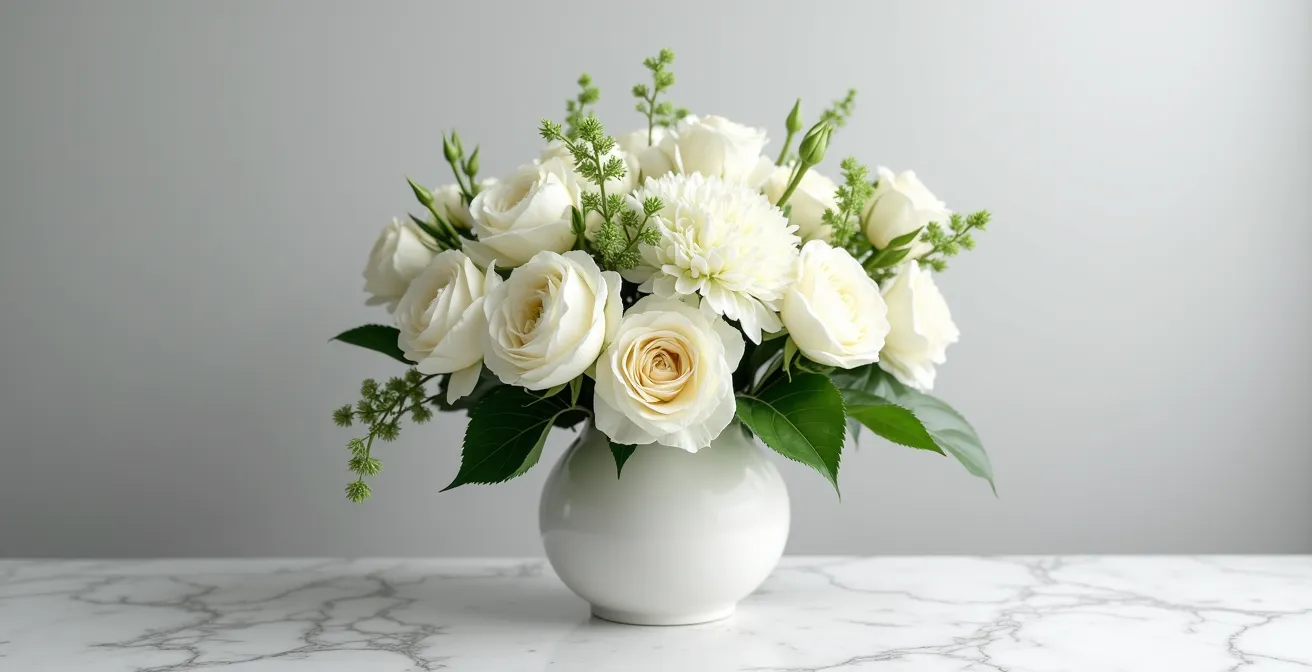
This all-white arrangement is a perfect example of monochromatic depth. By combining different flowers in shades of white, cream, and ivory, with subtle green foliage for contrast, the design achieves a rich, textural quality. It looks expensive and curated, yet it could be created from just a few simple, inexpensive white bouquets.
If you do opt for more than one color, adhere to the 60-30-10 rule from interior design: 60% of your arrangement should be a dominant color, 30% a secondary color, and 10% a small accent. This structured approach prevents visual chaos and ensures a harmonious final product.
In Which Order Should You Place Focal Flowers vs Filler Greens?
With your stems conditioned and mechanics in place, the process of building the arrangement begins. A common question is where to start: the big, show-stopping flowers or the leafy greens? The professional’s method is almost always to start with greenery. Think of the foliage as the structural framework or the sketch of your design. Placing your greens first allows you to establish the overall shape and size of the arrangement before committing a single bloom.
Once your green framework is established, follow this sequence for a balanced, dynamic composition:
- Place Focal Flowers: Add your largest, most dramatic blooms (your “focal” flowers) next. Don’t place them all at the same height or clumped together. Place them in a loose triangle at varying heights and depths to create visual hierarchy and draw the eye through the arrangement. Always use an odd number—3 or 5 is a classic rule—for a more natural, less static look.
- Add Secondary Flowers: Intersperse your secondary, medium-sized flowers around the focal blooms. Again, work in odd-numbered groups (3s or 5s) to create rhythm and balance.
- Fill with Filler: Use your most delicate, airy elements like baby’s breath or waxflower last. Their job is to fill any gaps, add texture, and create a sense of lightness.
- Layer by Visual Weight: A final check is to ensure the heaviest, darkest blooms are generally lower in the arrangement to provide a solid base, while the lightest, airiest elements seem to float on top. This creates a sense of intentional asymmetry and movement.
This layered approach ensures that you use fewer flowers more effectively. By building a strong green foundation first, you create the illusion of fullness, meaning your precious focal flowers are used for maximum impact rather than just filling space.
Ficus Tree or Hanging Pothos: Which Best Fills Vertical Dead Space?
When decorating for an event, design thinking extends beyond the centerpiece on the table. Empty corners and bare walls create “vertical dead space” that can make a room feel unfinished. The immediate thought might be to rent a large potted plant like a Ficus tree or use a hanging Pothos to add life and height. While effective, these can be costly and cumbersome for a one-time event. The truly resourceful designer looks to a more architectural and budget-friendly solution.
Instead of thinking about whole plants, think about their most dramatic elements: branches. Foraged branches are a designer’s best-kept secret for adding high-impact vertical interest for free. A single, tall, architectural branch—like curly willow, cherry blossom in the spring, or even bare winter branches—placed in a simple, tall floor vase can create more visual drama and sophisticated appeal than a bulky, generic rental tree. The clean lines and natural form draw the eye upward and fill a corner with sculptural beauty.
Case Study: The $200 Vertical Space Solution
Wedding designers working on a tight budget needed to fill the tall, empty corners of a reception hall. Instead of spending over $200 on renting two ficus trees, the team foraged for dramatic, moss-covered branches from a nearby wooded area. They anchored these branches in tall, inexpensive cylindrical vases filled with sand. The result was a stunning, organic installation that felt custom and elegant. For another event, they used tall gladiolus stems, which cost only $3 each, to provide elegant height and a pop of color for a fraction of the cost of potted plants.
Filling vertical space isn’t about adding bulk; it’s about drawing the eye upward with intention. For the budget-savvy host, dramatic branches or a few tall, linear flowers will always provide more style and impact per dollar than a conventional potted plant.
Soil or Hydroponic Glass: Which Look Is More Elegant for Centerpieces?
For a truly modern and minimalist aesthetic, consider moving beyond traditional soil-based potted plants or cut-flower bouquets. A rising trend in high-end event design is the use of hydroponic arrangements, where single stems or root-washed plants are displayed elegantly in clear glass vessels filled with water. This look is clean, architectural, and incredibly cost-effective. In fact, budget floral specialists report that hydroponic glass arrangements can cost up to 75% less than traditional soil-based or full floral centerpieces while delivering a chic, high-end feel.
The beauty of this style is its simplicity and focus on the plant’s natural form. A single, perfect calla lily or orchid stem submerged in a tall glass cylinder becomes a piece of living sculpture. The transparent mechanics showcase the clean lines of the stem, turning it into a key part of the design. This approach is not only elegant but also highly practical for creating multiple, cohesive centerpieces on a shoestring budget.
Here are a few ways to create stunning hydroponic centerpieces for under $5 each:
- Submerge a Single Bloom: Place one dramatic flower, like an orchid or calla lily, in a tall cylinder vase and fill with distilled water for crystal clarity.
- Force Bulbs on Pebbles: Grow paperwhite or amaryllis bulbs on a layer of pebbles or glass marbles in a shallow glass bowl. The exposed roots become part of the design.
- Display Washed Roots: Gently wash the soil from the roots of a small anthurium or peace lily plant and display it in a clear vase of water. The intricate root structure is visually stunning.
- Add Visual Weight: Use a handful of smooth river stones or black polished rocks at the bottom of the vase to anchor the stem and add a finished, professional touch.
This minimalist approach celebrates the beauty of a single element, proving that elegance doesn’t require abundance. It’s a confident, modern statement that is as beautiful as it is budget-friendly.
Key Takeaways
- The secret to a luxury look is not flower cost, but mastering the “invisible architecture” of design: vase, mechanics, and color.
- Proper stem conditioning (cutting at a 45° angle, removing lower leaves) is the single most critical factor for flower longevity.
- A limited, monochromatic color palette creates more elegance and perceived value than a chaotic mix of many colors.
How to Create Living Floral Decor for Weddings on a Budget?
Applying these budget-savvy principles to a large-scale event like a wedding may seem daunting, but it’s where they shine brightest. The core philosophy remains the same: it’s not about how much you spend, but how strategically you use your materials. The single most powerful strategy for maximizing a small floral budget is the “deconstructed bouquet.” This involves purchasing one or two large, mixed bouquets from a budget-friendly source and breaking them down into their individual components to be used across the entire venue.
This approach shifts your mindset from “one bouquet, one location” to “one bouquet, fifteen locations.” Each stem becomes an asset to be deployed with intention, creating a cohesive decorative theme that feels expansive and custom-designed, rather than sparse and limited. The key is to collect a variety of small, interesting vessels—bud vases, vintage bottles, or even simple glass jars—to house each individual stem or small cluster of blooms.
Case Study: The $40 Deconstructed Bouquet Strategy
A couple looking to decorate their wedding reception on a strict budget used this exact strategy. They purchased one $40 mixed bouquet from Trader Joe’s, which contained a variety of flowers and greenery. They then spent an afternoon separating every single stem. Using a collection of vintage bottles sourced from thrift stores and flea markets for less than $20 total, they created over 15 individual bud vase arrangements. These were scattered throughout the venue—on cocktail tables, the gift table, the bar, and in restrooms—creating a cohesive and charming floral presence that would have easily cost over $300 from a traditional florist.
This strategy is just one of many that prioritizes impact over volume. The goal is to find creative solutions that deliver the most visual bang for your buck.
| Strategy | Cost | Coverage | DIY Time | Impact |
|---|---|---|---|---|
| Deconstructed Bouquet | $40 | 15 locations | 30 minutes | High |
| Potted Herbs as Favors | $30 for 10 | Each place setting | 15 minutes | Medium |
| One Statement Piece | $50 | 1 focal point | 20 minutes | Very High |
| Edible Elements | $20 | Full centerpiece | 45 minutes | Medium |
Now that you are armed with the secrets of structural design, color theory, and strategic placement, you hold the power to transform any space. Start by experimenting with a single grocery store bouquet and see how many beautiful, intentional moments you can create. Your journey to becoming a budget-savvy floral artist begins today.