Many new aloe vera owners harvest a leaf only to find their plant stressed, damaged, or rotting weeks later. The secret isn’t just in the cutting technique, but in understanding the plant as a living partner. This guide reframes harvesting as a holistic practice, focusing on the plant’s foundational health—from soil and light to wound care—to ensure its long-term vitality and a continuous, sustainable supply of high-quality gel.
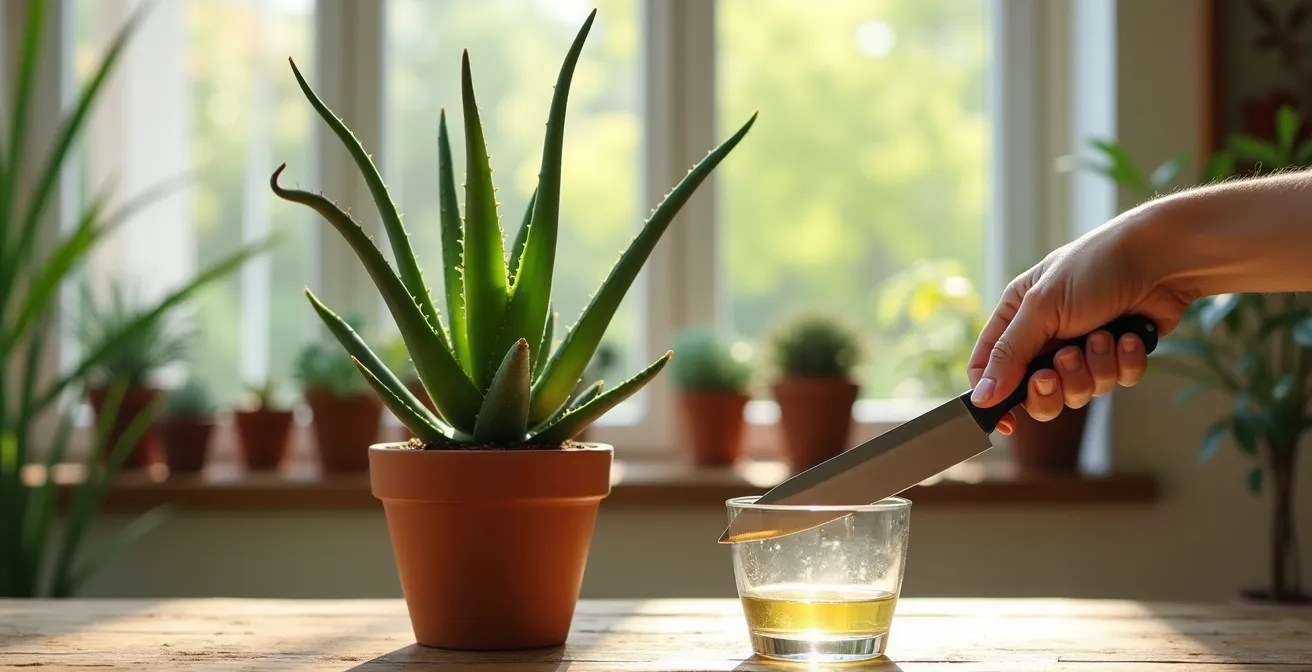
The joy of owning an Aloe vera plant often comes from the promise of its soothing gel, a natural remedy right at your fingertips. For any natural wellness enthusiast, the idea of snipping off a leaf for a sunburn or a skincare recipe is deeply appealing. Most advice focuses on the simple mechanics: use a clean knife, cut an outer leaf. While true, this approach misses the most critical element: the well-being of the plant itself.
This transactional view can lead to a stressed plant, poor quality gel, and even the eventual loss of your aloe. The real art of harvesting lies not in the taking, but in the giving back. It requires a gentle, instructive approach that considers the plant’s entire ecosystem. But what if the key to a bountiful, perpetual harvest wasn’t found in the cut, but in the care you provide before, during, and after?
This guide moves beyond the basics to embrace a plant-centric philosophy. We will explore how to read your aloe’s health signals, from sun exposure and soil composition to its reproductive cycle. By treating harvesting as a partnership, you can ensure every leaf you take is given willingly by a thriving, resilient plant, promising a sustainable source of potent gel for years to come.
To help you master this sustainable approach, this article details the essential knowledge for nurturing your aloe. The following sections provide a complete roadmap, from understanding environmental stressors to mastering the art of propagation and aftercare.
Summary: A Guide to Harvesting Aloe Vera While Protecting the Plant
- Why Is Your Aloe Vera Turning Brown and Mushy in Direct Sun?
- How to Separate Aloe Pups From the Base Without Killing the Roots?
- Cactus Mix or Regular Potting Soil: Which Prevents Root Rot Best?
- The Lighting Mistake That Causes Heavy Aloe Leaves to Snap
- When to Repot an Aloe Vera: 3 Signs It Is Rootbound?
- Why Even “Indestructible” Snake Plants Rot in Dark Bathrooms?
- Sand or Gravel: Which Top Dressing Prevents Stem Rot Best?
- How to Master Indoor Horticulture Without Expensive Equipment?
Why Is Your Aloe Vera Turning Brown and Mushy in Direct Sun?
One of the most common mistakes is believing that as a succulent, aloe vera craves scorching, direct sunlight. While it loves bright light, intense, direct sun acts as a powerful stressor. When the leaves turn brown, it’s a sign of “sunburn,” where the plant’s cells are being damaged. This stress response isn’t just cosmetic; it directly impacts the medicinal quality of the gel you wish to harvest. The plant diverts energy to protect itself, producing stress compounds rather than the beneficial polysaccharides you seek.
If you notice your aloe turning brown or reddish, it’s a cry for help. A mushy texture often indicates that the sunburn has been complicated by a secondary fungal or bacterial infection, as the weakened tissue becomes vulnerable. According to studies on thermal processing, stressed and sunburned plants lose up to 40% of their polysaccharide content, severely degrading the gel’s potency. Before you even think about harvesting, you must first nurse the plant back to health.
The solution is to immediately move the plant to a location with bright, indirect light, such as near an east-facing window or a few feet back from a south-facing one. Allow the plant several weeks to recover its deep green color. Harvesting from a stressed, brown plant will yield inferior gel and further weaken it, creating a downward spiral. A healthy, vibrant green aloe is the first sign of a plant ready to share its gifts.
How to Separate Aloe Pups From the Base Without Killing the Roots?
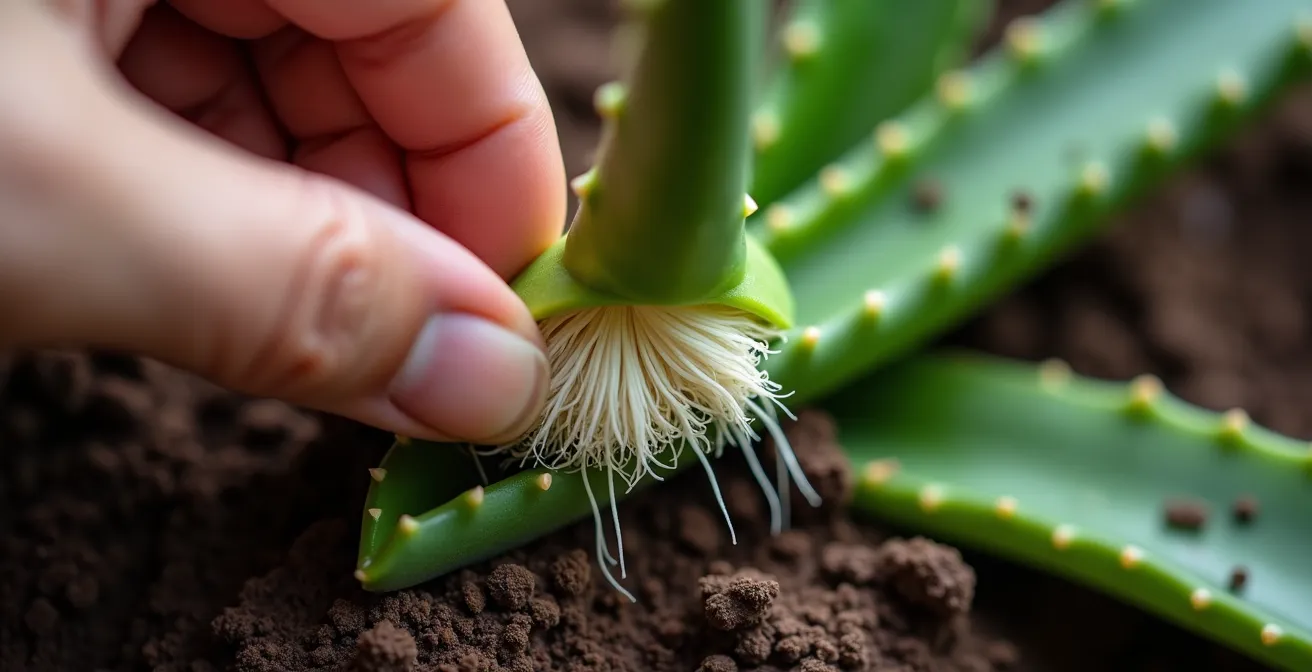
As your mother plant thrives, you’ll notice small “pups” or offshoots emerging around its base. While charming, these pups draw significant energy and water from the main plant. Separating them is a vital step in creating a sustainable, perpetual harvesting system. By removing them, you redirect all of the mother plant’s resources into producing larger, more potent leaves for your use. It is the ultimate expression of our plant-centric partnership: you help the plant manage its resources, and it rewards you with superior quality gel.
The key is patience. Wait until a pup is at least four inches tall and has developed its own set of roots before attempting separation. Use a sharp, sterilized knife to make a clean cut as close to the mother plant’s stem as possible, ensuring a portion of the root system remains attached to the pup. The most critical step follows: you must allow the wounds on both the mother and the pup to dry and form a callus for 24-48 hours before replanting the pup. This prevents rot from entering the fresh cuts.
This simple act of propagation not only expands your personal aloe farm but directly enhances the quality of your harvest. By focusing the plant’s energy, you are actively participating in its growth cycle for mutual benefit.
The difference in the mother plant’s performance is not trivial. As a comparative analysis shows, removing pups leads to measurably better outcomes for harvesting.
| Factor | With Pup Removal | Without Pup Removal |
|---|---|---|
| Energy Distribution | 100% to mother plant growth | Divided between mother and pups |
| Gel Quality | 15-20% higher polysaccharide content | Standard quality |
| Harvest Recovery Time | 2-3 weeks faster | Standard 4-6 weeks |
| New Leaf Production | 30% increase in growth rate | Normal growth rate |
Cactus Mix or Regular Potting Soil: Which Prevents Root Rot Best?
The foundation of a healthy, harvest-ready aloe vera is literally its foundation: the soil. Using standard potting soil is one of the quickest ways to doom your plant. It’s designed to retain moisture, which is fatal for aloe roots, leading to the dreaded root rot. A plant with rotting roots cannot absorb nutrients, its leaves will become weak, and the gel inside will be watery and lack potency. To ensure the plant has the structural integrity to support heavy, gel-filled leaves, you need a soil that prioritizes drainage above all else.
Cactus or succulent mix is the clear winner. Its formulation is designed to mimic the arid, gritty soil of the aloe’s native environment. This type of soil allows water to drain away quickly, forcing the roots to seek out moisture and grow strong, while preventing the waterlogged conditions where rot-causing fungi thrive. A healthy root system is the engine of the plant, directly responsible for the quality of the gel produced in the leaves.
For the dedicated herbalist, crafting your own soil mix provides ultimate control over your plant’s health. A well-regarded DIY soil recipe for maximum aloe gel potency involves a specific blend of ingredients, each serving a unique purpose. Mix two parts coarse sand for drainage, two parts perlite for aeration (which helps roots recover from harvest stress), one part coconut coir for slight moisture retention without sogginess, and one part decomposed granite for essential trace minerals that boost gel quality. This bespoke blend creates the perfect environment for a resilient and generous plant.
The Lighting Mistake That Causes Heavy Aloe Leaves to Snap
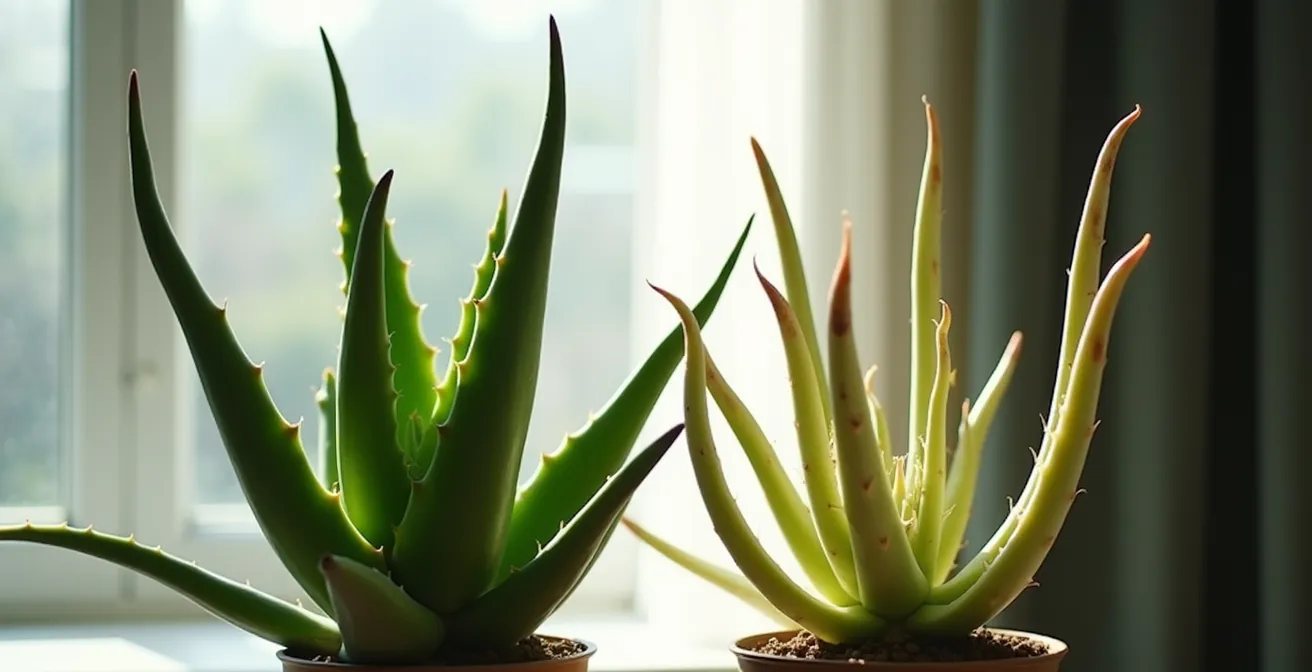
Have you ever noticed your aloe leaves growing long, pale, and floppy? This condition, known as etiolation, is a direct result of inadequate lighting. The plant is literally stretching itself thin, searching for more light to photosynthesize. These weakened, elongated leaves lack the structural integrity to hold the weight of their own gel, often leading them to bend, crease, or even snap off at the base. Harvesting from an etiolated plant is counterproductive; the gel quality is poor, and you risk further damaging the already-stressed structure.
Conversely, a plant receiving the correct amount of bright, indirect light will have thick, upright, dark green leaves. This robust structure is no accident. Proper lighting fuels the uptake of crucial minerals from the soil that are essential for building strong cell walls. As botanical experts note, this is a matter of plant biology.
Research shows that properly lit aloe vera leaves contain higher concentrations of structural compounds including calcium, magnesium and zinc, which strengthen cell walls. These minerals are essential for maintaining leaf rigidity and preventing snapping under the weight of water-rich gel.
This visual contrast between a healthy and an etiolated plant is a clear indicator of its readiness for harvest. Strong, self-supporting leaves signal a plant that is not just surviving but thriving.
To achieve this, you must provide at least six hours of bright, indirect light daily. If your plant has become etiolated, don’t move it into direct sun abruptly, as this can cause sunburn. Instead, gradually increase its light exposure over several weeks to allow it to build strength and a deep green color, a clear sign of high chlorophyll and dense, potent gel.
When to Repot an Aloe Vera: 3 Signs It Is Rootbound?
An often-overlooked aspect of long-term aloe care is repotting. A plant that has outgrown its container becomes “rootbound,” a condition where the roots have filled the entire pot and have nowhere left to grow. This chokes the plant, stunts its growth, and severely diminishes its ability to produce new, harvestable leaves. Harvesting from a rootbound plant only adds more stress, leading to a slow decline. Recognizing the signs is key to maintaining a healthy, productive aloe.
There are three primary signs your aloe is rootbound:
- Roots are escaping: You can see roots growing out of the drainage holes at the bottom of the pot.
- Growth has stalled: The plant hasn’t produced any new leaves or pups for a long time, even in the growing season.
- The plant is lifting itself: The dense root ball can actually start to push the entire plant up and out of the pot.
When you see these signs, it’s time to act. Repot the aloe into a container that is only about two inches wider in diameter. A pot that is too large can hold excess moisture and promote rot. After repotting, follow a strict recovery timeline before you resume harvesting. Do not water for the first week to allow any damaged roots to heal. Resume normal watering for the next month, and only consider harvesting once you see clear signs of new growth, which indicates the root system has successfully established itself in its new home.
Your Aloe Health Audit Checklist: Is Your Plant Ready for a Safe Harvest?
- Health Signals: List all visual cues of plant health, such as deep green leaf color, firmness, and signs of new central growth.
- Condition Inventory: Check the existing environment, including the pot size for root space, the soil’s drainage capacity, and daily light exposure.
- Harvest-Readiness: Compare the outermost leaves against ideal harvesting criteria—they should be thick, mature, and at least 8-10 inches long.
- Gel Quality Indicators: Look for signs of optimal gel, like a slight rosy tinge on leaf tips, versus stress signals like brown spots or mushiness.
- Action Plan: Based on the audit, define your harvesting priorities: which specific leaves to take, how many (one or two at most), and the post-harvest care steps to follow.
Why Even “Indestructible” Snake Plants Rot in Dark Bathrooms?
The myth of the “indestructible” houseplant, like the popular Snake Plant, often leads to neglect. While tough, no plant is immune to the consequences of a poor environment, especially high humidity and low light, a common combination in bathrooms. This principle applies even more strongly to Aloe vera, particularly after harvesting. Every time you cut a leaf, you create an open wound. In a humid environment, this wound becomes a perfect gateway for fungal and bacterial pathogens to enter and cause rot from the inside out.
This isn’t just a hypothetical risk; it’s a biological process. The moment the inner gel is exposed to air, it begins to change. As one study on post-harvest care notes, this vulnerability is immediate:
When Aloe vera gel is exposed to air after cutting, it rapidly oxidizes and decomposes, losing much of its biological activity. This creates an ideal entry point for pathogens, especially in humid bathroom conditions where fungal spores thrive.
Therefore, post-harvest wound care is not an optional step; it is essential for protecting the mother plant. Immediately after cutting a leaf, you must keep the plant in a dry, well-ventilated area for at least 48 hours. This allows the wound to dry and begin the process of “callusing over,” forming a protective seal. A simple but effective herbalist’s trick is to dust the cut surface on the mother plant with a bit of cinnamon powder, which acts as a natural antifungal agent and helps keep pathogens at bay while the plant heals itself.
Key Takeaways
- Sustainable harvesting is a partnership; a healthy, thriving plant produces the most potent gel.
- The plant’s foundational health—determined by its soil, light, and space—directly dictates the quality and structural integrity of its leaves.
- Proper wound care after cutting a leaf is non-negotiable to prevent rot and ensure the mother plant’s long-term survival and productivity.
Sand or Gravel: Which Top Dressing Prevents Stem Rot Best?
Protecting the base of your aloe plant is a final, crucial step in preventing rot, especially after a harvest. The area where the leaves meet the soil—the crown—is highly susceptible to moisture-related diseases. When you water, soil can splash up onto the crown and any recent harvest wounds, trapping dampness and inviting fungal growth. A “top dressing,” a decorative layer of material on top of the soil, serves as a protective barrier. But not all materials are created equal.
While decorative pebbles or moss might look appealing, they are poor choices for an aloe. Moss actively retains moisture against the plant’s stem, and the gaps between larger pebbles can trap water and provide a breeding ground for pests. The goal is a material that wicks moisture away from the plant’s base and allows for rapid drying. In this regard, coarse sand is the superior choice. Its fine particles create a dry barrier that prevents water from lingering around the crown, effectively shielding harvest wounds from soil-borne pathogens.
The benefits of sand go beyond moisture protection. Horticultural research indicates that this simple addition has a measurable impact on a plant’s resilience, even allowing for more generous harvesting schedules. For example, plants with proper sand top dressing can safely support harvesting of up to 2 leaves at a time with faster recovery, whereas plants with bare soil require more cautious, infrequent harvesting. This simple, inexpensive addition significantly improves your plant’s health and your harvesting potential.
| Material | Moisture Protection | Thermal Buffer | Pest Prevention | Wound Healing Speed |
|---|---|---|---|---|
| Coarse Sand | Excellent – wicks moisture away | Good – moderate insulation | Excellent – deters fungus gnats | Fastest (2 weeks) |
| Fine Gravel | Good – allows drainage | Fair – less insulation | Good – partial deterrent | Moderate (3 weeks) |
| Pebbles | Fair – gaps trap moisture | Poor – can overheat | Poor – allows egg laying | Slow (4+ weeks) |
| Decorative Moss | Poor – retains moisture | Poor – promotes rot | Poor – attracts pests | Very slow/infection risk |
How to Master Indoor Horticulture Without Expensive Equipment?
Achieving a thriving, harvestable aloe vera plant does not require a laboratory or expensive gadgets. The most profound tools are your own observation and a patient, plant-centric mindset. By learning to read the subtle cues your plant gives you, you can provide exactly what it needs to flourish. This is the essence of traditional herbalism: a deep, intuitive connection with the plant world, built on respect and attentiveness rather than technology.
Nature provides its own indicators for a perfect harvest. For instance, an expert gardener knows a simple visual cue that signals peak potency. As one guide notes, when the tips of the aloe leaves develop a rosy or purplish tinge, it’s a sign the leaf is mature and its gel content is at its optimum. This natural indicator eliminates any need for guesswork or testing equipment. Your plant tells you when it is ready to give.
By combining this observational skill with the practice of pup propagation, you can establish a zero-cost, perpetual aloe farm right in your home. Start with one mature plant. In the first year, harvest sparingly. In the second, separate its pups to create new plants. By the third year, you can rotate your harvesting among several plants, giving each one ample time to recover. This creates a staggered, sustainable system where you always have a mature plant ready for harvest, all while strengthening your overall stock. This is the path to true mastery—not through expense, but through partnership.
Begin today by observing your plant with this new perspective. See it not just as a source of gel, but as a living system you can nurture. By applying these gentle, attentive practices, you will cultivate a partnership that provides wellness for both you and your thriving aloe vera plant.