Mastering plant care isn’t about the tools you buy; it’s about learning to read the biological signals your plants are sending.
- Drooping leaves often signal a lack of oxygen at the roots (hypoxia), not just a lack of water in the soil.
- Nutrient control is about timing and chemistry—choosing between immediate liquid feeds and strategic slow-release granules dictates whether a plant grows leaves or flowers.
Recommendation: Shift your focus from treating symptoms (like yellow leaves) to diagnosing the root cause by understanding the interplay of water, oxygen, light, and soil pH.
For any dedicated hobbyist, the journey of indoor horticulture is filled with triumph and frustration. You bring home a beautiful plant, provide it with sunlight and water, yet sometimes it fails to thrive. The leaves droop, growth stagnates, and you’re left wondering what went wrong. The common advice is often a list of “dos and don’ts”: don’t overwater, give it enough light, fertilize regularly. While not incorrect, these tips treat the plant like a machine, ignoring the complex biological processes happening beneath the surface.
Relying on guesswork or generic advice leads to a cycle of trial and error. You might solve one problem only to create another, never truly understanding the fundamental needs of your botanical companions. But what if the key wasn’t in following a rigid set of rules, but in learning to interpret your plant’s own language? The true path to mastery lies not in acquiring expensive equipment, but in developing a deep understanding of the scientific principles that govern plant vitality. It’s about moving from being a plant keeper to a plant diagnostician.
This guide is designed to elevate your expertise by exploring the “why” behind common plant care challenges. We will delve into the science of root health, nutrient management, pest prevention, and seasonal adjustments. By understanding these core mechanics, you’ll gain the confidence to make informed decisions, transforming your approach from reactive guesswork to proactive, science-based care.
To help you navigate these advanced concepts, we’ve structured this guide to answer the most pressing questions that separate the hobbyist from the expert. Each section tackles a specific challenge, revealing the underlying science that empowers you to solve it for good.
Summary: How to Master Indoor Horticulture Without Expensive Equipment?
- Why Your Plant’s Leaves Droop Before the Soil Is Dry?
- How to Inspect New Plants to Prevent Bringing Pests Home?
- Liquid vs Slow-Release Granules: Which Gives Better Control Over Growth?
- The Acclimatization Mistake That Scorches Leaves in Spring
- When to Adjust Your Care Routine for the Fall Transition?
- Why Too Much Nitrogen Sacrifices Fruit for Green Leaves?
- Why a pH of 6.0 Is Ten Times More Acidic Than 7.0?
- What Are the Key Factors for Botanical Vitality When Plants Stop Growing?
Why Your Plant’s Leaves Droop Before the Soil Is Dry?
It’s one of the most confusing signals a plant can send: the leaves are wilting and drooping as if desperately thirsty, yet the soil is still damp to the touch. The novice gardener’s immediate impulse is to water it again, inadvertently worsening the real problem. This paradox is a classic symptom of root hypoxia, a condition where the roots are suffocating from a lack of oxygen. When soil is waterlogged, the air pockets that roots need to respire are filled with water. Without oxygen, the root cells cannot function effectively to absorb water and nutrients, even when they are abundant.
This cellular shutdown has a dramatic effect on the plant’s vascular system. Think of the roots as the engine and the stems and leaves as the chassis. If the engine chokes, the rest of the system sputters to a halt. In fact, studies on oxygen deprivation show the impact is severe. Recent findings reveal that waterlogged soils can trigger a 70% reduction in the hydraulic conductivity of a plant’s roots. This means the plant’s ability to pull water up into its leaves is drastically impaired, causing it to wilt from internal dehydration, not a lack of external water.
The solution is not more water, but more oxygen. For potted plants, this means ensuring your potting mix is well-aerated, with components like perlite or orchid bark to create air pockets. It also underscores the absolute necessity of pots with excellent drainage. Before watering again, always check the soil moisture an inch or two below the surface. If it’s still moist and the plant is wilting, your primary goal should be to increase airflow to the roots, not to add more water to the already saturated environment.
How to Inspect New Plants to Prevent Bringing Pests Home?
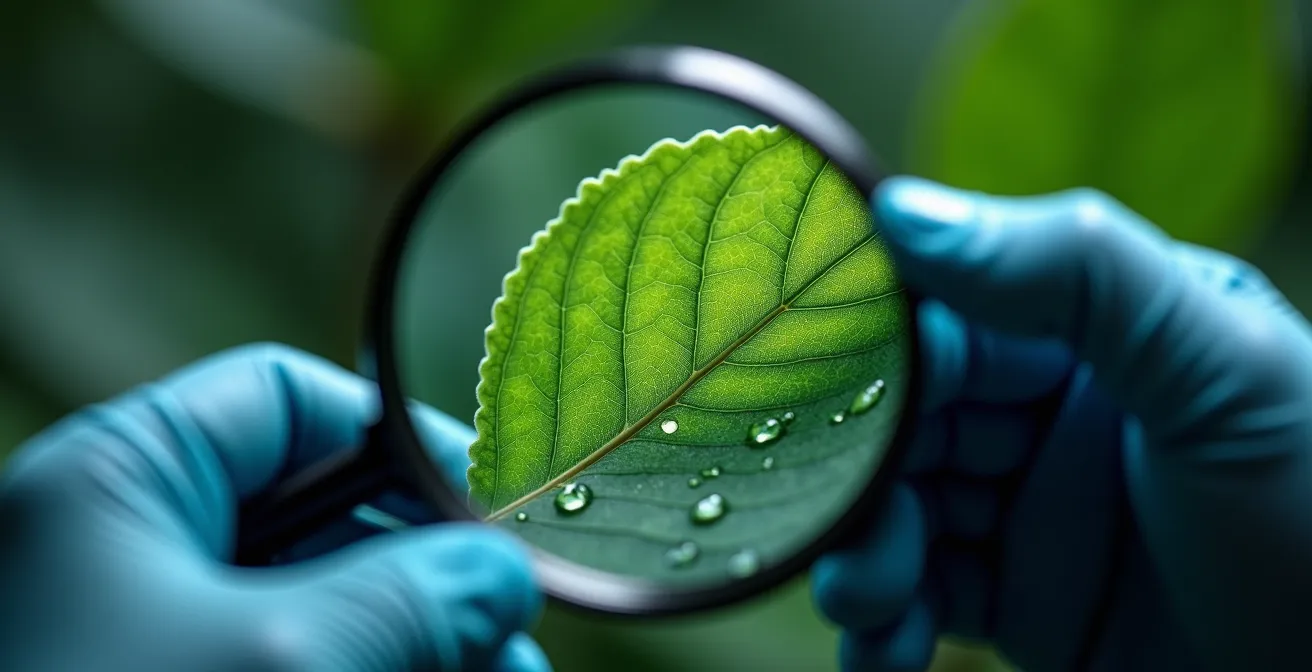
Every new plant is a potential Trojan horse. Bringing one home from a nursery or store without a thorough inspection is the number one way to introduce a devastating pest infestation to your entire collection. A casual glance is not enough; many pests like thrips, spider mites, and mealybugs are masters of disguise. To protect your indoor ecosystem, you must adopt a process of forensic inspection, treating every new acquisition as a potential biological threat that requires quarantine and detailed examination.
This means getting up close—much closer than the naked eye allows. Using simple magnification tools transforms your ability to spot trouble before it spreads. The image below showcases the level of detail required for a truly effective inspection, focusing on the hidden surfaces where pests lay their eggs and feed.
Choosing the right tool depends on the threat you’re looking for. While a basic hand lens is a good start, spotting minuscule pests like thrips or the eggs of spider mites requires more power. A professional approach means matching the tool to the task.
This comparative analysis, based on recommendations for professional growers, shows how different levels of magnification are suited for detecting specific pests. As detailed in a report by horticultural specialists on pest identification, investing a small amount in a clip-on microscope can provide a massive return in outbreak prevention.
| Tool Type | Magnification | Detection Capability | Cost (USD) |
|---|---|---|---|
| Standard Hand Lens | 10-20X | Adult aphids, whiteflies, scales | $15-30 |
| Clip-on Macro Lens | 15-24X | Basic thrips presence | $9-12 |
| 200X Clip-on Microscope | 200X | Thrips species ID, spider mite eggs | $25-40 |
Your 6-Step Plant Quarantine Audit
- Magnify and Scrutinize: Use a 10-20X hand lens or a clip-on smartphone macro lens to examine the undersides of leaves, stems, and where leaves meet the stem.
- Level Up for Thrips: For high-risk plants, use a 200X clip-on microscope with an LED light to inspect new, unfurling leaves, a favorite hiding spot for thrips.
- The Tap Test: Gently tap the plant over a sheet of white paper. Dislodged pests like spider mites and thrips will be easily visible against the white background.
- Soil Surface Scan: Inspect the top layer of the soil for the shimmering trails of fungus gnat larvae or other soil-dwelling pests.
- Root Ball Check: Carefully de-pot the plant just enough to examine the outer root ball. Look for the white, cottony masses of root mealybugs.
- Isolate for Two Weeks: Regardless of what you find, keep the new plant in a separate room away from your collection for at least two weeks to allow any hidden eggs to hatch.
Liquid vs Slow-Release Granules: Which Gives Better Control Over Growth?
Fertilizer isn’t just “plant food”; it’s a powerful tool for directing a plant’s energy and growth. The choice between a liquid fertilizer and slow-release granules is a strategic one that determines not only the convenience of your routine but also your level of control over the plant’s development. It’s a choice between providing an immediate, intense burst of nutrients versus a steady, prolonged supply. Neither is inherently better—they simply serve different purposes.
Liquid fertilizers are fast-acting. Once diluted in water, their nutrients are immediately available for the plant’s roots to absorb. This makes them perfect for giving a quick boost to a plant that is actively growing or showing signs of a specific nutrient deficiency. They offer precise control; you can adjust the dosage and frequency in real-time based on the plant’s response. However, this also means they can be easily over-applied, leading to fertilizer burn. Their effects are also short-lived, requiring more frequent application.
Slow-release granules, on the other hand, are designed for long-term, autonomous feeding. These granules are typically coated with a polymer that breaks down over time due to moisture and temperature, releasing a small, steady dose of nutrients over weeks or even months. This “set it and forget it” approach is excellent for consistent, stable growth and reduces the risk of over-fertilization. The downside is a lack of immediate control. You can’t quickly correct a deficiency or halt feeding if a plant enters dormancy. As experts from the University of Florida IFAS Extension explain, the release curve is the key difference:
Quick-release fertilizers are ideal for pre-plant applications, side dressing, hydroponics, or fertigation for many crops. They release all readily available nutrients in a short period after being properly applied to soil. Their release curve is immediate and does not synchronize with the dynamic needs of crop growth.
– University of Florida IFAS Extension, Controlled-Release and Slow-Release Fertilizers as Nutrient Management Tools
The best strategy often involves a combination of both. Use slow-release granules in your potting mix as a baseline to ensure foundational nutrition, and supplement with a targeted liquid fertilizer during periods of peak growth (like spring and summer) or when you want to encourage a specific outcome, such as flowering.
The Acclimatization Mistake That Scorches Leaves in Spring
As the weather warms in spring, the temptation to give our indoor plants a “vacation” outdoors is strong. But moving a plant directly from the stable, low-light conditions of your home into the intense, unfiltered sunlight of a patio is one of the fastest ways to cause severe damage. The resulting white or brown, papery patches on the leaves are not a simple sunburn; they are a sign of photoinhibition, a physiological shock where the plant’s photosynthetic machinery is overwhelmed.
An indoor plant is adapted to a low-light environment. Its leaves are structured to capture every available photon efficiently. When suddenly exposed to direct sun, this highly sensitive system is bombarded with far more light energy than it can process. This excess energy creates reactive oxygen species (ROS)—highly volatile molecules that damage cell walls, chlorophyll, and proteins. The plant’s defense mechanism is to shut down photosynthesis in the affected areas, effectively sacrificing those leaf sections to protect the rest of the plant.
The process is about more than just light. The sudden change in environment can cause a cascade of stress responses, which has been documented in scientific studies of plants under stress.
Case Study: The Shock of Sudden Environmental Change
Research on plant stress, such as studies on plants recovering from submergence, highlights how a sudden burst of light and oxygen can be detrimental. In a study available through the National Center for Biotechnology Information, scientists observed that this rapid change leads to a surge in ROS production. Paradoxically, the shock can also disrupt root function, leading to dehydration in the leaves even in moist conditions. This dual assault of cellular damage and internal water stress explains why the leaves appear “scorched” and desiccated so quickly.
To avoid this, you must “harden off” or acclimatize your plants gradually. Start by placing the plant in a fully shaded outdoor spot for just an hour or two. Over the course of one to two weeks, slowly increase its exposure to direct sunlight, adding an hour every couple of days. This gradual process gives the plant time to physiologically adapt by producing protective pigments and adjusting the structure of its leaves to handle the higher light intensity without being overwhelmed.
When to Adjust Your Care Routine for the Fall Transition?
As summer fades into fall, your indoor plants receive two unmistakable signals from the environment: the days are getting shorter and the ambient temperature is dropping. These are powerful cues that tell them to slow down their metabolic processes and prepare for a period of lower growth or even dormancy. For the dedicated gardener, this is the time to shift from a “growth-focused” care routine to a “maintenance-focused” one. Continuing a summer care regimen into the fall is a recipe for problems like root rot and weak, leggy growth.
The most critical factor to account for is the reduction in light. Less light means less photosynthesis, which in turn means the plant needs less water and far fewer nutrients. Your watering frequency should decrease significantly. The “finger test”—checking if the top two inches of soil are dry—becomes even more crucial. A plant that needed watering every week in July might only need it every two or three weeks in October. Fertilizing should also be tapered off. Most indoor plants do not need to be fed from late fall through winter, as providing nutrients they cannot use will only lead to a buildup of mineral salts in the soil, which can burn the roots.
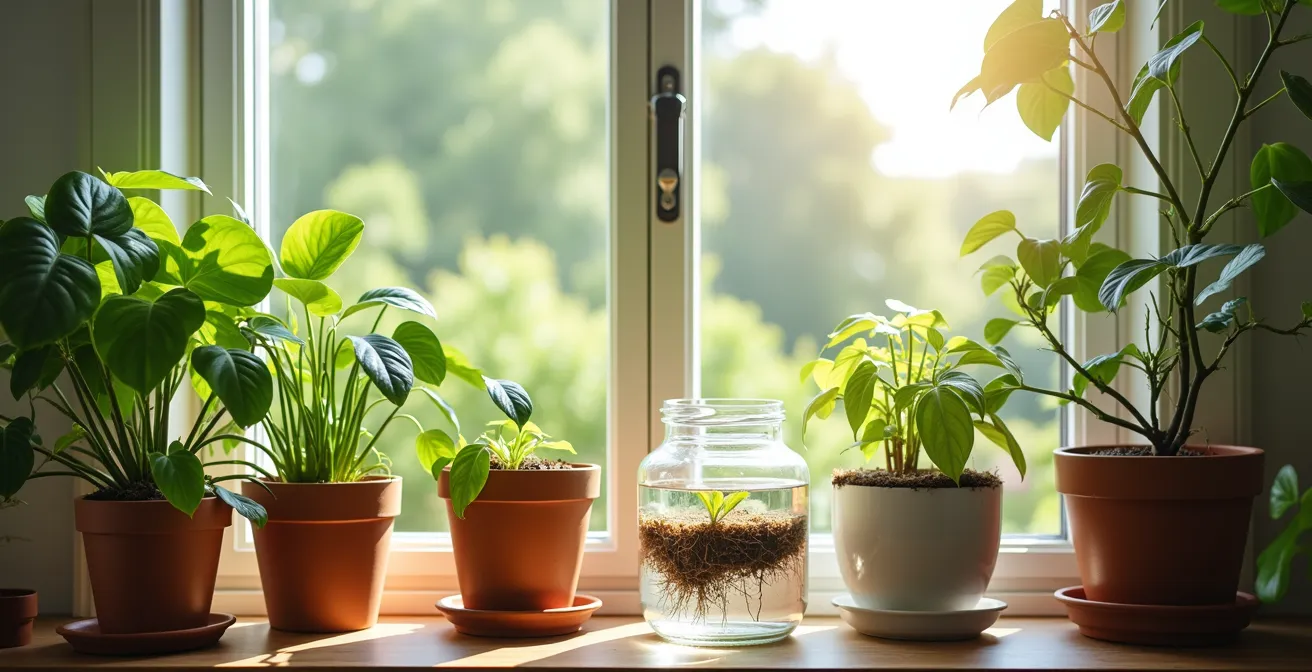
Observing and even measuring this change in light can help you make a more informed decision. The image below captures the essence of this seasonal shift, as a gardener assesses the changing quality of autumn light to guide their care adjustments.

This is also a good time to consider your plants’ location. A spot that provided perfect, bright indirect light in the summer might become too dim in the fall as the sun’s angle lowers. You may need to move your plants closer to a south- or west-facing window to compensate. Conversely, a plant that was happy in a north-facing window might now be in a prime position. This seasonal shuffle is a key part of advanced indoor horticulture, ensuring each plant continues to receive the optimal amount of energy it needs to stay healthy through the darker months.
Why Too Much Nitrogen Sacrifices Fruit for Green Leaves?
In the world of plant nutrition, nitrogen (the “N” in N-P-K) is the primary driver of vegetative growth—that is, the production of stems and leaves. It is an essential component of chlorophyll, the molecule that powers photosynthesis. Providing ample nitrogen results in lush, vigorous, green foliage. However, an excess of nitrogen can be detrimental, especially for plants you want to produce flowers or fruit. It creates an imbalance in the plant’s metabolic flux, signaling it to invest all its energy into growing more leaves at the expense of its reproductive functions.
Think of it as a resource allocation problem. A plant has a finite amount of energy derived from photosynthesis. It can either use that energy to build more “solar panels” (leaves) or to produce “offspring” (flowers and fruit). When nitrogen is overly abundant, it sends a powerful biological signal: “Conditions are perfect for growth! Build more foliage to capture more energy!” The plant enters a state of perpetual vegetative growth, never receiving the necessary cues to switch to its generative, or reproductive, phase. The result is a big, beautiful green plant that never flowers.
The choice of fertilizer is a primary factor in this equation. As one structural equation model demonstrated, fertilizer type accounts for a staggering 72.3% of the variance in plant nitrogen uptake. This highlights how critical your fertilizer choice is in managing this balance.
Case Study: Balancing Growth in Sunflowers
A study on sunflower cultivation provides a perfect real-world example of this principle. Researchers found that fertilizer formulations high in nitrogen resulted in excessive foliage at the expense of flower and seed production. In contrast, controlled-release fertilizers with balanced N-P-K ratios promoted both the vegetative (leaf) and reproductive (flower) phases appropriately. This balanced approach increased the final seed yield to nearly 4,000 kg per hectare, demonstrating that strategic nutrient limitation is just as important as nutrient provision for achieving specific growth goals.
To encourage flowering or fruiting, you need to reduce nitrogen and increase the relative amounts of phosphorus (P) and potassium (K). Phosphorus is crucial for energy transfer and the development of flowers, fruits, and seeds, while potassium regulates overall plant health and hardiness. Switching to a “bloom booster” fertilizer with a lower first number and higher second and third numbers (e.g., 5-10-10) is the practical way to send the right signal to your plant: “It’s time to reproduce.”
Why a pH of 6.0 Is Ten Times More Acidic Than 7.0?
Soil pH is one of the most overlooked yet critical factors in plant health. It acts as the gatekeeper that controls which nutrients are available for a plant to absorb. Most houseplants thrive in a slightly acidic soil with a pH between 6.0 and 7.0. When the pH is too high (alkaline) or too low (acidic), essential nutrients can become “locked out,” meaning they are present in the soil but in a chemical form that the plant’s roots cannot absorb. This can lead to nutrient deficiencies even in well-fertilized soil. But to truly grasp its importance, you must understand the scale itself.
The pH scale is logarithmic, not linear. This means that for each whole number you go down the scale, the acidity increases by a factor of 10. A pH of 6.0 is ten times more acidic than a neutral pH of 7.0. A pH of 5.0 is 100 times more acidic than 7.0. This exponential relationship is why even a small shift in pH can have a massive impact on the soil’s chemical environment and your plant’s ability to thrive. It’s a concept that is often misunderstood but is fundamental to soil science.
This table clearly illustrates the logarithmic nature of the scale, putting the difference between values into a more dramatic and understandable context. A slight change is, chemically speaking, a huge leap.
As demonstrated in a guide from the University of Florida, understanding this scale is the first step toward managing it effectively.
| pH Value | Relative Acidity | H+ Ion Concentration | Common Examples |
|---|---|---|---|
| 5.0 | 100x more than 7.0 | 10^-5 M | Black coffee |
| 6.0 | 10x more than 7.0 | 10^-6 M | Milk |
| 7.0 | Neutral | 10^-7 M | Pure water |
| 8.0 | 10x less than 7.0 | 10^-8 M | Baking soda |
Fortunately, you don’t need an expensive electronic meter to get a general sense of your soil’s pH or to make adjustments. There are several simple, budget-friendly methods you can use at home to test and amend your soil, ensuring your plants have access to the full spectrum of nutrients they need.
Checklist for DIY pH Management
- Conduct a DIY Test: Use a natural indicator like red cabbage juice. Boil chopped red cabbage, strain the purple liquid, and add a small soil sample. A pinkish-red color indicates acidic soil (pH below 7), while a greenish-blue color indicates alkaline soil (pH above 7).
- Gently Lower pH: If your soil is too alkaline, you can slowly lower the pH by incorporating acidic organic matter. Top-dressing the soil with used coffee grounds or composted pine needles are effective, gentle methods.
- Gently Raise pH: If your soil is too acidic, you can raise the pH by adding sources of calcium carbonate. Incorporating finely crushed eggshells into the potting mix or adding a small amount of agricultural lime works well.
- Apply Amendments Gradually: Never try to change the pH drastically overnight. Apply any amendments slowly, over a period of 4-6 weeks, and re-test to avoid shocking the plant’s root system.
Key takeaways
- Plant health is a system: Stagnation is often caused by a single limiting factor—be it light, pot size, or a specific nutrient—not a general lack of care.
- Reading the signals: Drooping leaves can mean too much water (lack of oxygen), not too little. Yellowing leaves can signal a pH imbalance locking out nutrients, not a lack of fertilizer.
- Control the inputs: The type of fertilizer (quick vs. slow release) and its N-P-K ratio are strategic choices that direct a plant’s energy towards either leafy growth or flowering.
What Are the Key Factors for Botanical Vitality When Plants Stop Growing?
When a plant stops growing, it has entered a state of stagnation. This is different from seasonal dormancy, which is a natural rest period. Stagnation is a cry for help, an indication that one of the key pillars of botanical vitality is missing or out of balance. To restart growth, you must play the role of a diagnostician and identify the limiting factor. This principle states that growth is dictated not by the most abundant resources, but by the scarcest one. It could be light, water, nutrients, root space, or even temperature.
The first area to investigate is the plant’s energy source: light. A plant that isn’t receiving enough light simply lacks the fuel to produce new leaves. Over time, it will cannibalize older leaves to survive, leading to yellowing and leaf drop. The second is the root environment. As we’ve seen, a waterlogged, compacted soil suffocates roots, shutting down all growth. Conversely, a plant that has become severely root-bound has no physical space to expand its root system to support new top growth. Checking the drainage holes for escaping roots is a clear sign that it’s time to repot.
Finally, consider the plant’s internal metabolic state. Under stress conditions like low oxygen, plants actively regulate their own metabolism to conserve energy. As explained in advanced botanical research, they can enter a sort of holding pattern.
Respiration rates and metabolic activity are actively regulated in response to declining oxygen levels. The HYPOXIA-RESPONSIVE MODULATOR 1 attenuates mETC activity under hypoxic stress, leading to NADH accumulation and slowing down the TCA cycle, which redirects the metabolic flux toward the fermentation pathway.
– Tsai et al., Plant metabolic regulation under oxygen stress
In simpler terms, when a key factor is missing, the plant’s internal engine slows to an idle to survive. Your job is to figure out what that missing factor is—light, oxygen, nutrients, or space—and reintroduce it. By methodically checking each of these key pillars, you can break the stagnation and signal to the plant that it’s safe to start growing again.
Now that you can diagnose the core issues affecting your plants, the next step is to consistently apply this scientific mindset to your entire collection, turning your home into a thriving indoor garden built on understanding, not just hope.
Frequently Asked Questions on How to Master Indoor Horticulture Without Expensive Equipment?
How can I tell if my plant is dormant or stagnating?
Dormant plants remain firm with healthy-looking foliage despite no growth, typically occurring seasonally. Stagnating plants show signs of stress like yellowing, limpness, or soil issues, indicating an underlying problem that needs to be solved.
What is the limiting factor principle in plant growth?
Imagine a barrel made of wooden staves of different lengths. The barrel can only hold water up to the height of the shortest stave. Similarly, plant growth is limited by the scarcest resource (the “shortest stave”)—this could be light, a specific nutrient, or pot size, not always the most obvious factor.
Should indoor environments have perfect stability?
No, perfectly stable conditions can sometimes cause stagnation. Creating subtle environmental shifts, such as a slight temperature drop at night or a change in light angle, can mimic natural cycles and stimulate plants out of growth ruts.