In summary:
- Adopt a system of preventative micro-tasks instead of reacting to large problems.
- Focus on high-leverage activities: sharp tools, smart irrigation, and timely soil care.
- Master the “Small Weed Rule” by addressing tiny issues before they become weekend-long projects.
- Use seasonal transitions, especially fall, to do the heavy lifting for you.
- Treat your one hour not as a chore list, but as a weekly system audit to maintain control.
The vision of a pristine yard is often at odds with the reality of a busy homeowner’s schedule. The weekend arrives, and the choice becomes a grueling session of yard work or foregoing a tidy landscape altogether. Many guides suggest simply “working faster” or buying more powerful equipment, but this approach only treats the symptom, not the cause. It keeps you on a treadmill of reactive, labor-intensive chores, from wrestling with overgrown weeds to battling compacted soil.
The conventional wisdom is to create a long to-do list: mow, edge, weed, water. This is fundamentally flawed. It treats all tasks as equal and guarantees you’ll always be behind. But what if the secret to a one-hour-a-week maintenance schedule wasn’t about more effort, but about smarter strategy? What if the key wasn’t in the work you do, but in the work you prevent?
This guide reframes groundskeeping from a list of chores into an efficient system. We will focus on leverage points—small, timely actions that deliver a disproportionately large return by eliminating hours of future labor. By thinking like an efficiency expert, you’ll learn to use tools, technology, and timing to your advantage. This system is designed to give you back your weekends, proving that a beautiful yard is the result of strategic consistency, not brute force.
To help you master this system, this article is structured around key decision points in yard maintenance. The following summary outlines the high-leverage topics we will cover to transform your approach and reclaim your time.
Summary: The One-Hour Groundskeeping System
- Why Dull Pruners Damage Plants and Double Your Work Time?
- Smart Controller or Timer: Which Irrigation Tech Saves More Water?
- Top-Dressing vs Removal: When Should You Just Add More Mulch?
- The “Small Weed” Rule: Why Pulling Weeds Young Saves 10 Hours Later
- Spring vs Fall Cleanup: Which Is More Critical for Plant Health?
- How to Maintain Garden Tools so They Last a Lifetime?
- When to Amend Your Soil Before Planting: Fall vs Spring?
- How to Check Structural Integrity of Retaining Walls After Heavy Rain?
Why Dull Pruners Damage Plants and Double Your Work Time?
The first leverage point in any efficiency system is the tool itself. Using dull pruners is a classic example of false economy. You’re not saving time by skipping sharpening; you’re actively costing yourself more time and effort. A dull blade crushes plant stems instead of cutting them cleanly. This action creates a larger, ragged wound that is slow to heal, inviting disease and pests. Your plants then expend energy repairing this damage instead of growing, weakening them over time.
On a purely mechanical level, you have to apply significantly more force to a dull blade. This extra effort translates directly into physical fatigue and slows you down. What should be a quick, satisfying snip becomes a strenuous squeeze. Multiply that by dozens or hundreds of cuts in a session, and you’ve doubled your work time and your physical strain. This is time you simply don’t have in a one-hour weekly schedule. The value of your time is significant; professional groundskeepers’ time is valued, and so should yours. In fact, the median hourly wage for grounds maintenance workers was $18.50 in May 2024, highlighting that time spent on these tasks has a real-world monetary value.
Treating your pruners as a high-performance instrument is a mindset shift. A sharp blade is a time-multiplier. It allows you to work faster, more precisely, and with less fatigue. More importantly, it keeps your plants healthier, which means less time spent in the future dealing with disease, die-back, and replacement. A 30-second sharpening pass before you start is one of the highest ROI activities in your entire groundskeeping system.
Smart Controller or Timer: Which Irrigation Tech Saves More Water?
Your second major leverage point is automation, specifically in irrigation. The choice between a basic timer and a smart controller isn’t just about convenience; it’s a fundamental decision about resource management and time investment. A basic digital or mechanical timer is a “dumb” system. It turns on and off at set times, regardless of weather conditions. This means you must act as the “brains” of the operation, manually adjusting it for rain, heatwaves, or changing seasons. This requires constant mental energy and physical adjustments—precisely the kind of time-consuming micro-management our one-hour system aims to eliminate.

A smart irrigation controller, by contrast, is a true “set it and forget it” system upgrade. It connects to Wi-Fi and uses real-time local weather data, soil moisture levels, and plant types to create a dynamic watering schedule. It automatically skips watering sessions when it rains and increases duration during a heatwave. The initial setup is longer, but the long-term time savings are immense. It removes the daily “Should I water?” question from your mind and ensures your landscape gets exactly what it needs without waste. This not only saves water but also promotes deeper root growth and healthier, more resilient plants, reducing future maintenance.
This table, based on a comparative analysis of garden tech, breaks down the time and mental load investment. The smart controller represents a higher upfront cost but buys back your time week after week.
| Feature | Basic Timer | Smart Controller |
|---|---|---|
| Initial Setup Time | 15-30 minutes | 1-2 hours |
| Weekly Adjustment Time | 10-15 minutes | 0-5 minutes |
| Annual Maintenance | 2-3 hours | 1 hour |
| Mental Load | High (manual adjustments) | Low (automated) |
| Cost | $20-50 | $100-300 |
Top-Dressing vs Removal: When Should You Just Add More Mulch?
Mulch is a cornerstone of low-maintenance gardening, but how you manage it determines if it’s a time-saver or a time-waster. The default action for many homeowners is to simply pile on a fresh layer each year. This is often the wrong move. While top-dressing (adding a thin layer on top) can refresh the appearance, it can lead to “mulch volcanoes” around trees and a thick, water-repellent barrier if not done correctly. The key to efficiency is knowing when to add, when to remove, and when to just leave it alone.
The decision to remove old mulch before adding new material should be based on three factors: depth, condition, and type. If your existing mulch is already at the recommended 2-3 inch depth, adding more can suffocate plant roots and prevent water from reaching the soil. If the mulch has become heavily compacted or shows signs of artillery fungus or slime mold, it’s a sign that it’s no longer providing benefits and may be hindering water penetration. In this case, removal is necessary. Finally, fine-shredded mulches tend to mat together over time, creating a crust that sheds water instead of absorbing it. This crust must be broken up or removed.
Making the right call is simple with a quick decision matrix. Before you buy bags of new mulch, ask yourself these questions:
- Question 1: Is the existing mulch deeper than 3 inches? If yes, you may need to remove some before adding a fresh layer to avoid suffocating plants.
- Question 2: Is the mulch heavily compacted or showing signs of mold? If yes, it’s no longer functioning properly and needs to be fully removed and replaced.
- Question 3: Is it a fine-shredded mulch that has matted into a water-repellent crust? If yes, break up the crust with a rake or consider removing it to ensure water can reach the soil.
Answering these questions takes five minutes but can save you hours of work and the cost of wasted mulch, ensuring your garden beds remain healthy and truly low-maintenance.
The “Small Weed” Rule: Why Pulling Weeds Young Saves 10 Hours Later
This is the absolute, non-negotiable core of the one-hour groundskeeping system: address problems when they are small. Nowhere is this more apparent than with weeding. Pulling a tiny weed seedling takes seconds and zero effort. It slides out of the soil with no resistance. Allowing that same weed to mature for a few weeks turns a 2-second task into a 10-minute battle. The mature weed develops a deep taproot, requires a trowel or a weeding tool, and leaves behind a large hole in your soil that invites other weeds to germinate.
This isn’t just a 1-to-1 time increase; it’s an exponential one. One mature weed that goes to seed can disperse hundreds or thousands of new seeds, creating a future workload that will consume entire weekends. The “Small Weed Rule” is a form of time arbitrage: you are spending a few minutes now to buy back hours of your future self’s time. A weekly 10-minute patrol of your garden beds, pulling any visible seedlings, is the single most effective way to maintain a weed-free yard.
This principle of consistent, small efforts is backed by real-world data. In an experiment to quantify garden labor, the Low-Tech Institute found that focused, daily time investment yielded massive results. They noted that “gardening one hour each day” could provide a significant portion of a household’s food, and their own food bill dropped to about $20 per week for two people. While your goal isn’t necessarily food production, the principle holds: small, regular inputs prevent overwhelming, large-scale problems. Your one-hour weekly slot is the perfect framework for this proactive approach.
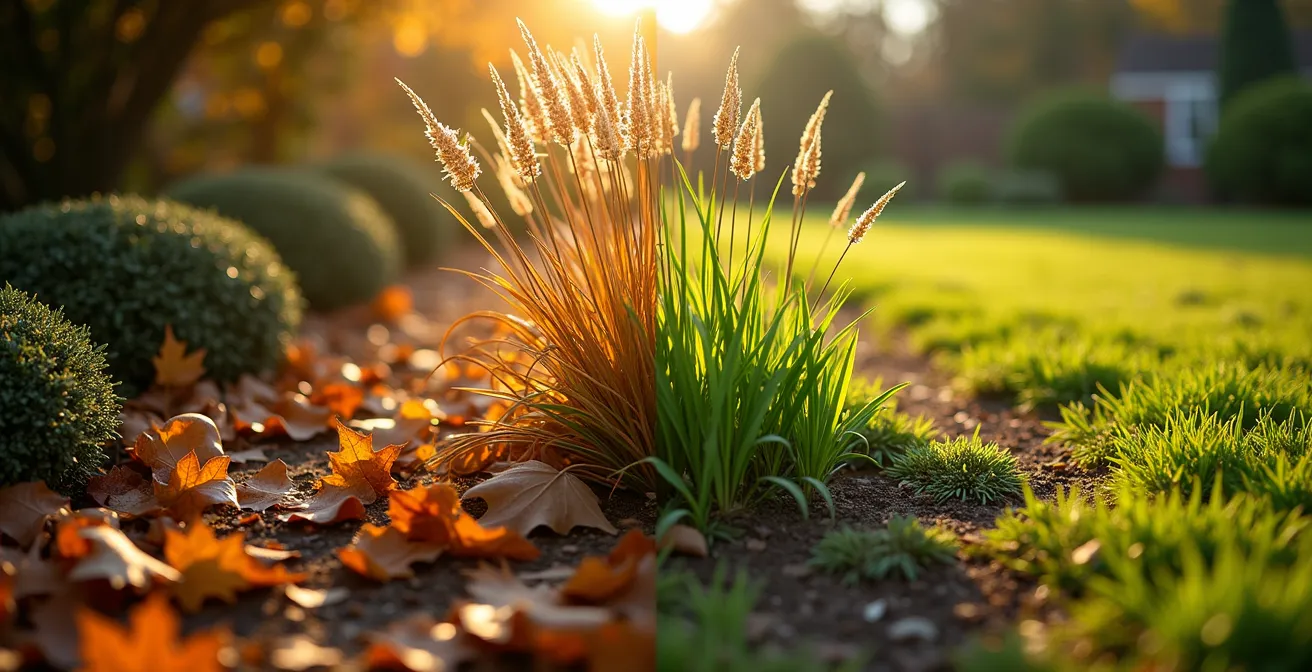
Spring vs Fall Cleanup: Which Is More Critical for Plant Health?
The traditional image of fall cleanup is a frenzy of raking, cutting back, and bagging, leaving the garden bare for winter. The one-hour system challenges this. From a plant health and time-efficiency perspective, a strategic fall cleanup is far more critical and beneficial than a spring one. Fall is your opportunity to work *with* nature to reduce your future workload.
A “messy” fall garden is a healthy garden. Leaving the stems and seed heads of perennials like coneflowers and black-eyed Susans standing provides crucial food and habitat for birds and beneficial insects over the winter. These same insects will help you with pest control the following spring. Fallen leaves (from disease-free trees) should be viewed as a resource, not waste. Raking them into your garden beds or mowing them into your lawn provides a free layer of insulating mulch that will break down over winter, enriching your soil.
The most important fall task is selective removal. Your time should be focused on removing any diseased plant material to prevent pathogens from overwintering. Cut back foliage with powdery mildew or black spot and dispose of it. This single act prevents a massive outbreak the following spring. By contrast, a frantic spring cleanup often involves clearing away the very leaf litter that was protecting plant crowns and feeding the soil. A strategic fall cleanup means your spring “cleanup” is minimal—just a quick tidying of what winter left behind, allowing you to focus on the more enjoyable tasks of planting and watching new growth emerge.
How to Maintain Garden Tools so They Last a Lifetime?
Just as sharp pruners are a leverage point, a consistent tool maintenance protocol is the mechanism that keeps the entire system running smoothly. Tools that are clean, sharp, and rust-free work more effectively, which saves you time and physical energy. More importantly, a simple end-of-session ritual prevents the cumulative damage that leads to costly replacements. A lifetime of service from a quality tool is not an accident; it’s the result of a disciplined, albeit brief, maintenance routine.
The goal is not a showroom shine, but functional reliability. The enemies of your tools are moisture, sap, and soil. Soil and moisture lead to rust, which seizes moving parts and weakens metal. Plant sap and resins build up on blades, increasing friction, attracting debris, and effectively dulling the edge. Leaving tools caked in dirt after a session is a surefire way to reduce their efficiency and lifespan. You wouldn’t put away your kitchen knives covered in food, and the same logic applies here.
Integrating a 3-minute tool care protocol at the end of your one-hour session is a non-negotiable part of the system. This small investment of time protects the larger investment you’ve made in your tools and ensures they are always ready for peak performance.
- Minute 1: Wipe Down. Use a dry rag to wipe all soil and moisture from every tool you used. This is the most critical step for preventing rust.
- Minute 2: Quick Sharpen. For cutting tools like pruners or loppers, make a few quick passes with a pocket diamond file or sharpener. This isn’t a full sharpening, just a touch-up to maintain the edge.
- Minute 3: Oil and Store. Apply a light spray of machine oil (like WD-40 or 3-In-One) to all metal surfaces and pivot points. Store them in a dry location off the ground.
Key Takeaways
- Embrace Proactive Prevention: The most significant time savings come from tasks that prevent future problems, like pulling small weeds or removing diseased leaves in the fall.
- Identify Your Leverage Points: Focus your limited time on actions with the highest return, such as keeping tools sharp, automating irrigation, and making strategic decisions about mulch and soil.
- Work With Nature’s Calendar: Use the seasons to your advantage. A smart fall cleanup and soil amendment routine allows winter to do the heavy work, saving you hours of labor in the spring.
When to Amend Your Soil Before Planting: Fall vs Spring?
Healthy soil is the foundation of a low-maintenance garden. Plants grown in rich, well-structured soil are more vigorous, more disease-resistant, and require less water and fertilizer. Amending your soil with compost and other organic matter is the best way to build this foundation. The question for the time-crunched homeowner is *when* to do it. The answer is clear: amending soil in the fall is a vastly more efficient use of your time than doing it in the busy spring.
Spring soil is often cold and wet. Digging in it can be a muddy, back-breaking chore that can actually damage the soil structure by causing compaction. You’re also fighting against the clock, trying to get amendments incorporated in time for planting. Fall, on the other hand, offers a perfect window of opportunity. The soil is still warm and workable, and you’re not under pressure. The most efficient method, known as “lasagna gardening” or sheet mulching, requires almost no digging at all. You simply layer your amendments (compost, shredded leaves, etc.) on top of the soil and let nature do the work.
Over the winter, the freezing and thawing cycles, along with the work of earthworms and microorganisms, will integrate these amendments deep into the soil. By spring, you’ll have a rich, friable bed ready for planting with no extra effort required on your part. This analysis of groundskeeping techniques highlights the dramatic difference in effort and effectiveness.
| Factor | Fall Amendment | Spring Amendment |
|---|---|---|
| Physical Labor Required | Low (layer on top) | High (dig and mix) |
| Time Investment | 30-45 minutes | 2-3 hours |
| Weather Working Against You | Winter does the work | You fight wet spring soil |
| Plant Availability | Full growing season ahead | May delay planting |
| Effectiveness | Superior (6 months to integrate) | Good (immediate but less integrated) |
How to Check Structural Integrity of Retaining Walls After Heavy Rain?
Your one-hour weekly system isn’t just about plants; it’s about the total health of your property. Hardscaping elements like retaining walls are often overlooked until a catastrophic failure occurs. A heavy rainstorm is the single biggest stress test for a retaining wall. The saturated soil behind the wall becomes immensely heavier, and hydrostatic pressure builds up. A quick, 10-minute inspection after a major downpour is a critical preventative task that can save you from tens of thousands of dollars in repairs.
You’re not expected to be a structural engineer. Your role is to be a vigilant observer, looking for signs of *change*. A small, old crack that has been stable for years is less concerning than a new, growing crack. The purpose of the post-rain audit is to spot new symptoms of stress. The most common failure points are inadequate drainage, which leads to the buildup of hydrostatic pressure, and a weak foundation or “footing,” which can be undermined by erosion.
Your inspection should be systematic. Look for new bulging or leaning, which indicates the wall is moving under pressure. Examine the base for any signs of soil being washed away, as this can undermine the entire structure. Most importantly, check that the “weep holes”—small pipes designed to let water escape from behind the wall—are clear and functioning. A clogged weep hole is a recipe for pressure buildup. This audit protocol is an essential part of a comprehensive groundskeeping plan.
Your 5-Point Structural Integrity Audit: Retaining Wall
- Systematic Scan: Visually inspect all surfaces of the wall, including the top, face, and base. Note any areas that look different than before the storm.
- Evidence Collection: Photograph and measure any new or expanding cracks. Note any new areas of bulging or signs of soil erosion at the base of the wall.
- Baseline Comparison: Use a 4-foot level held vertically against the wall to check for any new leaning, and horizontally to check for new bulges in the face.
- Critical Failure Point Check: Ensure that all weep holes are clear and draining water away from the wall. Probe them gently with a stiff wire to clear any debris.
- Monitoring Protocol: Based on your findings, decide if professional consultation is needed. Schedule your next inspection for after the next major storm to track any documented changes.
Your journey to a low-maintenance yard begins now. Stop thinking in terms of overwhelming chores and start seeing your property as a system you can manage. Take these principles, create your own one-hour weekly protocol, and reclaim your weekends for good.