True minimalist succulent styling isn’t about the pot—it’s about controlling the plant’s form to create a living sculpture.
- Light exposure dictates compact growth and structural integrity, not just survival.
- The right soil and top dressing act as an architectural frame, preventing the root rot that compromises form.
- Pruning and harvesting are design tools for maintaining clean lines, not just plant maintenance.
Recommendation: Treat every care decision as a design choice to preserve and enhance your succulent’s natural architectural integrity.
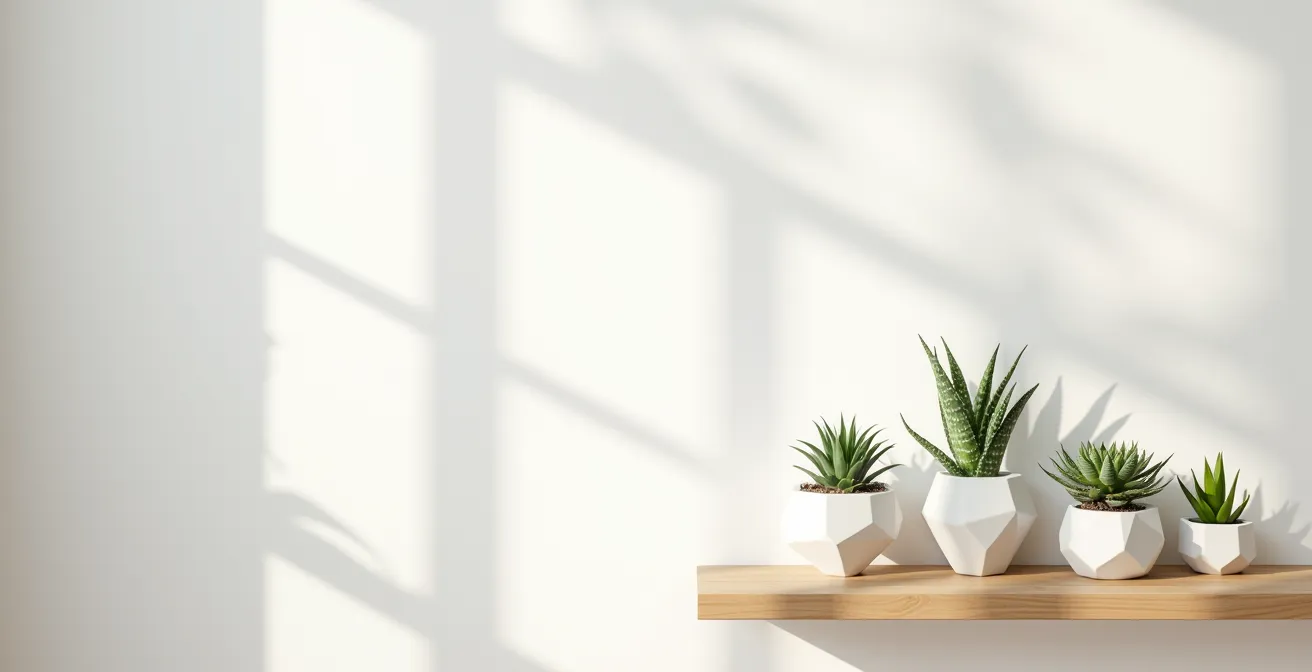
You chose succulents for their promise of clean lines and low maintenance—a perfect living accessory for a minimalist interior. Yet, instead of a tight, sculptural rosette, you have a lanky, sprawling plant that adds clutter rather than calm. The common advice—use a white pot, give it some sun—feels hollow and fails to address the core issue: the plant has lost its architectural integrity. Most guides treat succulents like simple decor, ignoring the botanical principles that define their beautiful, compact forms.
The secret to a truly chic, minimalist aesthetic lies not in the container, but in the plant itself. It’s a practice of ‘botanical sculpting,’ where every action, from watering to choosing a soil mix, is a deliberate design choice. This approach moves beyond basic care to actively preserve the strong, geometric shapes that make these plants living sculptures. It’s about understanding the ‘why’ behind the rules to prevent the very issues—stretching, rot, and misshapen growth—that undermine a minimalist look.
This guide will deconstruct the techniques of a desert landscape designer. We will explore how to manage light as a sculpting tool, select materials with ‘material honesty’ in mind, and perform ‘aesthetic pruning’ to maintain perfect form. By mastering these principles, you will learn to curate succulents that are not just surviving in your home, but are integral, structural elements of your design.
To achieve this, we’ll examine the critical mistakes and master the precise techniques that define the art of minimalist succulent styling. This structured approach will give you the tools to cultivate plants with enduring architectural beauty.
Summary: A Minimalist’s Guide to Styling Succulents with Architectural Form
- Why Your Echeveria Is Growing Tall and Leggy Instead of Compact?
- How to Drill Drainage Holes in Ceramics Without Cracking Them?
- Sand or Gravel: Which Top Dressing Prevents Stem Rot Best?
- The Glass Bowl Mistake That Steams Succulents to Death
- When to Stop Watering Succulents Completely for Winter Rest?
- Direct Sun vs Bright Indirect: Which Actually Fuels Growth?
- Cactus Mix or Regular Potting Soil: Which Prevents Root Rot Best?
- How to Harvest Aloe Vera Gel Safely Without Damaging the Mother Plant?
Why Your Echeveria Is Growing Tall and Leggy Instead of Compact?
The most common failure in minimalist succulent styling is the loss of form. That tight, sculptural Echeveria rosette you brought home begins to stretch, losing its density and revealing a pale, weak stem. This process, known as etiolation, is a plant’s desperate search for light, and it is the primary enemy of its architectural integrity. Instead of growing outward in a compact pattern, the plant diverts energy into rapid vertical growth, creating unsightly gaps between the leaves. According to succulent care experts, rosette-shaped succulents like Echeveria can show etiolated growth in just a few days of insufficient light.
This stretching is not just an aesthetic problem; it’s a sign of weakness. The elongated stem is fragile, and the pale leaves lack the vibrant ‘stress’ colors that contribute to their beauty. Reversing etiolation is impossible, but you can correct it through a process of botanical sculpting. This involves beheading the stretched plant and re-rooting the compact top rosette, effectively resetting its form. The remaining stem can also be used to propagate new, compact plants. This isn’t just a fix; it’s an opportunity to multiply your collection while restoring the clean lines essential for your design.
To perform this restorative pruning, assess where the compact growth ends and the leggy growth begins. Using a clean, sharp blade, cut the stem about an inch below the healthy rosette. After allowing the cut to callus for several days, you can replant it. This act of ‘beheading’ is a core technique for maintaining the dense, geometric form that defines a minimalist succulent aesthetic.
How to Drill Drainage Holes in Ceramics Without Cracking Them?
A minimalist pot with no drainage is a beautifully designed death trap. The principle of material honesty in design dictates that an object’s form should reflect its function. For a succulent planter, that function is to house a plant that requires sharp drainage. Without a drainage hole, water pools at the bottom, leading to root rot that will inevitably destroy the plant’s structure from the ground up. Finding the perfect ceramic vessel, only to realize it lacks a hole, is a common frustration. Fortunately, creating one is a straightforward process if you use the right tools and technique.
The key to drilling through ceramic, concrete, or porcelain without causing cracks is to use the correct drill bit and manage heat and vibration. A diamond-tipped drill bit is essential for glazed ceramics and porcelain, as it grinds rather than chips the material. For unglazed terracotta or concrete, a less expensive masonry bit is sufficient. The technique requires patience and a gentle touch. Start the drill at a 45-degree angle to create a small notch, which prevents the bit from wandering. Once the notch is established, slowly bring the drill to a 90-degree angle and apply light, steady pressure.
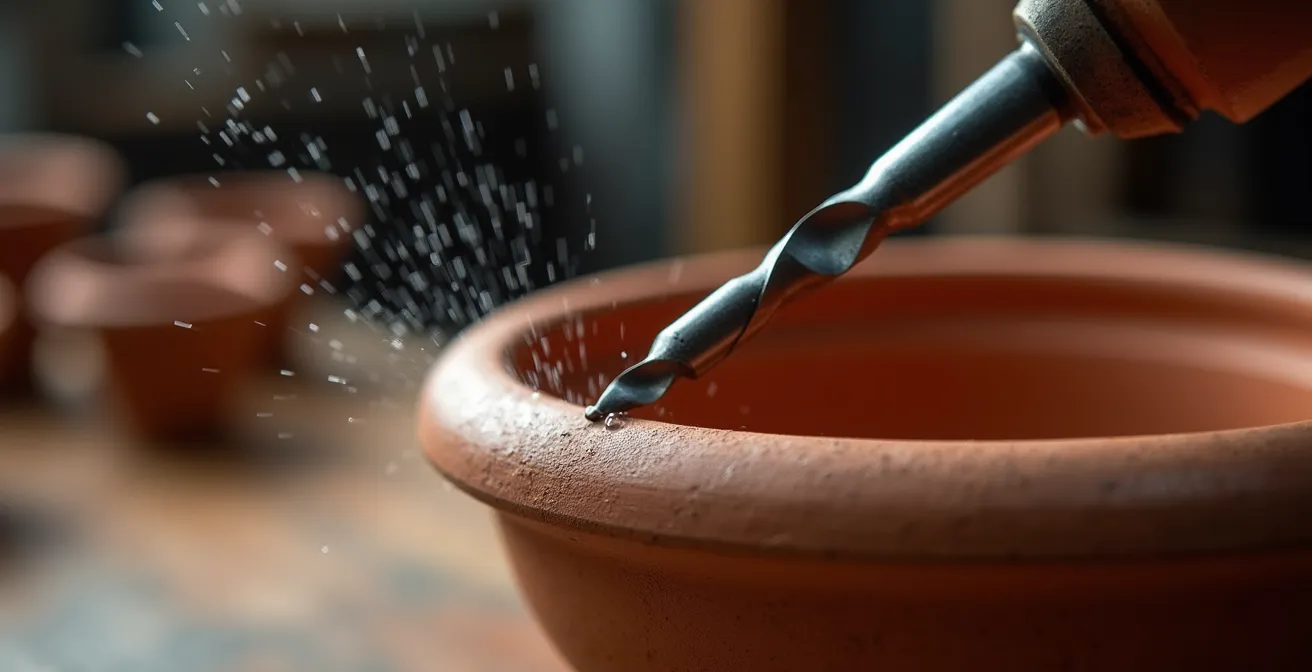
Cooling is non-negotiable. Heat is the primary cause of cracking. Continuously spray the area with water or create a small puddle over the drilling spot to dissipate heat. A slow drill speed provides maximum control and minimizes the risk of fracturing the pot. Mastering this skill liberates you from the limited selection of pre-drilled planters, allowing you to convert any ceramic object into a functional, minimalist home for your succulents.
The following table provides a clear guide for adapting your technique based on the planter’s material, ensuring a perfect hole every time.
| Material | Drill Bit Type | Speed | Cooling Method | Minimalist Style Match |
|---|---|---|---|---|
| Unglazed Terracotta | Masonry bit | Medium | Water spray | Warm Minimalism |
| Glazed Ceramic | Diamond-tipped | Slow | Continuous water | Scandinavian |
| Concrete | Masonry bit | High | Periodic cooling | Industrial |
| Porcelain | Diamond-tipped | Very slow | Water puddle | Japandi |
Sand or Gravel: Which Top Dressing Prevents Stem Rot Best?
Top dressing—the layer of material covering the soil—is more than a decorative afterthought. In minimalist design, it’s a crucial element that provides textural contrast, completes the color palette, and serves a vital horticultural function: protecting the plant’s stem from rot. When organic soil is in direct contact with the base of a succulent, it can retain moisture and promote fungal diseases that lead to stem collapse, destroying the plant’s upright, architectural form. The right top dressing creates a dry barrier, wicking moisture away from the delicate stem.
While fine sand can create a clean, zen-garden look, it is often a poor choice. Sand can be too dense, trapping moisture underneath and preventing the soil from drying out. It can also work its way down into the soil mix, reducing aeration. Coarser materials like gravel, pebbles, or crushed granite are functionally superior. They create larger air gaps, allowing for excellent air circulation around the plant’s base and promoting faster drying of the soil surface. This is critical for preventing rot. In a study of minimalist succulent arrangements, landscape design experts found that using pebbles and rocks not only enhances the desert aesthetic but also significantly reduces the risk of root rot by preventing plants from sitting in water.

The choice of material should also inform your design. Black lava rock provides a dramatic contrast against green succulents for an industrial or modern look. White quartz pebbles create a bright, serene feeling suitable for Scandinavian or coastal styles. Natural river stones or crushed granite offer an earthy, organic texture perfect for a Japandi aesthetic. The top dressing is the finishing touch that frames your living sculpture, unifying the plant, pot, and surrounding negative space into a cohesive composition.
The Glass Bowl Mistake That Steams Succulents to Death
The allure of a glass terrarium is undeniable—a miniature, self-contained world. However, for succulents, an enclosed glass bowl is a death sentence. This common styling mistake creates a high-humidity environment that is the antithesis of the arid conditions these plants need to thrive. Without air circulation, moisture from the soil and plant transpiration becomes trapped. When placed in bright light, this turns the bowl into a greenhouse, effectively steaming the succulent’s roots and leading to swift, irreversible rot. This is a fundamental misunderstanding of the plant’s nature, prioritizing a fleeting trend over the plant’s structural health.
The sleek look of glass can still be achieved without compromising the plant’s well-being. The solution lies in choosing the right kind of vessel. As houseplant expert Nicole Young of Greenspace Plants advises:
Use wide, shallow glass dishes or trays instead of enclosed bowls. This maintains the sleek look of glass while allowing for proper airflow and top-down watering.
– Nicole Young, Houseplant expert from Greenspace Plants
This approach allows you to create a “glasscape” that is both beautiful and horticulturally sound. The wide opening ensures proper air circulation, preventing the buildup of humidity. It also allows the soil to dry out between waterings, a critical requirement for succulent health. By layering materials like charcoal, gravel, and a minimal amount of soil, you can create a visually stunning composition that is visible through the glass, celebrating the very elements that keep the plant healthy. This is a perfect example of material honesty, where the container’s transparency reveals the functional beauty of the system.
Action Plan: Creating an Open Glasscape Alternative
- Choose a shallow glass dish: Select a vessel no more than 3 inches deep with a wide opening to maximize airflow.
- Add a filtration layer: Place a 1-inch layer of activated charcoal at the bottom to absorb impurities and odors.
- Create a drainage layer: Layer decorative gravel or sand. This creates a reservoir for excess water to drain away from the roots, and its texture is visible through the glass.
- Use minimal soil: Add just enough well-draining succulent soil mix to anchor the plants.
- Position with space: Arrange plants with ample space between them to ensure air can circulate freely around each one, leveraging negative space in your design.
- Provide proper light: Place the glasscape in bright, indirect light to prevent the intense sun from creating a deadly greenhouse effect.
When to Stop Watering Succulents Completely for Winter Rest?
For many succulents, winter is a period of dormancy—a natural resting phase where growth slows or stops entirely. For the minimalist designer, this is not a time of decline but a moment of peak architectural beauty. During rest, many succulents tighten their forms, their colors intensify through controlled stress, and they take on a dense, jewel-like quality. However, continuing a summer watering schedule during this period is a fatal error. With growth stalled, the plant’s water needs plummet, and moist soil will quickly lead to root rot.
The key is to drastically reduce watering to signal the plant that it’s time to rest. According to care specialists, you should water sparingly between September and March when most common succulents are dormant. For many species in a typical indoor environment, this means watering deeply but very infrequently—perhaps only once a month or even less. The goal is to provide just enough moisture to keep the leaves from shriveling, not to encourage growth. Allow the soil to become bone dry and stay that way for an extended period before watering again. Some hardcore collectors in cooler climates stop watering almost completely from late fall to early spring.
This period of rest is essential for the plant’s long-term health and for maintaining its compact form. It prevents the soft, weak growth that can occur when a dormant plant is overwatered in low winter light. Embracing this dormant phase allows the plant to conserve energy, preparing it for vigorous, healthy growth in the spring. It is the ultimate expression of low-maintenance care, aligning the owner’s actions with the plant’s natural, beautiful rhythm.
Direct Sun vs Bright Indirect: Which Actually Fuels Growth?
Light is the most powerful tool for botanical sculpting. It dictates not only a succulent’s survival but also its color, shape, and density. The common advice to “provide bright light” is too simplistic and fails to capture the nuance required for high-impact minimalist styling. The choice between direct sun and bright indirect light is a strategic one, made to achieve a specific aesthetic outcome. Bright indirect light—like that from an east-facing window or a few feet from a south-facing one—is the baseline for maintaining health and preventing the etiolation that destroys a plant’s compact form.
However, direct sunlight is the key to unlocking the most dramatic design feature of many succulents: stress coloration. When exposed to high levels of light (and other stressors like cold or drought), succulents like Echeveria, Sedum, and Crassula produce anthocyanin pigments. This is a protective response that results in vibrant red, purple, and orange hues. This ‘controlled stress’ is a deliberate technique to transform a green plant into a dynamic design element. However, as a guide on Echeveria care warns, abruptly moving a plant into full sun can cause permanent sunburn. The transition must be gradual, increasing exposure over a week or more to allow the plant to acclimate.
The ideal lighting strategy involves zoning your plants based on their needs and your desired aesthetic. Haworthia and Gasteria, with their deep greens and architectural patterns, thrive in bright indirect light and will scorch in direct sun. Echeveria and Sedum need some direct sun to maintain their compact rosettes and develop rich colors. Understanding your home’s microclimates is key to becoming a successful botanical sculptor.
This zoning table helps translate window direction into actionable styling choices for a minimalist home.
| Window Direction | Light Quality | Best Succulents | Visual Effect |
|---|---|---|---|
| South/West | Bright, direct | Echeveria, Sedum | Vibrant stress colors (reds, purples) |
| East | Gentle morning sun | Haworthia, Gasteria | Deep greens, subtle tones |
| North | Bright indirect | Sansevieria, ZZ plant | Architectural greens |
Cactus Mix or Regular Potting Soil: Which Prevents Root Rot Best?
The foundation of any strong structure is critical, and for a succulent, the soil is its foundation. Using standard potting soil is one of the fastest ways to undermine a succulent’s architectural integrity. Regular potting mix is designed to retain moisture for leafy tropicals, a death sentence for desert dwellers. It stays wet for too long, compacts easily, and suffocates the roots, inevitably leading to the root rot that collapses the plant from below. While a pre-bagged cactus and succulent mix is a significant improvement, the true designer customizes their medium for perfect performance.
A superior mix has one primary goal: to drain with extreme speed. The ideal minimalist’s recipe is simple and focuses on creating air pockets within the medium. This ensures that roots are never sitting in water and have access to the oxygen they need. A good starting point is a blend of cactus soil, which provides some nutrients, and an inorganic amendment like pumice or perlite. Pumice is a volcanic rock that is slightly heavier and more porous, holding its place in the mix, while perlite is lighter and can sometimes float to the top. Both serve to create a light, airy structure.
As the experts at DigsDigs note, creating the right foundation is the most important part of the setup. Their advice is both practical and effective:
Fast-draining mix is the whole game. If the mix compacts, I add chunky orchid bark. It’s a 3-minute setup that prevents soggy roots.
– DigsDigs Garden Expert, How To Display Succulents Guide
This addition of chunky material like orchid bark or horticultural charcoal is an advanced technique to further increase aeration for particularly rot-prone species or for use in deeper containers. Crafting your own soil mix is the ultimate expression of control over your plant’s environment and a key step in becoming a master of botanical sculpting.
Key takeaways
- Prioritize Architectural Integrity: Your goal is to preserve the plant’s natural, compact form. Every care decision should support this.
- Use Controlled Stress as a Tool: High light and reduced water are not neglect; they are techniques to enhance color and density, turning your plant into a dynamic sculpture.
- Practice Material Honesty: Choose pots, soil, and top dressings that are functionally appropriate for a desert plant. Beauty follows function.
How to Harvest Aloe Vera Gel Safely Without Damaging the Mother Plant?
For functional plants like Aloe vera, harvesting is inevitable. But for a designer, this process must be treated as aesthetic pruning, not just utilitarian cutting. Haphazardly removing leaves from the center or taking too many at once can destroy the plant’s elegant, upward-reaching form, leaving it looking hacked and unbalanced. A properly harvested Aloe should look almost untouched, its core architectural shape preserved. This maintains its value as a minimalist design element while still providing its beneficial gel.
The correct technique focuses exclusively on the outer, most mature leaves. These are the oldest leaves and contain the most potent gel. More importantly, removing them maintains the plant’s central rosette and symmetrical shape. Professional growers recommend this method to preserve the plant’s visual appeal, preventing it from becoming a sprawling, disorganized clump. Select only thick, healthy leaves that are at least 4-5 inches long from the base of the plant. Use a clean, sharp knife and cut the leaf at a 45-degree angle as close to the main stem as possible. This clean cut will callus over quickly, protecting the mother plant from infection.
A crucial rule is to never remove more than one-third of the plant at any given time. Over-harvesting shocks the plant and forces it into a state of recovery, often leading to stunted or misshapen growth. By selectively and thoughtfully removing outer leaves, you are actively shaping the plant, encouraging new growth from the center and maintaining the clean, vertical lines that make Aloe such a striking living sculpture. This is the essence of combining function with high design.
Begin curating your space not just with objects, but with these living, architectural forms. Start today by assessing your collection and making one small, deliberate change—be it adjusting light, repotting with a better mix, or performing a single, precise cut—to enhance a plant’s natural beauty.
Frequently Asked Questions on Minimalist Succulent Styling
How do Sempervivum look during winter dormancy?
Sempervivum (Hens and Chicks) are excellent for minimalist winter styling. During dormancy, they tighten up their rosettes, becoming more dense and jewel-like. Their colors often deepen, enhancing their aesthetic appeal without any active care.
Should I move dormant succulents out of display areas?
This is a design choice. For a truly curated look, consider rotating dormant succulents to a cooler, less prominent spot (like a bright, unheated room). You can replace them with non-plant minimalist decorative objects, like ceramic sculptures or stones, to maintain the aesthetic balance of your space during the winter months.
When exactly should I stop watering for winter?
The process should be gradual. Begin reducing the frequency of your watering in early autumn (September in the Northern Hemisphere). Through the winter months until early spring (March), water only when the soil is completely dry and the leaves show the slightest sign of softening. This allows the plant to maintain its compact, architectural form.