In summary:
- Stagnant growth is rarely due to one single cause, but a chain reaction of hidden imbalances.
- Look for specific visual clues: yellowing patterns on leaves can pinpoint exact nutrient deficiencies.
- The soil’s pH is often the real culprit, “locking out” nutrients even if they are present.
- Strategic pruning and managing the plant’s “energy budget” can hormonally trigger new growth.
- Investigate the root system; a pot-bound plant can be starving for water even if you water it regularly.
You’ve been watching it for months. Your houseplant isn’t dead, but it certainly isn’t alive with the vibrant growth you expected. It’s just… there. Stagnant. You’ve followed the standard advice: you’ve adjusted its watering schedule, moved it to a spot with different light, and maybe even whispered a few words of encouragement. Yet, nothing changes. This state of suspended animation is one of the most frustrating experiences for any plant owner, leaving you feeling helpless and confused.
The common solutions often fail because they treat the symptom, not the disease. The real problem is that plant vitality is a complex system of interconnected factors. A single imbalance, like incorrect soil pH, can trigger a cascade of issues that masquerade as something else entirely, like a nutrient deficiency. The key isn’t just to act, but to investigate. It’s time to stop guessing and start diagnosing.
This guide abandons generic advice and instead equips you with the mindset of a botanical detective. We’re going to delve into the subtle clues your plant is giving you, from the specific pattern of yellowing on its leaves to the unseen drama unfolding in its root ball. You’ll learn to interpret these signs to uncover the true, underlying reason for its stagnation. By understanding the science behind your plant’s “energy budget” and hormonal triggers, you can make precise interventions that finally break the stalemate and unlock explosive new growth.
text
To help you navigate this botanical investigation, this article is structured to tackle each potential culprit systematically. Explore the topics below to pinpoint the exact issue affecting your plant.
Summary: A Detective’s Guide to Stagnant Plant Growth
- Why Do Veins Stay Green While Leaves Turn Yellow?
- How to Know if Root Binding Is Stunting Your Plant’s Vitality?
- Direct Sun vs Bright Indirect: Which Actually Fuels Growth?
- The Flowering Mistake That Drains Energy From Foliage Growth
- When to Prune a Stagnant Plant to Trigger New Growth Hormones?
- The Hygiene Mistake That Invites Spider Mites Into Your Home
- Why a pH of 6.0 Is Ten Times More Acidic Than 7.0?
- How to Balance Macronutrients for Explosive Spring Growth?
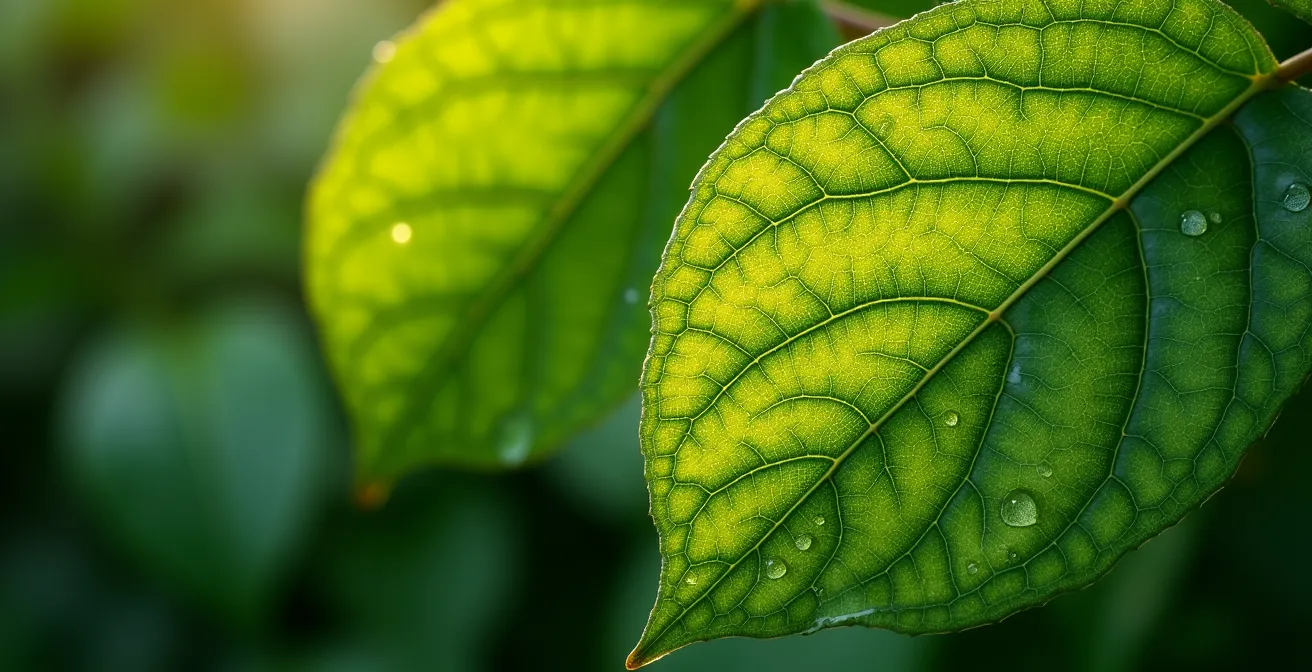
Why Do Veins Stay Green While Leaves Turn Yellow?
When you notice a leaf turning yellow, your first instinct might be to suspect a watering issue. However, a true botanical detective looks closer at the pattern. If the veins elevationMap the leaf remain a stark, dark green while the tissue between them turns pale yellow or chartreuse, you are witnessing a classic clue: interveinal chlorosis. This specific pattern isn’t random; it’s a clear signal of a magnesium deficiency. Magnesium is a central component of the chlorophyll molecule, the very engine of photosynthesis. Without it, the plant can’t produce the green pigment, and the leaf tissue fades.
This deficiency becomes critical when the mineral is scarce. In fact, research shows that magnesium concentrations below 0.1% of leaf dry weight are a direct threshold for the onset of chlorosis. Because magnesium is a mobile nutrient, the plant will intelligently pull it from older, lower leaves to supply new growth. This is why you’ll almost always see these symptoms appear on the oldest leaves first—another crucial piece of evidence for your diagnosis.
Ignoring this clue allows the deficiency to advance, leading to reddish-brown spots and eventual leaf death. Correcting it, however, can be straightforward once identified. A foliar spray of Epsom salts (magnesium sulfate) can provide a rapid dose directly to the leaves, bypassing any potential uptake issues in the soil. This is a targeted solution to a precisely diagnosed problem, far more effective than a generic, all-purpose fertilizer that might not even contain sufficient magnesium.
This diagnostic approach turns a vague problem into a solvable case, demonstrating how specific patterns lead to specific solutions.
How to Know if Root Binding Is Stunting Your Plant’s Vitality?
Your plant’s stagnation might not be a problem with what you’re adding (water, fertilizer), but with the physical container it’s in. When a plant becomes root-bound, its root system has completely filled the pot, forming a dense, tangled mass. The most telling surface-level clues are roots peeking out of the drainage holes or pushing the plant upwards out of the pot. But the real damage is happening invisibly, within the soil itself.
A severely root-bound plant creates a condition known as hydrophobic soil. The dense mat of roots becomes so compact that it actively repels water. When you water the plant, the liquid channels down the small gap between the root ball and the side of the pot, draining straight out the bottom without ever hydrating the core. You might be watering regularly, but the plant is in a state of chronic dehydration. This is the “Case of the Hydrophobic Pot”: the plant owner believes they are providing care, but the plant is physically unable to receive it.
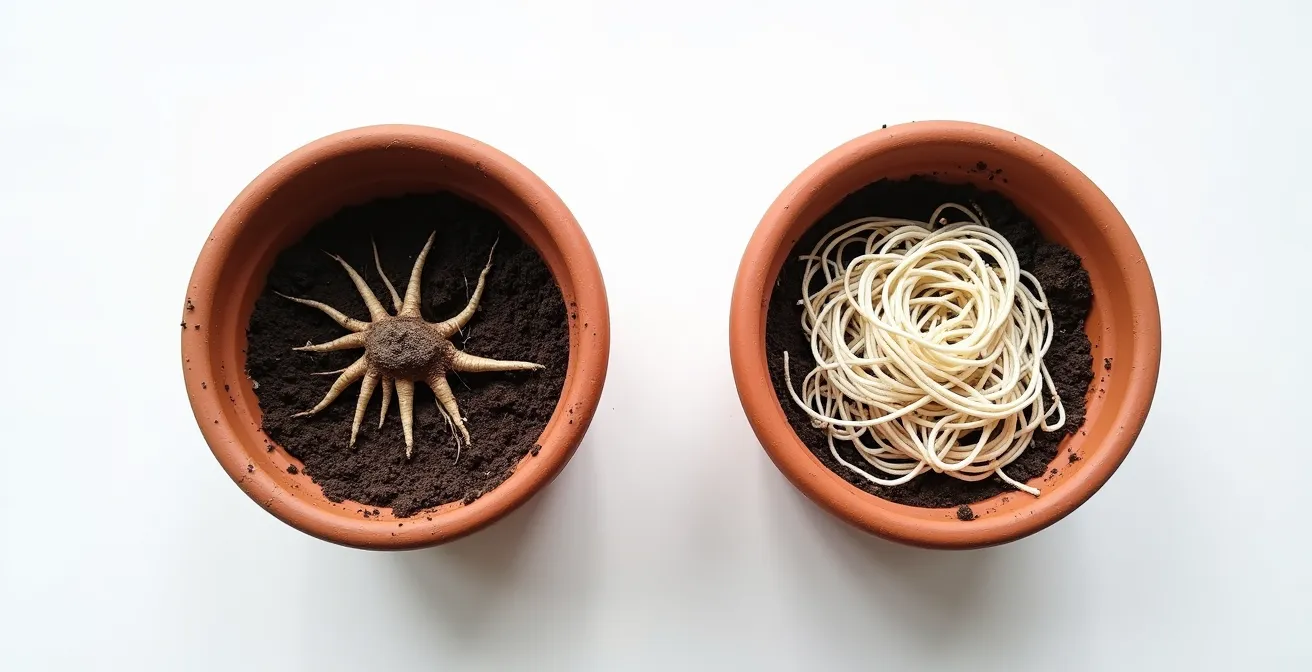
The illustration above clearly shows the difference. On the left, healthy roots have room to spread and access moisture throughout the soil. On the right, the tangled, circling roots of a root-bound plant form an impenetrable barrier. To confirm your suspicion, gently slide the plant out of its pot. If you see more roots than soil, and they are circling the shape of the container, you have your culprit. The only solution is to repot into a container that is 1-2 inches wider, gently teasing the roots apart to break the pattern and encourage them to grow outwards into the new soil.
This physical limitation is a hard stop on growth, and no amount of fertilizer or light can fix it until the roots have room to expand.
Direct Sun vs Bright Indirect: Which Actually Fuels Growth?
One of the most common platitudes in plant care is “give it more light.” But for many houseplants, this advice is not only wrong, it’s harmful. The critical distinction a botanical detective must make is between direct sun and bright, indirect light. The right type of light is determined by a plant’s evolutionary origin. Placing a forest-floor dweller in the path of a desert sun is a recipe for scorched leaves and stunted growth, as the plant shuts down to protect itself from excessive radiation.
The key to cracking this case is to think about your plant’s natural habitat. A plant that evolved under a dense jungle canopy is adapted to receive dappled, filtered light, not the harsh, direct rays of the sun. Conversely, a succulent from an arid desert expects and requires hours of intense, unfiltered sunlight to photosynthesize effectively. Arbitrarily moving a plant to a “brighter” spot without considering this is a gamble. The following table breaks down these requirements, providing a clear diagnostic framework.
| Plant Category | Natural Habitat | Light Needs | Example Plants |
|---|---|---|---|
| Forest Floor Plants | Under dense canopy | Low to medium indirect | Calathea, Ferns |
| Jungle Canopy Dwellers | Filtered tree light | Bright indirect | Fiddle Leaf Fig, Monstera |
| Desert Natives | Open sun exposure | Direct sun 6+ hours | Cacti, Succulents |
As the table illustrates, a Monstera thrives in bright, indirect light, mimicking its life climbing trees in a jungle. For desert natives like cacti, however, the need is absolute. As the experts at Aerify Plants note, they require “at least 6 hours of direct sunlight per day” to truly prosper. Mismatching a plant with its required light environment is a primary cause of stagnation. The plant isn’t getting the right fuel for its photosynthetic engine, forcing it into a state of arrested development to conserve energy.
Instead of just seeking “more” light, diagnose the “right” light, and you’ll provide the fundamental energy source your plant has been waiting for.
The Flowering Mistake That Drains Energy From Foliage Growth
Sometimes, the cause of stagnation is not a deficiency, but a success. When a plant flowers, it may seem like a sign of peak health. However, for many plants, especially young ones or those prized for their foliage, flowering is an immense drain on the plant’s energy budget. The metabolic shift required to produce flowers, and potentially seeds, is one of the most energy-intensive processes a plant undertakes. This energy is redirected from other areas, primarily from vegetative growth—the production of new leaves and stems.
A stark example of this biological trade-off is seen in citrus trees. During their peak blooming period, it’s been observed that up to 60% of the plant’s energy reserves are rerouted from leaf and shoot development to support the flowers and subsequent fruit. This often results in a temporary halt in foliage growth and even some leaf yellowing. While this is normal for a fruiting tree, for a houseplant grown for its lush leaves, like a Coleus or a young Fiddle Leaf Fig, allowing it to flower can be a critical mistake that grinds its growth to a halt.
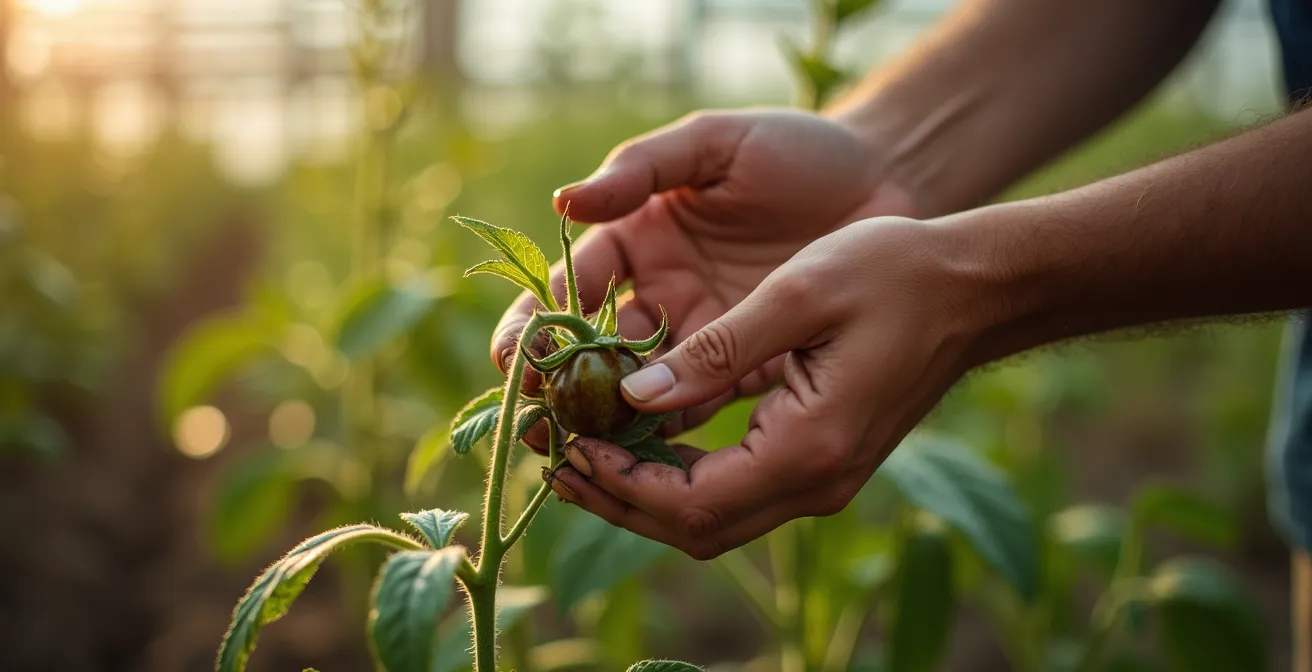
The solution is a technique called disbudding. As shown in the image, this involves carefully pinching off or snipping away flower buds as soon as they appear. While it may feel counterintuitive to remove what looks like a sign of health, this single action tells the plant to redirect its precious energy budget back into producing the foliage you desire. For a stagnant plant, this can be the very trigger it needs to break out of its plateau and invest in new, vibrant leaf growth.
This is a proactive, detective-like intervention, prioritizing long-term vitality and foliage over a fleeting floral display.
When to Prune a Stagnant Plant to Trigger New Growth Hormones?
If your plant is leggy, sparse, and has ceased all new growth, the answer may lie in a strategic cut. Pruning is not just about shaping a plant; it’s a powerful tool to manipulate its hormones and break a state of dormancy. The key concept to understand is apical dominance, a phenomenon where the main, central stem of a plant grows more strongly than its other side stems. This is controlled by hormones, called auxins, produced at the tip (apex) of the main stem, which suppress the growth of buds lower down the plant.
When you prune a plant and remove that dominant tip, you break the hormonal signal. This awakens the dormant buds located at the nodes (the small bumps on the stem where leaves emerge) just below the cut. These nodes are then free to develop, leading to a fuller, bushier plant. This hormonal reset is incredibly effective; studies on plant stem cells show that 2-3 lateral shoots emerge within 14 days of removing the apical bud. This is how you turn one lanky stem into multiple points of new growth.
However, timing and technique are everything. Pruning a plant when it’s fully dormant in winter can be ineffective or even stressful. The ideal time is at the very beginning of its active growing season (spring for most houseplants), just as you see the first tiny signs of life. This ensures the plant has the energy reserves to respond to the pruning and push out new growth. Making a clean, angled cut just above a node maximizes the chances of success.
Your Action Plan: Strategic Pruning to Stimulate Growth
- Identify the Season: Confirm the plant’s active growing season, which is typically spring and summer for most indoor varieties.
- Wait for the Signal: Look for the very first signs of new life, such as tiny leaf buds or the swelling of shoot tips, before making any cuts.
- Locate the Nodes: Identify the nodes on the stems—these are the small, slightly raised bumps from which leaves and new shoots will grow.
- Make the Cut: Using sterilized scissors or pruning shears, cut the stem about 1/4 inch above a chosen node, angling the cut at 45 degrees.
- Don’t Overdo It: As a rule of thumb, never remove more than one-third of the plant’s total mass in a single pruning session to avoid causing excessive stress.
This is one of the most proactive steps a botanical detective can take to jolt a stagnant plant back into a state of active vitality.
The Hygiene Mistake That Invites Spider Mites Into Your Home
Sometimes, the reason for a plant’s decline isn’t a cultural issue, but an invasion. Pests like spider mites are masters of stealth. They are incredibly tiny and can establish a significant colony before you notice the first tell-tale signs of fine webbing or stippled, discolored leaves. By the time the damage is obvious, the plant is already under significant stress, diverting all its energy to survival rather than growth. The most common vector for these invasions? A lack of biosecurity hygiene.
p>
The single biggest mistake plant owners make is failing to quarantine new additions to their collection. Nurseries and grocery stores, with their high-density plant populations, are common breeding grounds for pests. Bringing a new plant directly into your home and placing it among your existing collection is like introducing a new, unscreened student into a healthy classroom. An invisible infestation can spread rapidly. This is a point strongly emphasized by experts in the field.
In a discussion on pest control, entomologist Summer Rayne Oakes highlights this exact issue:
Summer emphasizes that most spider mite infestations enter homes on new plants from stores, making a 2-week quarantine period essential.
– Summer Rayne Oakes, on Bloom & Grow Radio Podcast
This simple act of isolation is your number one defense. Placing a new plant in a separate room for two weeks gives you time to inspect it closely for any signs of pests before they have a chance to spread. Regular leaf cleaning with a damp cloth also plays a crucial role, as it removes dust that mites thrive in and can wipe away eggs before they hatch. This proactive hygiene is the foundation of Integrated Pest Management and is far more effective than reacting to a full-blown infestation.
For a botanical detective, preventing a crime is always better than solving one. By securing your home’s “border,” you protect your entire collection and ensure他们的energy is focused on growth, not survival.
Why a pH of 6.0 Is Ten Times More Acidic Than 7.0?
You can provide the perfect amount of light, water, and even high-quality fertilizer, but if your soil’s pH is wrong, your plant will starve. This is the concept of nutrient lockout, and it is one of the most misunderstood causes of plant stagnation. The pH scale, which measures acidity and alkalinity, is logarithmic. This means a pH of 6.0 is ten times more acidic than a neutral pH of 7.0, and a pH of 5.0 is one hundred times more acidic. This small numerical difference represents a huge chemical change in the soil environment.
Each nutrient your plant needs—nitrogen, phosphorus, magnesium, etc.—is only available for the roots to absorb within a specific pH range. Outside of that window, the nutrients become chemically bound to soil particles, making them unavailable to the plant, even if they are physically present. Your plant is sitting at a locked dinner table, unable to eat the food right in front of it. For most houseplants, this optimal window is slightly acidic. In fact, soil chemistry research indicates that a pH of 6.0-6.8 allows for up to 80% of essential nutrients to be available for uptake.
The table below, based on data from university agricultural extensions, vividly illustrates how dramatically nutrient availability changes with pH. Notice how availability for crucial macronutrients like Phosphorus and Magnesium plummets in overly acidic or alkaline soil.
| pH Level | Nitrogen | Phosphorus | Potassium | Magnesium | Iron |
|---|---|---|---|---|---|
| 5.5 | Medium | Low | Medium | Low | High |
| 6.5 | High | High | High | High | Medium |
| 7.5 | Medium | Low | Medium | Medium | Very Low |
A plant in soil with a pH of 7.5 might show signs of magnesium deficiency (like the yellowing leaves in our first case) not because there’s no magnesium, but because the alkalinity has locked it away. A botanical detective armed with a simple soil pH test kit can uncover this root cause, saving them from adding more and more fertilizer to no effect. Correcting the pH, often by using soil acidifiers or lime, is the key that unlocks the pantry.
It moves the investigation from “what to add” to “how to make what’s there available.”
Key Takeaways
- Stagnant growth is a symptom, not the disease. Your role is to investigate the underlying cause.
- The three pillars of vitality are physical environment (roots, light), chemical balance (pH, nutrients), and biological energy (hormones, pests).
- Always start with the simplest, non-invasive checks before taking drastic measures like heavy fertilization or repotting.
How to Balance Macronutrients for Explosive Spring Growth?
Once you’ve ruled out physical, environmental, and pH issues, it’s time to investigate the final piece of the puzzle: nutrition. After a long period of stagnation, or during the active growing season of spring, a plant’s demand for macronutrients—Nitrogen (N), Phosphorus (P), and Potassium (K)—increases dramatically. However, the instinct to apply a full-strength dose of fertilizer to a struggling plant is often the final blow. A stagnant plant has a slow metabolism, and a sudden flood of mineral salts can burn its delicate roots, causing more harm than good.
The detective’s approach is one of caution and precision. It’s guided by a crucial principle articulated by a horticulture expert:
When it comes to feeding plants, too little fertilizer is always better than too much. Most plants benefit from light, regular feeding during spring and summer, but very little or no fertilizer at all when the plant is dormant during the winter months.
– Gardening Know How Expert Team, My Houseplant Stopped Growing – Complete Guide
This principle is best put into practice with a method known as “feed weakly, weekly.” Instead of a monthly shock of full-strength fertilizer, you provide a highly diluted, consistent supply of nutrients with every watering during the growing season. This mimics the gentle, constant nutrient availability found in nature and allows the plant to take up what it needs without the risk of root burn. It’s a safe and highly effective way to re-awaken a plant’s metabolism and fuel the explosive growth of spring.
Start by diluting a balanced liquid fertilizer to 1/4 of the recommended strength. Use this solution in place of plain water. Watch the plant closely for a few weeks. If you see positive signs like new leaves or a deepening of color, you can gradually increase the concentration to 1/2 strength. This methodical approach ensures you are providing fuel at a rate the plant can actually use, fostering sustainable vitality rather than creating more stress.
Begin your plant’s recovery by adopting this gentle but consistent feeding regimen, and provide the steady energy it needs to finally break its stagnation.
Frequently Asked Questions on Plant Pests and Health
Can spider mites travel on cut flowers from the grocery store?
Yes, spider mites frequently hitchhike on bouquets and fresh herbs. They can establish themselves on the cut foliage and then migrate to nearby houseplants, making quarantine of all new botanical material, not just potted plants, a wise precaution.
What humidity level prevents spider mite proliferation?
Spider mites thrive in dry conditions. Maintaining a relative humidity level of 50-60% in your home creates an environment that is significantly less hospitable for them and drastically reduces their reproduction rates.
How often should I clean plant leaves to prevent infestations?
pruning
A weekly cleaning of plant leaves with a soft, damp cloth is an excellent preventative measure. This action removes dust, which can inhibit photosynthesis, and also physically wipes away any spider mite eggs or adults before they can establish a colony.