Your fertilizer isn’t the problem; it’s the invisible chemistry of your soil that’s locking it away from your plants.
- Soil pH is logarithmic, meaning a small number change creates a massive chemical shift, binding essential minerals like calcium and phosphorus into unusable forms.
- Sudden “fixes” with too much lime or sulfur can shock and kill the beneficial soil bacteria that are essential for making nutrients available to plant roots.
Recommendation: Test your soil’s pH first, amend it gradually based on its specific needs, and only then apply fertilizer to ensure your plants can actually absorb the nutrients you provide.
You’ve done everything by the book. You bought the best organic fertilizer, followed the application rates to the letter, and watered diligently. Yet, your plants are a testament to your frustration: yellowing leaves, stunted growth, and a disappointing lack of flowers or fruit. You see the symptoms of deficiency, so you add more fertilizer, but nothing changes. This baffling cycle is a common plight for even the most dedicated gardeners, leading them to believe they simply lack a “green thumb.”
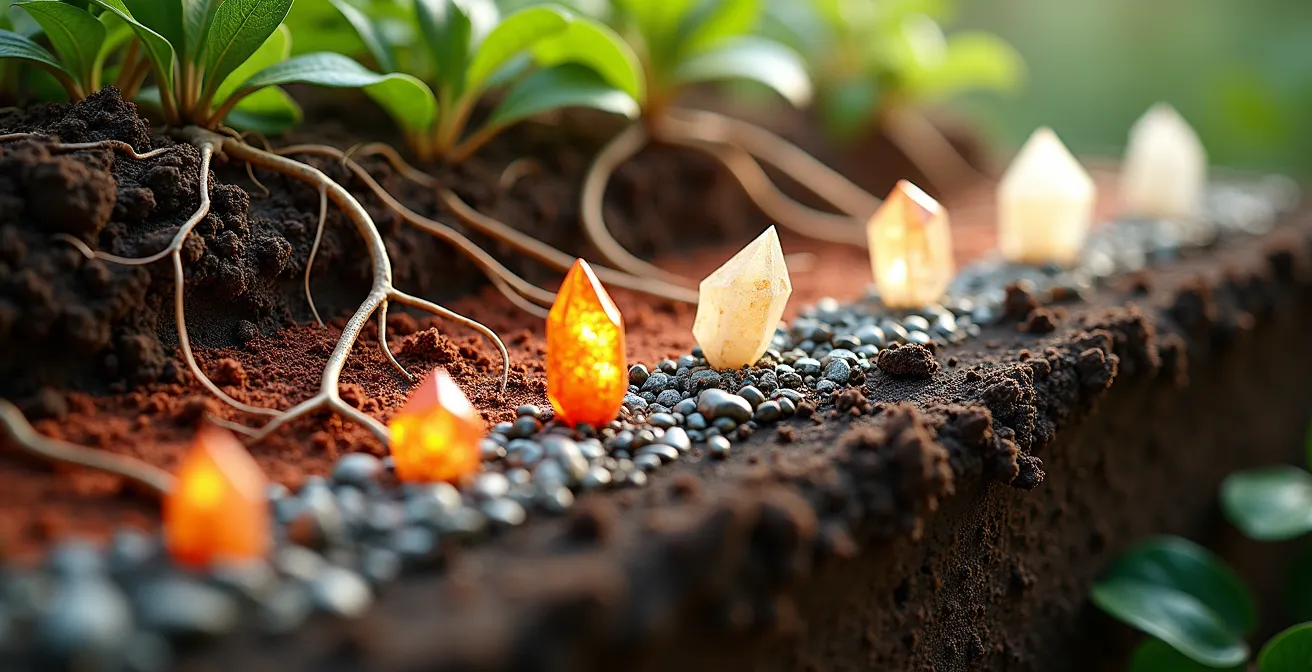
The common advice to “test your soil pH” is often where the conversation ends, but it should be where the real investigation begins. The issue is rarely a lack of nutrients in the soil; rather, it’s a chemical prison called nutrient lockout. This phenomenon occurs when the soil’s pH is too high or too low, causing chemical reactions that bind essential minerals, making them unavailable for plant uptake. No matter how much fertilizer you apply, your plants are effectively starving in a sea of plenty.
This guide moves beyond surface-level tips to reveal the molecular-level interactions governed by pH. We will approach your garden not as a patch of dirt, but as a complex, living chemical system. By understanding the science, you can stop fighting your soil and start working with it. We will decode the logarithmic power of the pH scale, explore precise testing and amendment strategies, and finally, teach you how to synchronize your fertilizing efforts with your soil’s chemical reality to unlock explosive, healthy growth.
To navigate this chemical deep-dive, we’ve structured this guide to build your expertise from the ground up. The following sections will walk you through the fundamental science of pH, practical testing, corrective actions for common issues, and a holistic strategy for long-term soil health.
Table of Contents: A Chemical Breakdown of Soil pH and Nutrient Availability
- Why a pH of 6.0 Is Ten Times More Acidic Than 7.0?
- How to Test Soil pH Without an Expensive Lab Analysis?
- Sulfur or Lime: Which Amendment Fixes Your Blueberry Patch?
- The pH Adjustment Mistake That Shocks Soil Bacteria to Death
- How to Match Fertilizer Application With pH Correction Cycles?
- Why Too Much Nitrogen Sacrifices Fruit for Green Leaves?
- Does Gypsum Actually Loosen Clay Soil or Is It a Myth?
- How to Balance Macronutrients for Explosive Spring Growth?
Why a pH of 6.0 Is Ten Times More Acidic Than 7.0?
The first step in mastering soil chemistry is to understand that the pH scale is not linear; it’s logarithmic. This means for every single-point drop on the scale, the acidity increases tenfold. Therefore, a soil with a pH of 6.0 is 10 times more acidic than a neutral soil at pH 7.0. A soil at pH 5.0 is a staggering 100 times more acidic. This exponential increase in acidity has profound chemical consequences for your plants.
Acidity is a measure of hydrogen ions (H⁺) in the soil solution. As these positively charged ions proliferate in acidic soil, they aggressively displace other essential nutrient cations like calcium (Ca²⁺) and magnesium (Mg²⁺) from the surfaces of soil particles—a concept known as Cation Exchange Capacity (CEC). These displaced nutrients are then easily washed away by rain or irrigation, a process called leaching, before plant roots can absorb them. At the same time, the high concentration of hydrogen ions can directly damage root cell membranes, further impairing their ability to absorb what little nutrition remains.
Conversely, other elements like iron and manganese become hyper-available at low pH. While plants need these in trace amounts, high concentrations become toxic. For instance, at a pH of 5.0, iron and manganese are so readily absorbed that they can reach toxic levels, while the absorption of calcium and magnesium is severely inhibited. According to an analysis on nutrient availability, at this low pH, plants are highly likely to suffer calcium and magnesium deficiencies, even if these minerals are physically present in the soil. This is the chemical reality of nutrient lockout: the pH has rendered essential food unusable.
How to Test Soil pH Without an Expensive Lab Analysis?
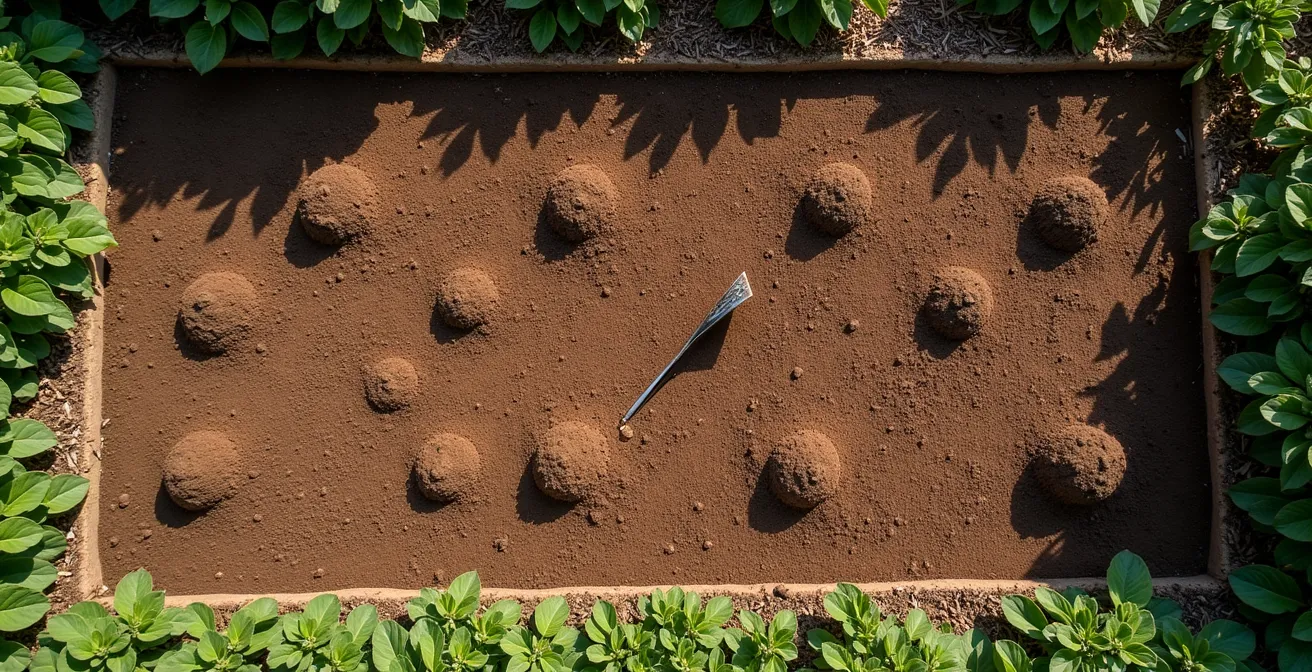
While a professional lab analysis provides the most detailed results, you can get a reliable baseline reading of your soil’s pH using simple, inexpensive DIY methods. The accuracy of any test, however, hinges on one critical factor: a representative sample. A single scoop of soil from one spot is not enough, as pH can vary significantly across even a small garden bed. To get a meaningful average, you must use a systematic sampling technique.
The most effective method is to take multiple sub-samples and combine them. An excellent way to ensure you cover the area evenly is by following a “W” pattern, as shown in the diagram below. This ensures you collect soil from different zones within your garden bed, providing a much more accurate picture of the overall soil condition.
Once you have your composite sample, you can proceed with a home test. There are several accessible options, from test strips to simple chemical reactions. The key is to follow the procedure carefully to avoid contamination and get a clear reading. Here is a step-by-step process for gathering and preparing your soil for testing:
- Create the Sampling Hole: Using a clean spade or trowel, cut a V-shaped hole into the soil to a depth of 6 to 8 inches, where most feeder roots are active.
- Take a Slice: From one side of the “V,” take a 1-inch thick slice of soil that runs the full depth of the hole. This ensures you capture the entire root zone profile.
- Repeat and Mix: Repeat this process at several random points around your garden (following a W-pattern is ideal). Mix all the slices together in a clean, dry container, breaking up any large clumps and removing rocks or roots.
- Dry the Sample: Measure out approximately one cup of your mixed soil. Spread it on a piece of cardboard or newspaper and let it air dry indoors for a day or two. A dry sample prevents water in the soil from diluting your test reagents.
- Perform the Test: Use a commercial pH test strip kit, which is a reliable and affordable option. Alternatively, the classic “vinegar and baking soda” test can give you a rough indication of whether your soil is acidic or alkaline.
Sulfur or Lime: Which Amendment Fixes Your Blueberry Patch?
The choice between adding sulfur or lime is not arbitrary; it’s a prescriptive chemical intervention based entirely on your current soil pH and your target pH. A common scenario involves acid-loving plants like blueberries, which thrive in conditions that would stunt most vegetables. While most garden plants prefer a near-neutral pH, blueberry bushes require a highly acidic environment, with an optimal range around pH 5.5 to perform well. If your soil test reveals a pH of 6.5 or 7.0, you must lower it. This is where sulfur comes in.
To lower pH, or “acidify” the soil, elemental sulfur is the safest and most common choice for home gardeners. However, it’s a biological process, not an instant chemical reaction. Soil bacteria, specifically of the genus Thiobacillus, consume the sulfur and excrete sulfuric acid as a byproduct. This process is slow and can take several weeks or even months to effect a significant pH change. Other, faster-acting amendments exist, but they come with higher risks of damaging plants or soil life if misapplied.
The following table, based on guidance from an analysis of soil amendments by the University of Florida, compares the most common options for acidification.
| Amendment | Speed of Action | Risk Level | Mechanism |
|---|---|---|---|
| Elemental Sulfur | Slow (weeks-months) | Low | Biological – Thiobacillus bacteria convert to sulfuric acid |
| Aluminum Sulfate | Fast (days) | High | Chemical – Direct acidification |
| Ammonium Sulfate | Moderate | Medium | Chemical – Acidifying fertilizer |
Conversely, if your soil is too acidic for plants like tomatoes or lavender (e.g., pH 5.0), you need to raise the pH. This is achieved with lime (calcium carbonate). Lime works by neutralizing acidity, making the soil more alkaline. Just as with sulfur, the application must be gradual and based on a soil test to avoid overshooting the target pH.
The pH Adjustment Mistake That Shocks Soil Bacteria to Death
In the rush to correct an imbalanced pH, the most common and damaging mistake is applying too much amendment at once. Whether it’s lime or sulfur, a sudden, drastic shift in pH creates an environmental catastrophe for the soil’s microscopic inhabitants. This is what can be termed microbial shock. The vast, diverse community of bacteria and fungi that drives nutrient cycling is finely tuned to its environment. A rapid change in acidity is like a chemical fire, wiping out entire populations of beneficial organisms.
These microbes are not passive bystanders; they are the engines of a healthy soil ecosystem. They decompose organic matter, fix atmospheric nitrogen, and, most importantly, convert minerals into forms that plant roots can absorb. As soil expert Steven Voser notes in his guide on cannabis cultivation:
Soil rich in beneficial bacteria and fungi is less likely to develop pH imbalances or nutrient/salt buildup.
– Steven Voser, Zamnesia Cannabis Growing Guide
When you kill them with a chemical shock, you are effectively turning living soil into a sterile, inert medium. This not only halts natural nutrient availability but also makes the soil more susceptible to future pH swings and colonization by pathogenic organisms. To prevent this, amendments must be applied gradually, over time, allowing the soil ecosystem to adapt. As a rule of thumb for raising pH, soil experts recommend applying no more than 50 lbs of lime per 1000 sq ft in a single application. If your soil test calls for a larger correction, it’s crucial to split the total amount into two or more applications spaced several months apart.
How to Match Fertilizer Application With pH Correction Cycles?
One of the most counterintuitive aspects of nutrient lockout for gardeners is realizing that fertilizing at the wrong time is not just wasteful—it can make the problem worse. When soil pH is outside the optimal range, certain nutrients will chemically bind with other elements, forming insoluble compounds. As explained in a Hanna Instruments soil guide, nutrients such as calcium and phosphorus will bind up, becoming completely unavailable to plants. Adding more phosphorus-rich fertilizer to a highly alkaline soil simply creates more insoluble calcium phosphate, further “locking” both nutrients away.
The solution is to decouple the two processes: pH amendment and fertilization. You must first correct the soil’s chemical environment and *then* introduce nutrients. This requires a patient, phased approach that gives the soil time to stabilize after an amendment is applied. The goal is to amend, wait for the chemistry and biology to adjust, test again to confirm, and only then apply your primary fertilizer. This “Amend, Wait, Feed” strategy ensures that the nutrients you add will be available for uptake.
The timeline for this process depends on the amendment used and environmental conditions, but a structured approach is essential for success. Here is a practical plan for implementing this strategy.
Your Action Plan: The ‘Amend, Wait, Feed’ Timeline
- Amend in the Off-Season: Apply pH amendments like lime or sulfur in the fall. This allows the slow biological and chemical reactions to work over the winter, aided by rain and frost cycles.
- Allow for Stabilization: Wait a minimum of 4-6 weeks after application before disturbing the soil or testing again. For slow-acting amendments like elemental sulfur, this period should be even longer (2-3 months).
- Re-test Before Planting: In the spring, before you plant or apply any primary fertilizers, take a new soil sample and test the pH again. This confirms if you have reached your target range.
- Feed Only When Ready: Apply your main N-P-K fertilizer only after the pH is confirmed to be within the optimal range for your chosen plants (typically 6.0-7.0 for most vegetables).
- Monitor and Maintain: Don’t assume the fix is permanent. Test your soil pH every 3-5 years to catch any drift and make small, maintenance-level corrections as needed.
Why Too Much Nitrogen Sacrifices Fruit for Green Leaves?
Nitrogen (N) is the macronutrient most associated with vigorous, green, leafy growth. It’s a primary component of chlorophyll, the molecule that powers photosynthesis. However, an overabundance of readily available nitrogen creates a hormonal imbalance in the plant, signaling it to invest all its energy into vegetative growth (stems and leaves) at the expense of reproductive growth (flowers and fruit). The result is a beautiful, lush, green plant that produces little to no harvest—a common frustration with plants like tomatoes and peppers.
This problem is often exacerbated by the use of synthetic nitrogen fertilizers. Many of these, particularly those based on ammonia, have an acidifying effect on the soil. As noted by the experts at Hanna Instruments, artificial nitrogen fertilizers can significantly lower soil pH over time. This can create a vicious cycle: a gardener sees poor fruiting, adds a high-nitrogen “bloom-booster” that is also acidic, which in turn lowers the pH further, locking out other essential nutrients like phosphorus and potassium that are critical for flowering and fruit development. This is a classic case of chemical antagonism, where an excess of one element interferes with the uptake of others.
The key to avoiding this trap is to supply nitrogen in balance with other macronutrients and to be mindful of its form and timing. During the early stages of growth, a higher nitrogen ratio is beneficial. But as the plant matures and enters its flowering and fruiting phase, the nitrogen supply should be reduced relative to phosphorus (P) and potassium (K). Using slow-release organic sources of nitrogen, like compost, can also provide a more stable, less aggressive supply that is less likely to cause a sudden vegetative surge or a dramatic drop in soil pH.
Does Gypsum Actually Loosen Clay Soil or Is It a Myth?
Gypsum (calcium sulfate) is one of the most misunderstood soil amendments. It is widely marketed as a universal solution for “breaking up” heavy clay soil, but this is a dangerous oversimplification. The truth is that gypsum is a highly specific tool for a very particular problem, and using it on the wrong type of clay soil is not only ineffective but a waste of time and money. Its effectiveness is not a myth, but its application is widely misconstrued.
The mechanism by which gypsum improves soil structure is a chemical process called flocculation. It works specifically on a type of clay soil known as sodic soil, which is characterized by a high concentration of sodium (Na⁺) ions. In these soils, the tiny clay particles carry negative charges and are kept dispersed by single-charge sodium ions, creating a dense, compacted structure. When gypsum is added, its calcium (Ca²⁺) ions, which have a double positive charge, displace the sodium ions. These calcium ions then act as a bridge between multiple clay particles, causing them to clump together into larger aggregates (flocculation). This creates pore space, improving drainage and aeration.
Case Study: The Specific Action of Gypsum on Sodic vs. Non-Sodic Clay
According to the Royal Horticultural Society’s analysis on soil management, gypsum’s primary role is correcting sodic clay soils. In these high-sodium environments, the calcium in gypsum effectively displaces the sodium from clay particles, allowing them to flocculate and improve soil structure. However, in most common clay soils that are not sodic but simply dense, this chemical reaction does not occur. For these non-sodic clays, the RHS confirms that amending with bulky organic matter (like compost or well-rotted manure) is a far more effective long-term strategy for improving structure, aeration, and water retention.
For non-sodic clay soils, especially those that are acidic, lime is often a more effective amendment than gypsum. As noted in soil management guides, when the pH of acid clay soil is raised to above 5.0 with lime, the change in chemistry can also help the clay particles to aggregate, improving the structure while simultaneously correcting acidity. The take-home message is clear: identify your soil’s specific problem before applying a solution. Gypsum is for high-sodium soils; organic matter and lime are the primary tools for most other clay soil issues.
Key Takeaways
- The pH scale is logarithmic: A 1-point change means a 10x change in acidity, drastically altering soil chemistry and nutrient availability.
- Gradual correction is crucial: Sudden, large applications of lime or sulfur can shock and kill the beneficial soil microbes that feed your plants.
- Test before you fertilize: Correcting the pH is the first step. Fertilizing soil with an improper pH is ineffective and can worsen nutrient lockout.
How to Balance Macronutrients for Explosive Spring Growth?
Achieving a thriving garden is the ultimate goal, and it rests on the principle of balanced nutrition. Once you have mastered your soil’s pH, you can finally ensure that the macronutrients you provide—Nitrogen (N), Phosphorus (P), and Potassium (K)—are fully available to your plants. The vast majority of these essential nutrients are most readily absorbed when the soil is in a slightly acidic to neutral state. Data from cannabis growing guides confirms that the sweet spot where macronutrients are most available is between pH 6.0 and 7.0. Maintaining your soil within this range is the single most important factor for maximizing the return on your fertilizer investment.
However, simply having nutrients available is not enough. Their balance must also shift to match the plant’s life cycle. Different growth phases have different nutritional demands. Supplying the right balance of N-P-K at the right time is the final piece of the puzzle for optimizing plant health and productivity. For example, providing high nitrogen during the flowering phase can suppress bloom production, while a lack of potassium can lead to weak stems and poor fruit quality.
The following table, adapted from an analysis of plant nutritional needs by master gardeners, provides a general roadmap for matching nutrient focus to the primary phases of plant growth.
| Growth Phase | Primary Nutrient | N-P-K Focus | pH Requirement |
|---|---|---|---|
| Root Establishment | Phosphorus | Low-High-Low | 6.0-6.5 |
| Vegetative Growth | Nitrogen | High-Low-Medium | 6.2-6.8 |
| Flowering/Fruiting | Potassium | Low-Medium-High | 6.0-6.5 |
By using this framework, you can move from being a reactive gardener who treats symptoms to a proactive soil chemist who anticipates needs. You can select fertilizers (e.g., 5-10-5 for establishment, 10-5-5 for vegetative growth) that are tailored to the current phase, confident that your well-managed pH will allow the plant to use every bit of the nutrition you provide.
By understanding that soil pH is the master variable controlling your garden’s health, you can now take deliberate, effective steps. Your first action should be to get an accurate reading of your current soil conditions. Start today by getting a reliable soil test kit and gathering a proper composite sample from your garden.