Contrary to popular belief, your Alocasia Polly losing its leaves in summer isn’t a sign of death; it’s a strategic ‘stress-induced hibernation’ triggered by specific events like flowering or pests.
- Dormancy is a protective mechanism where the plant retreats to its underground corm to conserve energy.
- Overwatering a dormant corm is the most common mistake, leading to irreversible rot.
- The key to revival lies in finding the healthy corm, providing the right incubation conditions, and preventing future stress.
Recommendation: Stop watering immediately, unearth the pot to inspect the corm for firmness, and follow the corm-sprouting protocol detailed in this guide to bring it back to life.
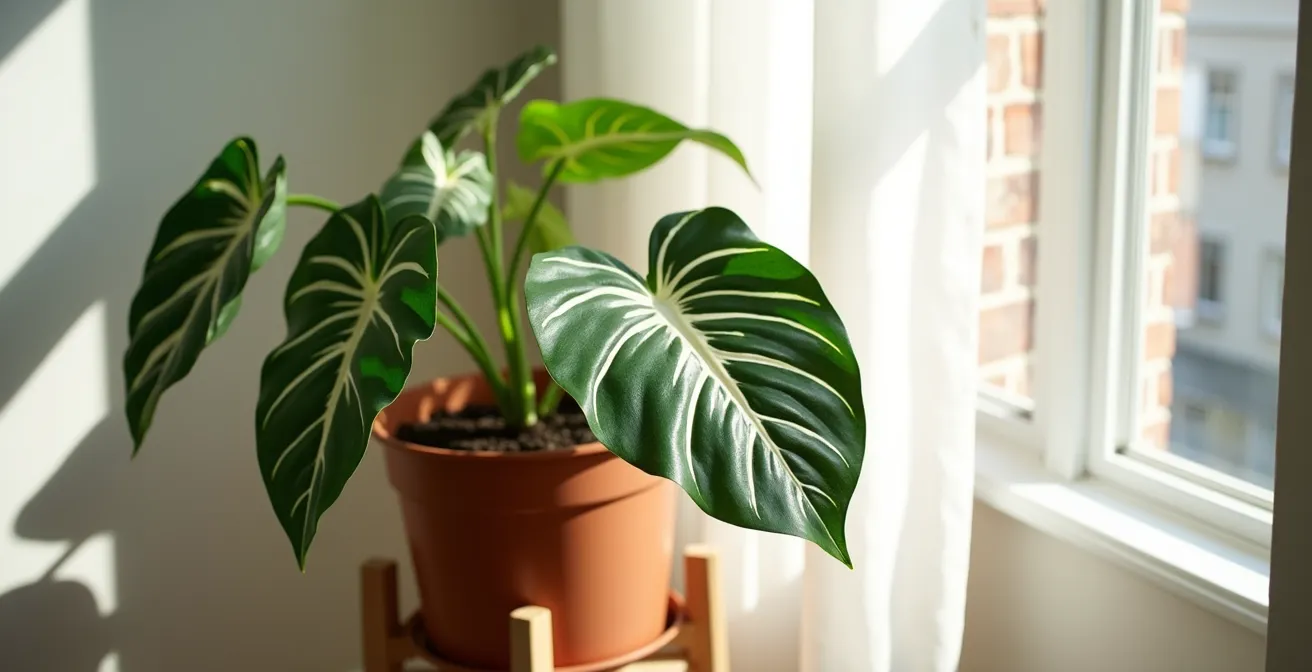
The panic is familiar to many Alocasia Polly owners. One week, you have a stunning plant with vibrant, arrowhead-shaped leaves. The next, its foliage begins to yellow and droop, collapsing one by one until nothing remains but a pot of soil. When this happens in the middle of summer, the conclusion feels obvious: the plant must be dead. This assumption leads to the most critical mistakes, often turning a temporary setback into a permanent loss. You may have heard they are simply “drama queens,” but there’s a deeper biological process at play.
The truth is, Alocasia Polly operates on a different set of rules than many common houseplants. Its life force isn’t primarily in its leaves, but in its underground corm—a small, bulb-like structure that acts as an energy reserve. What looks like death is often a protective, stress-induced hibernation. This dormancy isn’t always tied to the winter season; it’s a biological reset triggered by specific stressors such as the energy drain of flowering, an attack by pests like spider mites, or incorrect watering. Understanding this cyclical rhythm is the first step to saving your plant.
This guide moves beyond generic advice to focus on the corm-centric nature of your Alocasia. We will explore the precise triggers for this unexpected summer dormancy and provide a clear, biology-focused path to not just determine if your plant is salvageable, but to successfully guide it back to lush, leafy growth. We’ll cover everything from post-flowering care and corm propagation to creating a resilient soil ecosystem that prevents these issues from recurring.
To navigate this process effectively, this article breaks down the essential knowledge into clear, manageable sections. The following summary outlines the key topics we will cover to transform your understanding and care of this remarkable plant.
Summary: Your Guide to Alocasia Polly’s Dormancy and Revival
- Why Alocasia Polly Droops After Producing a Flower?
- How to Find and Sprout Corms From a “Dead” Alocasia Pot?
- Neem Oil or Predatory Mites: Which Controls Spider Mites Better on Alocasia?
- The Overwatering Mistake During Dormancy That Turns Corms to Mush
- How to Mix a Chunky Soil Blend That Alocasia Roots Love?
- The Hygiene Mistake That Invites Spider Mites Into Your Home
- Coco Coir vs Sphagnum Moss: Which Pole Promotes Better Aerial Root Grip?
- How to Manage Winter Dormancy for Potted Plants Without a Greenhouse?
Why Alocasia Polly Droops After Producing a Flower?
Seeing your Alocasia Polly produce a flower, known as an inflorescence, can feel like a victory. However, this event is often followed by a swift decline that leaves many growers confused. This isn’t a sign of poor care; it’s a matter of biology. Flowering is an incredibly energy-intensive process for an Alocasia. The plant diverts a massive amount of its resources from maintaining foliage to producing the bloom and potential seeds. Once this process is complete, the corm’s energy reserve is often depleted, triggering a protective dormancy to recover.
This post-flowering dormancy is a classic example of a biological reset. The plant essentially shuts down its visible growth to focus on replenishing its underground storage organ. As one documented case study of a gardener’s plant showed, an Alocasia can enter an extended dormancy of several months immediately after flowering, even if it was perfectly healthy beforehand. During this time, the corm remains firm and viable, patiently waiting for conditions to be right for regrowth. To help your plant recover instead of decline, you should remove the spent flower spike immediately with sterile scissors. This action redirects the plant’s remaining energy back toward its corm and potential new leaf growth, shortening the necessary recovery period.
How to Find and Sprout Corms From a “Dead” Alocasia Pot?
When your Alocasia Polly has lost all its leaves, the pot of soil is not an ending but a treasure chest. The key to revival lies in finding the small, bulb-like corms. Gently sift through the soil with your fingers. Healthy corms will feel firm and solid like small rocks. Discard any that are mushy (rotted) or dry and wrinkly (desiccated). You will likely find one large parent corm and several smaller “cormlets” attached to the root system. These are all viable clones of your plant.
Once you’ve gathered the healthy corms, the goal is to provide them with the perfect incubation conditions to “wake up.” Success hinges on warmth and humidity. Propagation experiments show a significant difference in success rates, with an 85% success rate in spring versus 50% in fall, highlighting the importance of providing warmth. Creating a mini-greenhouse with moist sphagnum moss or perlite provides the 100% humidity needed to trigger root development. With consistent warmth, you can expect to see the first signs of life within a few weeks.
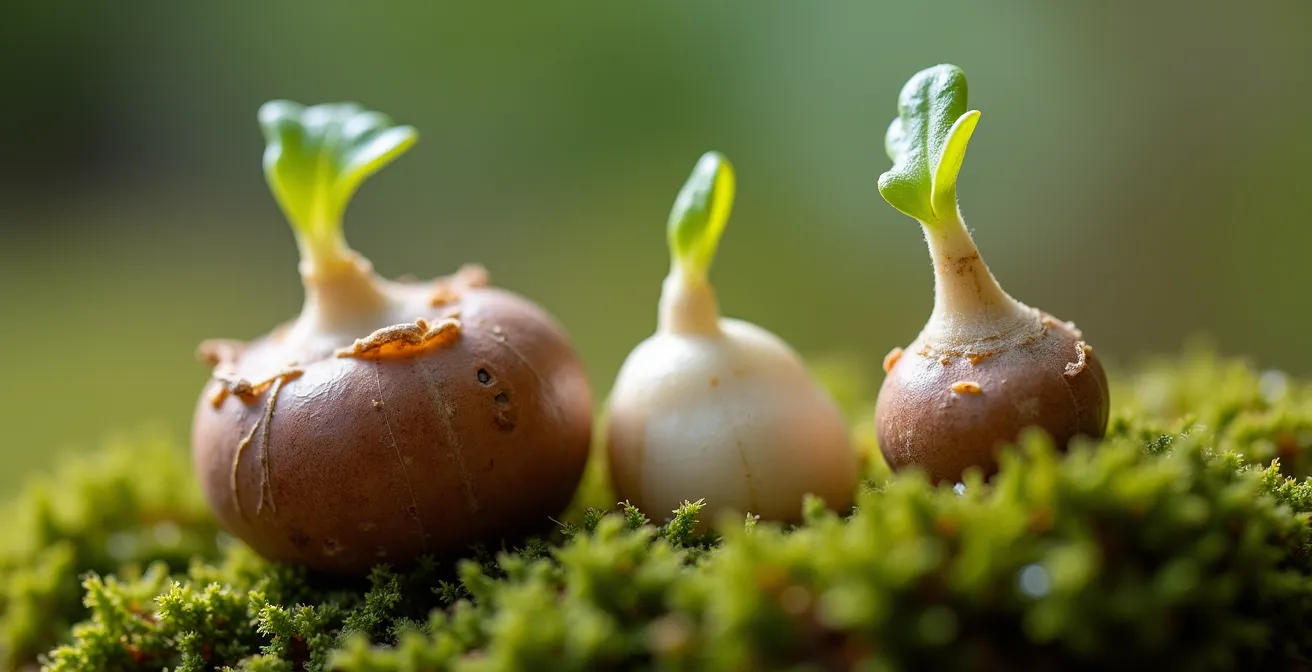
As the image above illustrates, the transformation from a dormant brown corm to a living plant is a gradual process. First, tiny white roots emerge, followed by a small green shoot that breaks through the surface. It is crucial not to rush this stage. Wait until the new plantlet has at least two leaves before slowly acclimating it to lower ambient humidity. This careful transition prevents the tender new growth from going into shock.
Your Action Plan: Corm Viability and Incubation
- Assess Viability: Gently squeeze each corm. Keep only those that are firm and rock-solid. Discard any that are soft, mushy, or hollow.
- Create an Incubation Chamber: Place the viable corms in a clear container with a lid, nestled on a bed of damp (not soaking) sphagnum moss or perlite. Seal it to maintain high humidity.
- Provide Consistent Warmth: Position the container in a warm spot, ideally between 70-80°F (21-27°C). Use a seedling heat mat if your home is cool to ensure optimal sprouting temperatures.
- Monitor for Progress: Check for condensation daily, airing it out for a few minutes if needed. Look for the first white roots in 7-14 days and green shoots within 3-4 weeks.
- Transition with Care: Once two small leaves have unfurled, begin to acclimate the plantlet to normal room humidity by opening the container for longer periods each day over two weeks before potting it up.
Neem Oil or Predatory Mites: Which Controls Spider Mites Better on Alocasia?
Alocasias are notoriously susceptible to spider mites, especially when stressed. These tiny pests thrive in the warm, dry conditions often found indoors and can quickly overwhelm a plant, causing leaf yellowing, stippling, and eventually, stress-induced dormancy. As expert Amy Andrychowicz notes in her guide, ” Spider mites can reproduce and double their population every couple of weeks in warm, dry conditions,” making swift and effective action critical. While many reach for neem oil, it’s not always the best choice for a sensitive, stressed Alocasia.
Neem oil can be effective, but it also carries the risk of clogging the stomata (the plant’s pores) on weakened leaves, adding further stress. A biological approach using predatory mites, such as Phytoseiulus persimilis, is often a superior strategy. These beneficial insects hunt and consume spider mites without causing any harm to the plant. They create a balanced, self-regulating ecosystem, addressing the infestation at its source rather than just treating the symptoms. This method is particularly effective because it requires a single release and poses no chemical stress to a plant that is already struggling.
The best approach depends on the severity of the infestation and the health of your plant. For a minor issue on a healthy plant, a gentle wipe-down and insecticidal soap may suffice. For a recurring problem or a stressed plant, predatory mites offer a more sustainable and less harmful solution.
This comparative table breaks down the most common treatment options, highlighting their effectiveness on a plant already under duress. According to an analysis of indoor pest control methods, biological controls are highly effective with low risk.
| Treatment Method | Effectiveness on Stressed Plant | Application Frequency | Risk to Dormant Alocasia |
|---|---|---|---|
| Neem Oil | Moderate – can stress plant further | Weekly spray | High – may clog stomata on weakened plant |
| Predatory Mites (P. persimilis) | High – natural biological control | One-time release | Low – creates balanced ecosystem |
| Insecticidal Soap | Moderate – contact killer only | Every 3-4 days | Medium – requires frequent handling |
| Water Spray | Low – temporary relief | Daily | Low – but insufficient alone |
The Overwatering Mistake During Dormancy That Turns Corms to Mush
The single most destructive action you can take when an Alocasia is dormant is to continue watering it on a normal schedule. When a plant has no leaves, its transpiration and water usage drop to nearly zero. The soil stays wet for much longer, creating an anaerobic environment that is perfect for fungal and bacterial growth. This is what turns a firm, healthy corm into an unsalvageable, mushy mess. The instinct is to “help” the plant by providing water, but in this state, water is the enemy.
During dormancy, the goal is to keep the corm alive, not to encourage growth. This means allowing the soil to dry out significantly more than usual. A documented success story showed a grower preventing rot by reducing watering by 50% during winter dormancy and only watering when the top two inches of soil were completely dry. This “tough love” approach is what protects the corm’s energy reserve. You must shift your mindset from nurturing leaves to preserving the underground corm.
Learning to assess soil moisture without relying on a schedule is a critical skill. Techniques like the “pot weight test”—learning the difference in weight between a fully dry and a freshly watered pot—are invaluable. Another method is the wooden skewer test: inserting a skewer deep into the soil for a minute will show you exactly where the moisture line is. During dormancy, you should only consider watering when the skewer comes out almost completely clean and dry. A general guideline is to reduce watering to once every 2-3 weeks, or even less, depending on your home’s environment.
How to Mix a Chunky Soil Blend That Alocasia Roots Love?
The foundation of a healthy, resilient Alocasia Polly is its soil. These plants are aroids, and their root systems are not adapted to dense, water-retentive standard potting soil. In their native environment, they grow in loose, airy forest floor debris. A proper soil mix must replicate this by providing excellent aeration and fast drainage while retaining just enough moisture. A chunky, well-aerated soil ecosystem is your best defense against overwatering and root rot, especially during the vulnerable dormancy period.
A good Alocasia mix is a recipe of different components, each serving a specific purpose. Orchid bark and perlite create large air pockets, allowing oxygen to reach the roots and letting excess water drain away freely. Coco coir helps retain a bit of moisture without becoming compacted like peat moss. For a premium blend, adding activated charcoal can improve drainage further and may help inhibit fungal growth, creating an even healthier environment for the corm and roots. Building your own mix gives you complete control over this crucial factor.
While pre-made aroid mixes are available, creating your own is often more cost-effective and allows for customization. Even a basic blend of equal parts potting soil, perlite, and orchid bark is a significant improvement over using potting soil alone. As outlined in an analysis of different soil recipes, investing in better components directly translates to better plant performance and resilience.
| Quality Level | Ingredients & Ratios | Cost | Performance |
|---|---|---|---|
| Good (Basic) | Equal parts: potting soil + perlite + orchid bark | $15-20 | Adequate drainage, may compact over time |
| Better (Intermediate) | 1:1:1:0.5 mix: potting soil + orchid bark + perlite + coco coir | $25-35 | Good aeration and moisture balance |
| Best (Premium) | 1:1:1:0.5 mix: potting mix + orchid bark + perlite + activated charcoal | $40-50 | Excellent drainage, aeration, and fungal resistance |
The Hygiene Mistake That Invites Spider Mites Into Your Home
Spider mite infestations don’t appear out of thin air. More often than not, they are unknowingly carried into our homes on new plants, fresh-cut flowers, or even on our clothing after a visit to a garden center. The most significant hygiene mistake is failing to implement a strict quarantine protocol for any new addition to your plant collection. Without isolation, a single infested plant can quickly lead to a widespread problem that is difficult to manage.
A proper quarantine isn’t just a brief separation; it must be long enough to break the pest’s life cycle. According to the University of Minnesota Extension, spider mite eggs can hatch within 7 days and the nymphs can mature into reproducing adults in about a week. Therefore, a quarantine period of at least three to four weeks is essential to ensure enough time for any hidden eggs to hatch and for the pests to become visible. During this period, the new plant should be kept in a separate room, far from your other houseplants.
Rigorous inspection is the second pillar of good hygiene. Shaking leaves over a white piece of paper can reveal tiny moving specks that are otherwise invisible to the naked eye. This should be done weekly during the quarantine period. Furthermore, always sterilize your tools, such as snips or trowels, with rubbing alcohol between handling different plants to prevent cross-contamination. This disciplined approach is your first and most effective line of defense, preventing a stress-induced dormancy before it even has a chance to start.
Coco Coir vs Sphagnum Moss: Which Pole Promotes Better Aerial Root Grip?
In the world of aroids, moss poles are a popular tool for supporting climbing species like Monsteras and Pothos. This leads many Alocasia owners to assume a pole would benefit their plant as well. However, this is a fundamental misunderstanding of the Alocasia Polly’s growth habit. The question isn’t whether coco coir or sphagnum moss is better; it’s that for this plant, a moss pole serves no functional purpose and can actually be detrimental.
Alocasia Polly is a terrestrial, clumping aroid, not a vining epiphyte. It grows upwards from its corm in a tight clump and does not produce the long, searching aerial roots needed to grip onto a surface. As plant care specialists note, its hybrid nature means it was bred for a compact size, typically maxing out at two feet tall. Attempting to strap it to a moss pole is working against its natural biology. Worse, the constantly damp surface of a moss pole pressed against the plant’s stems can create a perfect breeding ground for fungal issues and spider mites, introducing the very stressors that lead to dormancy.
If your Alocasia’s large leaves are causing it to droop, the solution is not a climbing pole but simple structural support. Use thin bamboo stakes or a small, decorative plant cage placed around the base of the plant. These tools can help cradle heavy leaves and stems without compromising the plant’s health. The goal is to support, not to encourage a climbing behavior that is foreign to the species. Freeing your Alocasia from a misguided moss pole can often relieve stress and improve its overall health.
Key Takeaways
- Summer dormancy in Alocasia is a stress response, not a death sentence. Common triggers include flowering and pests.
- The plant’s life is stored in its underground corm. As long as the corm is firm, the plant is viable.
- The worst mistake during dormancy is overwatering. Reduce water drastically to prevent the corm from rotting.
How to Manage Winter Dormancy for Potted Plants Without a Greenhouse?
While this guide focuses on unexpected summer dormancy, it’s crucial to distinguish it from the more predictable winter dormancy. Winter dormancy is a natural part of the plant’s cyclical rhythm, triggered by shorter days and cooler temperatures. Summer dormancy, in contrast, is an emergency shutdown caused by stress. Understanding the difference in triggers and presentation is key to managing each state correctly. A winter dormancy is a slow, progressive die-back, whereas a stress dormancy is often rapid and sudden.
For a natural winter dormancy, the management is simple: respect the plant’s need for rest. You should significantly reduce watering, stop fertilizing completely, and keep the plant in a warm spot away from cold drafts. The goal is to maintain the corm’s viability until spring, when longer days and warmer temperatures will naturally signal it to “wake up.” However, for growers who wish to avoid this leafless period, it is possible to trick the plant into thinking it’s still summer.
Creating an “artificial spring” indoors is the most effective way to bypass winter dormancy. This involves supplementing the two key environmental triggers: light and heat. By using a full-spectrum grow light on a timer for 10-12 hours a day and placing the pot on a seedling heat mat to keep the soil consistently warm (70-75°F), you can mimic ideal growing conditions. When providing this artificial environment, you must also maintain your regular watering and fertilizing schedule, as the plant will remain in an active growth phase. This technique allows you to enjoy your Alocasia’s foliage year-round, but requires a commitment to maintaining a stable, artificial environment.
The table below summarizes the key differences between these two types of dormancy, which are often confused.
| Characteristic | Summer Stress Dormancy | Winter Cyclical Dormancy |
|---|---|---|
| Trigger | Spider mites, overwatering, heat stress, post-flowering exhaustion | Shorter days, cooler temperatures, reduced light |
| Onset | Sudden, can happen anytime | Gradual, typically October-November |
| Leaf Loss Pattern | Rapid yellowing and dropping | Slow, progressive die-back |
| Management | Address underlying stress, maintain warmth | Reduce watering, stop fertilizing, keep warm |
| Recovery Time | Variable, depends on stress resolution | Natural revival in spring (March-April) |
Embracing the cyclical nature of your Alocasia Polly transforms care from a series of anxious reactions to a confident partnership. By understanding its corm-based biology and stress responses, you can navigate any dormancy—expected or not—and cultivate a resilient plant for years to come.